
Apple Crisp Bars are like the perfect mix of tender apple filling and a crunchy, buttery topping all baked into one easy-to-hold treat. They have that warm cinnamon apple flavor we all love, with a crumbly oat crust that gives every bite a little extra comfort. They’re simple enough for a midday snack but special enough to bring to any gathering.
I love making these bars when apples are in season because the fresh fruit makes all the difference. What’s great is that they’re not too sweet, so you get a nice balance between the fruit and the crispy topping. I usually make a big batch and keep them in the fridge—they’re always gone before the week is up!
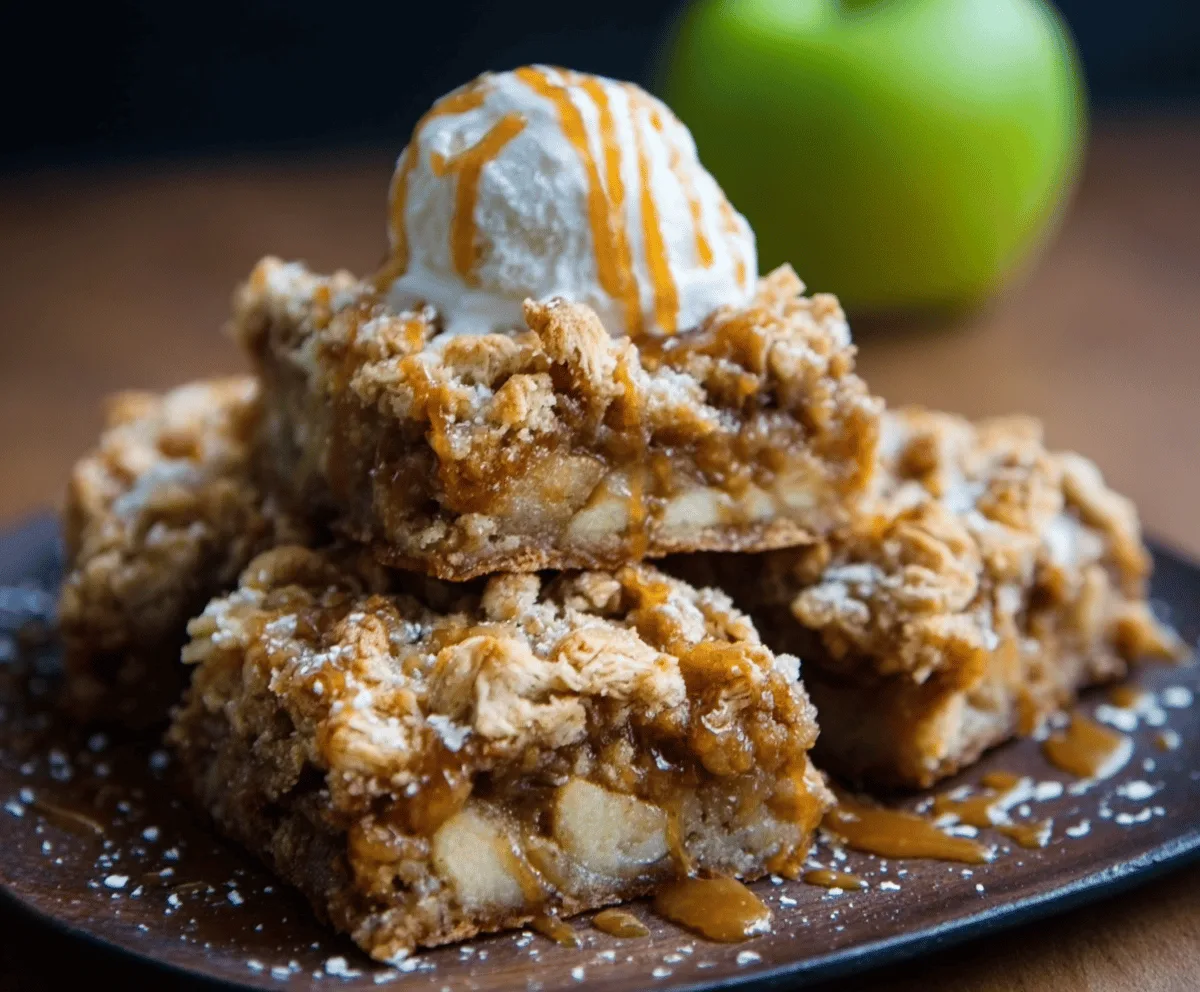
My favorite way to enjoy Apple Crisp Bars is just as they are, maybe with a cup of tea or coffee in the afternoon. But they’re also fantastic warmed up a bit with a scoop of vanilla ice cream on top for a little weekend treat. These bars have a way of bringing back cozy memories, like cool autumn days and baking in the kitchen with family.
Key Ingredients & Substitutions
Apples: Tart apples like Granny Smith hold their shape well and add a nice tang, while sweeter ones like Honeycrisp bring natural sweetness. Feel free to mix both for balanced flavor.
Rolled oats: These add chewiness and texture to the crumb topping. If you’re avoiding oats, you can try crushed cornflakes or chopped nuts for crunch instead.
Butter: Using cold, unsalted butter helps create that perfect crumbly texture in the crust and topping. You can substitute with vegan butter if needed, but the flavor may be milder.
Spices: Cinnamon and nutmeg give warmth and depth. If you only have cinnamon, it’s fine to skip nutmeg or try a pinch of allspice or cloves for a twist.
How Do You Get a Crispy, Crumbly Topping and Crust?
The key is cutting cold butter into the dry ingredients until you see pea-sized bits. This creates pockets of butter that melt during baking, making the texture crumbly but not greasy.
- Keep the butter chilled and cut it quickly into the flour mixture using a pastry cutter, two forks, or your fingers.
- Don’t overwork the dough; stop when it looks like coarse crumbs.
- Press the bottom layer firmly in the pan for a sturdy crust but leave the topping loose and crumbly.
- Let the bars fully cool before cutting so they set up nicely and don’t fall apart.
Equipment You’ll Need
- 9×13-inch baking pan – I like this size because it’s just right for a thick, even layer of crust and filling.
- Parchment paper – helps lift the bars out easily without sticking or breaking apart.
- Mixing bowls – for combining dry ingredients and tossing the apples, making cleanup simple.
- Pastry cutter or two forks – essential for cutting the cold butter into the dry ingredients to get that perfect crumbly texture.
- Knife and cutting board – for peeling and slicing the apples smoothly.
- Measuring cups and spoons – to keep everything precise and consistent for best results.
- Baking sheet (optional) – to catch drips if you’re baking on a baking stone or if you want to check for any overflowing juices.
Flavor Variations & Add-Ins
- Different fruits: Swap apples for pears, peaches, or berries to vary the flavor and seasonality.
- Spice blends: Add a pinch of ginger, cloves, or cardamom in the spice mix for extra warmth and depth.
- Chocolate chips: Sprinkle a handful into the filling or on top for a chocolaty twist.
- Nuts: Mix chopped walnuts, pecans, or almonds into the topping for added crunch and flavor.
Apple Crisp Bars
Ingredients You’ll Need:
For the Crust and Topping:
- 2 cups all-purpose flour
- 1 cup old-fashioned rolled oats
- 1 cup packed brown sugar
- 1 teaspoon ground cinnamon
- ½ teaspoon ground nutmeg
- ½ teaspoon salt
- 1 cup (2 sticks) unsalted butter, cold and cut into small pieces
For the Apple Filling:
- 3 medium apples (such as Granny Smith or Honeycrisp), peeled, cored, and thinly sliced
- ¼ cup granulated sugar
- 2 teaspoons lemon juice
- 2 teaspoons cornstarch
- ½ teaspoon vanilla extract
Optional for Serving:
- Vanilla ice cream or whipped cream
- Caramel sauce
How Much Time Will You Need?
This recipe takes about 15 minutes to prepare and 45-50 minutes to bake. Allow additional time for cooling completely before cutting and serving (about 30 minutes). Overall, plan for around 1.5 hours from start to finish.
Step-by-Step Instructions:
1. Prepare Your Pan and Crust:
Preheat your oven to 350°F (175°C). Line a 9×13-inch baking pan with parchment paper, leaving an overhang on the sides for easy removal later. In a large bowl, mix together the flour, rolled oats, brown sugar, cinnamon, nutmeg, and salt.
Add the cold, cubed butter to the dry ingredients. Use a pastry cutter or your fingers to mix until the mixture looks like coarse crumbs, with some butter pieces about the size of peas. Save about 1½ cups of this mixture for the topping, and press the rest firmly and evenly into the bottom of the prepared pan as your crust.
2. Make the Apple Filling:
In another bowl, toss together the sliced apples, granulated sugar, lemon juice, cornstarch, and vanilla extract until the apples are well coated. Spread this apple mixture evenly over the crust layer in the pan.
3. Add the Crumble Topping and Bake:
Sprinkle the reserved crumble topping evenly over the apples. Bake in your preheated oven for 45-50 minutes, or until the topping is golden brown and you see the apple filling bubbling around the edges.
4. Cool and Serve:
Remove the pan from the oven and let the bars cool completely on a wire rack. Once cooled, lift the bars out using the parchment paper overhang and cut into squares.
Serve your Apple Crisp Bars warm or at room temperature. For an extra special touch, top with vanilla ice cream or whipped cream and drizzle with caramel sauce.
Can I Use Frozen Apples for Apple Crisp Bars?
Yes, you can use frozen apples, but make sure to thaw them completely and drain any excess liquid before mixing with the other ingredients. This helps prevent a soggy crust or topping.
How Should I Store Leftover Apple Crisp Bars?
Store leftovers in an airtight container at room temperature for up to 2 days or in the refrigerator for up to 5 days. Reheat gently in the microwave or oven before serving.
Can I Make These Bars Gluten-Free?
Absolutely! Substitute the all-purpose flour with a gluten-free flour blend and make sure your oats are certified gluten-free. The bars will still turn out delicious and crumbly.
Is It Okay to Prep These Bars Ahead of Time?
Yes! Assemble the bars and refrigerate them (unbaked) for up to 24 hours. When ready, bake as directed—just add a few extra minutes to the baking time if chilled.