
Cheesy chicken bacon ranch tacos bake up with crackly tortilla edges, a molten cheese center, and just enough ranch seasoning to keep every bite bold without turning greasy. The tortillas go into the oven brushed with butter, so they don’t just warm through — they crisp into something closer to a handheld quesadilla with taco-night energy. The bacon stays snappy, the chicken stays juicy, and the cheese does the job of holding the whole thing together.
What makes these work is the order. The chicken gets seasoned before it goes into the tortillas, which keeps the filling from tasting flat after baking. The butter on the outside does more than add richness; it helps the ranch powder cling and gives the tortilla that golden, blistered finish you want to hear when you bite in. If you’ve ever had baked tacos that came out soft or a little damp, the fix is using less filling than you think and baking them long enough for the edges to really dry and crisp.
Below, I’ve laid out the part that matters most if you want the tortillas crisp instead of limp, plus a few swaps that still keep the same salty, creamy, crunchy balance. The recipe also includes the one reheating trick that keeps leftovers from turning leathery.
The tortillas got crisp all the way to the fold, and the ranch seasoning on the outside gave them this salty, savory finish that kept us going back for “just one more.” I used rotisserie chicken and it came together fast, but it still tasted like I planned ahead.
Save these cheesy oven-crispy chicken bacon ranch tacos for the night you want crunchy baked tacos with almost no stovetop work.
Why These Tacos Stay Crispy Instead of Turning Soft
The biggest problem with baked tacos is steam. If the filling is too wet, the cheese melts out before the tortilla has time to dry and crisp, and you end up with a soft shell that bends instead of cracking. These tacos avoid that by using already-cooked chicken, a modest amount of filling, and a hot oven that starts setting the tortilla right away.
Butter on the outside helps, but the real trick is giving both sides of the tacos direct heat. Flipping them halfway through lets the second side pick up color instead of sitting pale and flexible on a sheet pan. If yours are browning too quickly before the centers are hot, the oven is probably running hot; pull the pan a minute early and let residual heat finish the job.
What Each Ingredient Is Actually Doing in This Dish

- Shredded cooked chicken — Rotisserie chicken works well here because it’s seasoned and sturdy enough to hold up in the oven. Freshly cooked chicken is fine, but shred it finely so the tacos pack evenly and don’t split open when you fold them.
- Bacon — This gives the filling its salty crunch and keeps the ranch flavor from tasting one-note. Cook it until crisp; soft bacon turns chewy again inside the tortilla, which is not what you want.
- Cheddar cheese — Cheddar melts into the filling and acts like the glue that helps the tacos stay closed. Pre-shredded cheese works, though freshly grated melts a little cleaner and gives you fewer clumps.
- Ranch seasoning mix — This seasons both the filling and the outside, which is what makes these taste like ranch from the first bite to the last. If you swap it for homemade ranch seasoning, use the same amount and don’t over-salt the chicken first.
- Flour tortillas — Small flour tortillas crisp better than corn in this method because they bend without cracking open in the oven. Keep them small; oversized tortillas trap more steam and take longer to get crunchy.
- Melted butter — The butter helps the seasoning stick and promotes that toasted, golden finish. Olive oil can work in a pinch, but the flavor is richer and the crust browns a little better with butter.
The 20 Minutes That Make the Difference
Season the Chicken First
Toss the shredded chicken with half the ranch seasoning before it goes into the tortillas. That keeps the flavor distributed through the filling instead of living only on the outside of the shell. If the chicken seems dry, a spoonful of sour cream or a splash of melted butter can help it hold together, but don’t add so much that it turns wet.
Fill and Fold Without Overstuffing
Spoon the chicken, bacon, and cheese into each tortilla, then fold them in half and press gently so they seal into a neat taco shape. Too much filling is the fastest way to tear the tortilla and leak cheese onto the pan. You want a full taco, not a bulging one.
Brush, Season, and Bake Hot
Brush both sides with melted butter, then dust on the remaining ranch seasoning before they hit the oven. Bake at 425°F on parchment so the bottoms start crisping right away instead of sticking. If the tortillas look pale at the first timer mark, give them another minute or two; the color should be deep golden with a few darker spots at the folds.
Flip for the Final Crackle
Turn the tacos halfway through baking so both sides get direct heat. Pressing down lightly with a spatula after the flip helps the surface contact the pan and improves browning without flattening the filling completely. When they’re done, the shells should feel firm and sound a little crisp when tapped.
How to Adapt These Tacos Without Losing the Crunch
Dairy-Free Version
Use dairy-free shredded cheese and swap the butter for olive oil or avocado oil. You’ll lose a little of the rich, toasted flavor from the butter, but the tacos still crisp nicely if the oil is brushed on thinly and evenly.
Gluten-Free Version
Use sturdy gluten-free flour-style tortillas that are flexible enough to fold without cracking. They usually need a minute or two less in the oven, and they can brown faster on the edges, so watch the color instead of relying only on the timer.
Make It with Rotisserie Chicken
Rotisserie chicken is the easiest shortcut here, and it’s the version I’d use on a busy night. Pull off the skin, shred the meat, and season it well enough that it tastes intentional; otherwise the bacon and cheese do all the work.
Storage and Reheating
- Refrigerator: Store leftovers in an airtight container for up to 3 days. The tortillas soften a bit as they sit, but they still re-crisp well.
- Freezer: These freeze fairly well if wrapped individually and stored in a freezer bag. Thaw in the fridge before reheating so the center warms evenly without scorching the outside.
- Reheating: Reheat in a 400°F oven or toaster oven for 8-10 minutes. A microwave will make the tortillas chewy, which is the main mistake people make with leftovers from this style of taco.
Answers to the Questions Worth Asking
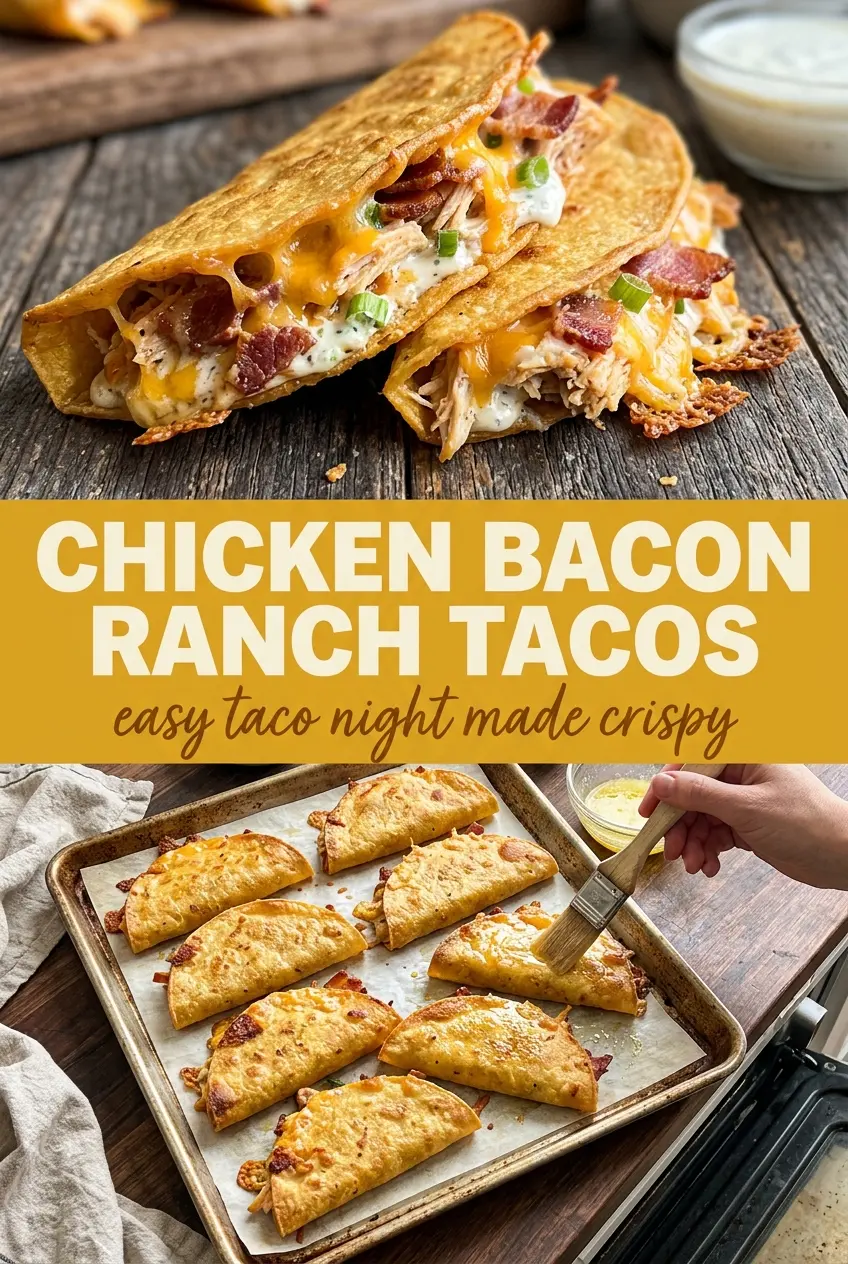
Cheesy Oven-Crispy Chicken Bacon Ranch Tacos
Ingredients
Equipment
Method
- Preheat the oven to 425°F and line a baking sheet with parchment, keeping the oven fully heated before baking.
- Toss the shredded cooked chicken with half of the ranch seasoning mix until evenly coated.
- Fill each small flour tortilla with the ranch-seasoned chicken, bacon, and shredded cheddar cheese, then fold in half to enclose the filling.
- Brush both sides of each folded taco with the melted butter and sprinkle with the remaining ranch seasoning mix so the tortillas brown and crisp.
- Bake the tacos for 10-12 minutes, then flip and continue baking another 10-12 minutes until golden and crispy, with visibly browned, crackly edges.
- Serve warm with sour cream and hot sauce for tang and heat.