
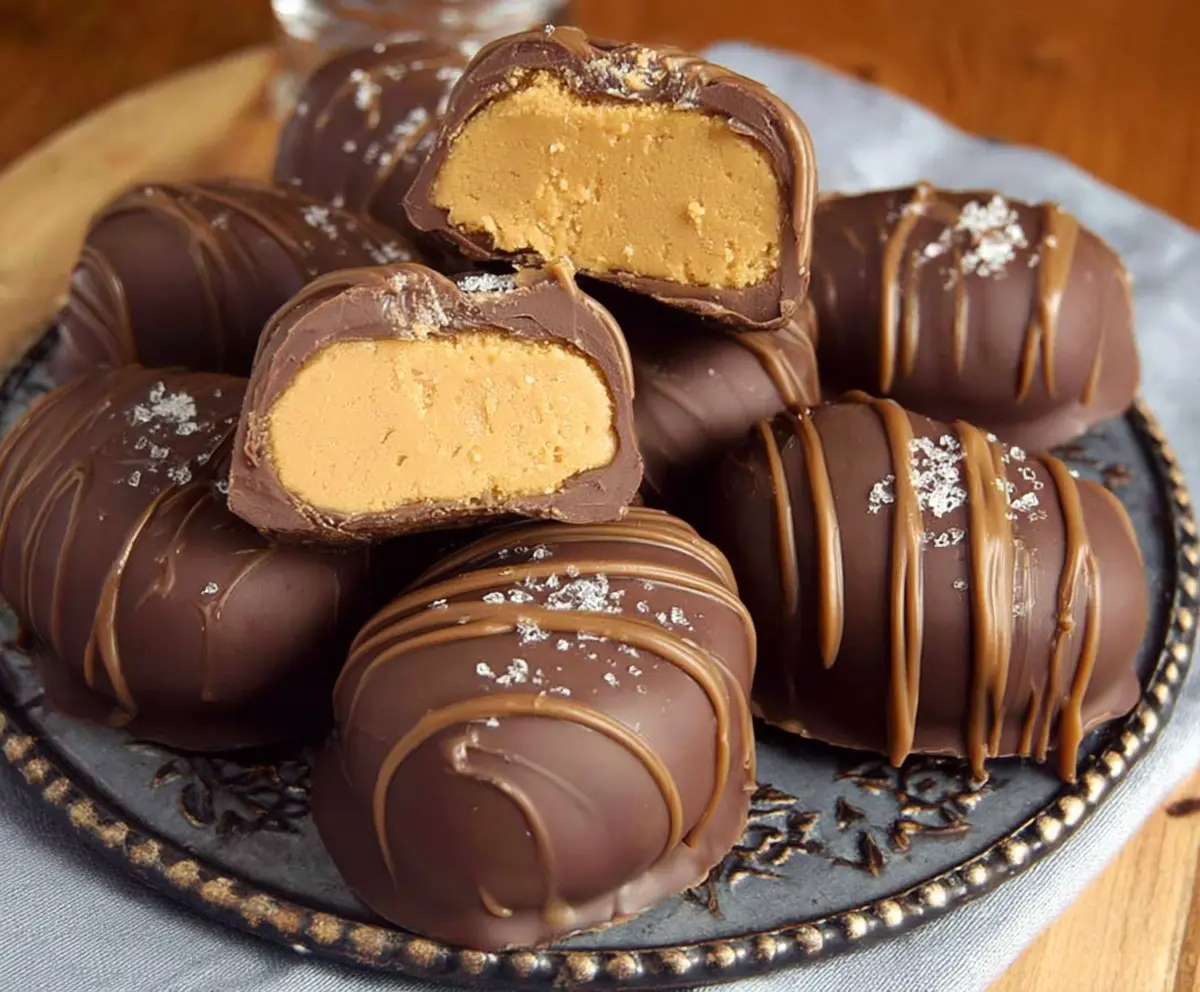
Chocolate Peanut Butter Egg Truffles are little bites of happiness that bring together smooth peanut butter and rich chocolate in a fun, egg-shaped treat. They have a creamy center wrapped in a silky chocolate shell, making them perfect for anyone who loves the classic peanut butter and chocolate combo.
I love making these truffles because they’re simple to prepare but feel special enough for sharing with friends or as a sweet surprise during the holidays. I usually chill them for a bit so they’re firm and just right for popping in your mouth. Plus, you can get creative and decorate them with sprinkles or drizzle extra chocolate on top.
These truffles always remind me of cozy gatherings where everyone reaches for a couple pieces and smiles. I find they’re best served chilled alongside a cold glass of milk or your favorite cup of tea. Whether you’re treating yourself or gifting them, they bring a little extra joy to any day.
Key Ingredients & Substitutions
Peanut Butter: Creamy peanut butter works best for smooth truffles. If you prefer, natural peanut butter is fine but may make the mixture less sticky. For allergies, try almond or sunflower seed butter instead.
Butter: Using unsalted butter lets you control the sweetness. Make sure it’s softened to mix easily. You can swap with dairy-free margarine for a vegan version.
Powdered Sugar: It sweetens and firms the filling. If the mixture feels too sticky, add more powdered sugar gradually for the right texture.
Chocolate: Dark chocolate gives a rich coating. Milk or semi-sweet chocolate can be used if you like it sweeter. Adding a bit of oil thins the chocolate for a smooth dip.
Toppings: Crushed graham crackers add crunch and a bit of sweetness while crushed peanuts give extra peanut flavor and texture. Use either or skip toppings for a cleaner look.
How Can You Get Smooth, Shiny Chocolate Coating Without Mess?
Melt chocolate gently to avoid burning and ensure a silky finish. Use a double boiler or microwave in short bursts, stirring often. Add a bit of oil to thin chocolate, helping it coat smoothly and evenly.
- Dip truffles quickly to avoid chocolate hardening too fast.
- Let excess chocolate drip off to keep a nice shape.
- Place dipped truffles on parchment paper for easy clean-up.
- Sprinkle toppings right after dipping before chocolate sets.
These steps help you get a glossy, smooth shell that looks professional and tastes great.
Equipment You’ll Need
- Mixing bowl – I like a big one so I can stir the peanut butter mixture easily without splattering.
- Cookie scoop or your hands – helps make evenly sized egg-shaped truffles with less mess.
- Parchment-lined baking sheet – keeps the truffles from sticking and makes cleanup quick.
- Microwave-safe bowl or double boiler – for melting the chocolate gently without burning.
- Fork or dipping tool – makes dipping the truffles into chocolate neat and simple.
- Small spatula or spoon – for drizzling melted chocolate over the coated eggs for decoration.
- Refrigerator or freezer – to chill the truffles quickly and set the chocolate coating properly.
Flavor Variations & Add-Ins
- Use milk or semi-sweet chocolate for a sweeter coating that pairs well with the peanut butter for a milder flavor.
- Mix crushed cookies or pretzels into the peanut butter filling for extra crunch and flavor.
- Swirl in a bit of caramel or fudge into the melted chocolate for a richer, more indulgent coating.
- Replace crushed peanuts with toasted coconut flakes on top for a tropical twist.
Chocolate Peanut Butter Egg Truffles
Ingredients You’ll Need:
For The Filling:
- 1 cup creamy peanut butter
- 1/4 cup unsalted butter, softened
- 1 cup powdered sugar
- 1 tsp vanilla extract
For The Coating:
- 8 oz dark chocolate
- 1 tbsp vegetable oil or coconut oil (optional, for thinning chocolate)
- Crushed graham crackers or crushed peanuts (for topping)
How Much Time Will You Need?
Preparing and shaping the truffles takes about 15 minutes. Freezing the peanut butter eggs for 30 minutes plus another 15 minutes to set the chocolate means you should plan for about 1 hour total. This includes chilling and coating time.
Step-by-Step Instructions:
1. Make the Peanut Butter Filling:
In a large bowl, mix the peanut butter, softened butter, powdered sugar, and vanilla extract until you get a smooth, creamy mixture. If it feels sticky, add a little more powdered sugar until it’s firm enough to shape.
2. Shape the Truffles:
Use your hands or a small cookie scoop to form the mixture into oval-shaped balls that look like eggs. Place them on a baking sheet lined with parchment paper and put them in the freezer for about 30 minutes to firm up.
3. Melt the Chocolate:
While the truffles chill, melt the dark chocolate in a heatproof bowl over simmering water or microwave in short bursts, stirring often to prevent burning. Stir in the oil if you want the chocolate thinner and smoother for dipping.
4. Dip and Decorate:
Take the peanut butter eggs out of the freezer. Using a fork or dipping tool, coat each egg fully in melted chocolate, letting extra drip off. Place them back on the parchment. Drizzle more melted chocolate on top and immediately sprinkle crushed graham crackers or peanuts for a crunchy, pretty topping.
5. Set and Store:
Let the chocolate harden at room temperature or pop the truffles in the fridge for 15 minutes. Once set, store them in an airtight container in the refrigerator until you’re ready to enjoy your delicious treats!
Can I Use Natural Peanut Butter Instead of Creamy?
Yes, you can! Natural peanut butter may make the mixture a bit less sticky, so you might need to add a little extra powdered sugar to get the right consistency for shaping.
How Should I Store These Truffles?
Store them in an airtight container in the refrigerator. They keep best chilled and will stay fresh for up to one week.
Can I Make These Truffles Ahead of Time?
Absolutely! Prepare and dip the truffles, then keep them refrigerated. They actually taste great after resting a day, which helps flavors meld.
What Can I Use If I Don’t Have Vegetable or Coconut Oil?
No worries! The oil is optional to thin the chocolate. You can skip it if your chocolate melts smoothly on its own — just be sure to stir well while melting to avoid burning.