
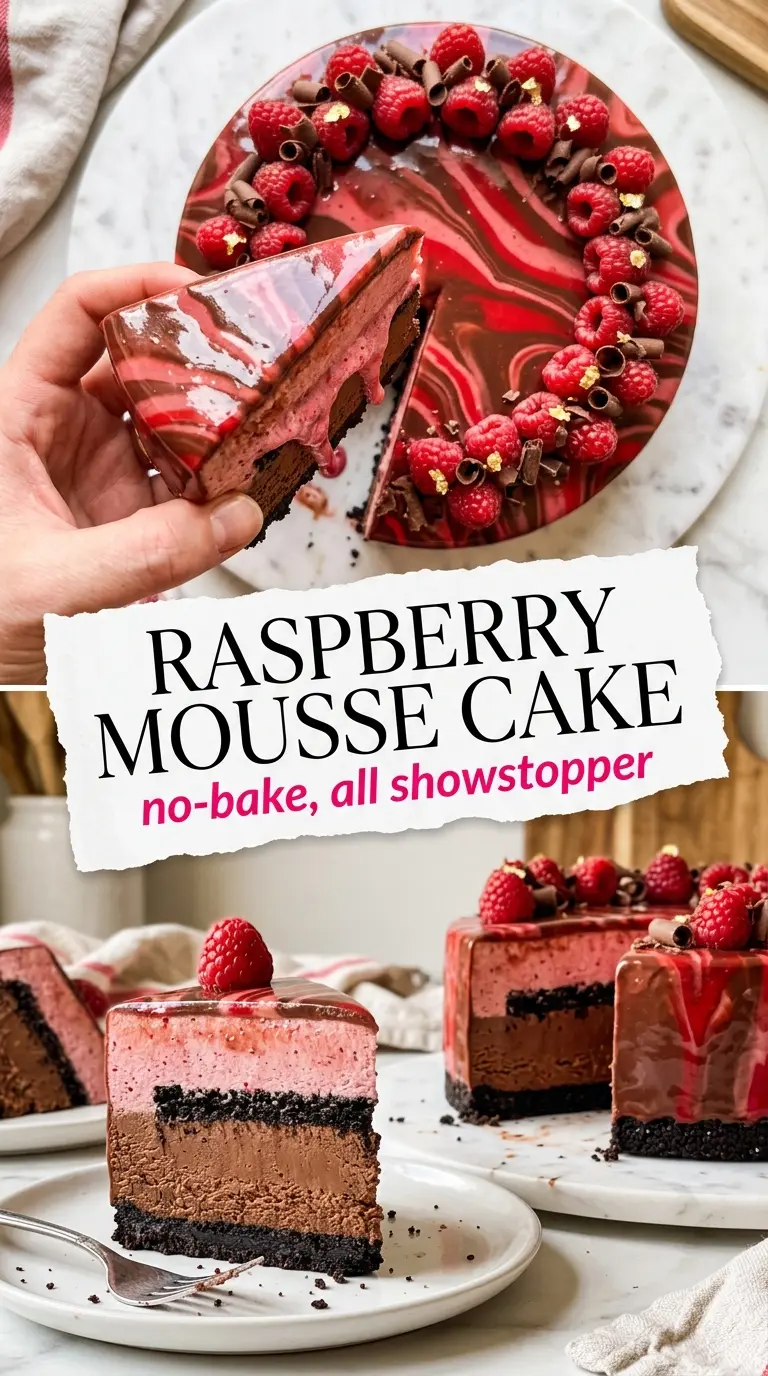
A clean slice of chocolate raspberry mousse cake looks like something you’d order in a pastry shop and hope not to mess up at home. The contrast is the whole point: a crisp Oreo base, a dark chocolate layer that tastes rich without turning heavy, and a raspberry mousse that cuts through all that creaminess with a bright, tart edge. When the glaze lands right, the cake slices with sharp, glossy layers and holds its shape long enough to give you that perfect cut-edge reveal.
What makes this version work is the freezing. Each mousse layer needs time to set before the next one goes on, or the colors blend where they shouldn’t and the cake loses its clean structure. The mirror glaze also has a narrow temperature window, and that matters more than almost anything else here. Too warm and it runs thin; too cool and it drags instead of flowing into that smooth finish.
Below, I’ve broken down the exact points that matter most: how to keep the mousse layers distinct, how to hit the glaze temperature, and what to do if you want a simpler finish without losing the drama of the dessert.
The chocolate layer set up beautifully and the raspberry mousse stayed bright and airy instead of getting muddy. I poured the glaze at the right temperature and it flowed smooth enough to cover the whole cake in one pass.
Save this Chocolate Raspberry Mousse Cake for the night you want a dramatic chocolate-and-berry dessert with sharp layers and a glossy mirror finish.
The Layering Trick That Keeps the Mousse Caught in Clean Bands
The biggest failure point in a mousse cake like this is impatience. If the chocolate layer is still soft when the raspberry mousse goes on top, the two blend together and you lose the clean cut edge that makes the dessert look polished. Freezing between layers gives each mousse enough structure to hold the next one without sinking or marbling.
The other thing that trips people up is the mirror glaze. It’s not forgiving. The cake has to be fully frozen, and the glaze has to be poured at the right temperature so it spreads in a sheet instead of clumping or sliding off in streaks. That temperature window is what gives you a finish that looks smooth and even instead of patchy.
What Each Ingredient Is Actually Doing in This Dish
- Oreo crumbs — The filling and cookie pieces both matter here because they give the crust a deep chocolate flavor and enough structure to slice cleanly. A food processor makes the most even crumbs, but a sealed bag and rolling pin works fine if the texture stays fine and sandy.
- Heavy cream — This is what keeps both mousses light instead of dense. Whip it to soft peaks, not stiff, or it gets harder to fold in and the mousse can turn grainy.
- Dark chocolate — Use a bar you’d actually eat on its own. The mousse only has a few ingredients, so the chocolate flavor comes through plainly. Chips work in a pinch, but bar chocolate melts smoother and gives a silkier texture.
- Raspberry purée — Strain it. That step removes the seeds and gives the raspberry layer a clean, smooth finish instead of a gritty one. Frozen raspberries thawed and puréed work well if fresh raspberries aren’t in season.
- Gelatin — This is what lets the raspberry mousse hold its shape without turning heavy. Bloom it fully before warming it into the purée, or you’ll get little hard bits that never dissolve.
- Condensed milk and white chocolate — These are the backbone of the mirror glaze. They give it body and shine, so swapping either one changes the finish. If you need a dairy-free glaze, this is the hardest part to replicate cleanly.
How to Build the Cake Without Blurring the Layers
Pressing the Crust
Mix the Oreo crumbs with melted butter until every crumb looks evenly damp, like wet sand. Press it into the bottom of a lined 9-inch springform pan and pack it firmly, especially around the edges, so it doesn’t crumble when you slice the cake later. A loose crust is the first sign the base wasn’t pressed hard enough. Chill it for 20 minutes so the butter firms up before the mousse goes in.
Setting the Chocolate Layer
Fold the whipped cream into the melted dark chocolate in two or three additions. That keeps the mixture smooth and prevents streaks of unmixed chocolate from seizing up in the mousse. Spread it over the chilled crust and level it with an offset spatula. Then freeze it for about 30 minutes, until the top is set enough that it doesn’t pick up on your spoon.
Adding the Raspberry Mousse
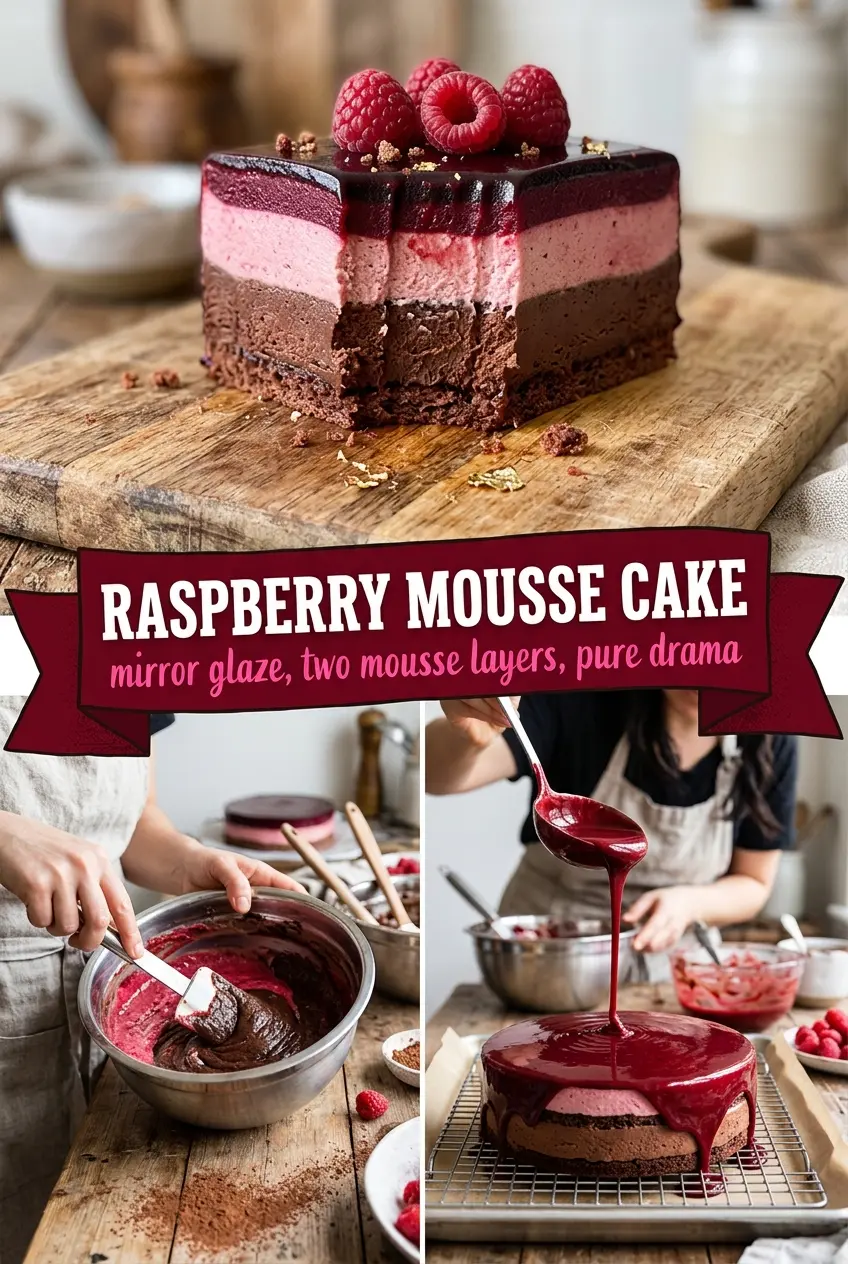
Bloom the gelatin first, then dissolve it into the raspberry purée while it’s still warm enough to melt cleanly. Let that mixture cool slightly before folding in the whipped cream, or you’ll collapse the air you just whipped in. Pour it gently over the chocolate layer and smooth it out. Freeze the cake for at least 2 hours, and longer if your freezer runs soft, because the glaze needs a solid frozen surface to cling to.
Pouring the Mirror Glaze
Bring the glaze to 95°F and hold it there for a moment before pouring. That’s the sweet spot where it flows in a sheet without being watery. Set the frozen cake on a rack, pour from the center outward, and work fast if you’re doing the raspberry-and-chocolate swirl, because the glaze starts to set within a minute. If it looks thin or runs off the sides too fast, it’s too warm.
How to Adapt This for a Simpler Finish or Different Diets
Glaze-Free Finish
If you want a less technical version, skip the mirror glaze and finish the cake with whipped cream, fresh raspberries, and shaved chocolate. You lose the dramatic shine, but the cake still slices beautifully and tastes just as balanced.
Gluten-Free Version
Swap the Oreo crust for gluten-free chocolate sandwich cookies or a gluten-free chocolate crumb crust. The mousse layers stay the same, and the texture stays close to the original as long as the crumbs are fine and packed tightly.
Dairy-Free Adaptation
Use dairy-free whipping cream and a dairy-free dark chocolate, then replace the condensed milk in the glaze with a dairy-free version if you can find one. The texture will be a little less rich, but the cake still keeps that layered mousse look.
What to Do If You Don’t Want a Dark Chocolate Layer
Use milk chocolate instead of dark chocolate for a sweeter, softer flavor. The cake will taste lighter and less intense, but it also means the raspberry mousse stands out more sharply against the chocolate.
Storage and Reheating
- Refrigerator: Keep the cake covered for up to 4 days. The glaze will stay glossy, though the crust softens slightly by day two.
- Freezer: This cake freezes well before glazing. Wrap it tightly and freeze up to 1 month, then thaw in the fridge before pouring the glaze.
- Reheating: Don’t reheat this cake. Serve it chilled straight from the fridge, because warming it will melt the mousse and ruin the layers.
Answers to the Questions Worth Asking
Chocolate Raspberry Mousse Cake
Ingredients
Equipment
Method
- Press Oreo crumbs mixed with melted butter into a lined 9-inch springform, firmly and evenly to form the crust. Chill for 20 min to set.
- Pour the dark chocolate mousse over the chilled crust and smooth the top. Freeze for 30 min until the surface is firm enough to hold the next layer.
- Make the raspberry mousse and pour it over the dark chocolate layer. Freeze for 2+ hours until completely frozen through.
- Prepare the mirror glaze and heat it to 95°F until smooth, then remove from heat. Pour over the frozen cake on a rack so the glaze flows evenly.
- Immediately swirl raspberry and chocolate coloring together over the wet glaze, using a gentle tool motion so swirls set quickly. Decorate with fresh raspberries right after swirls so they adhere.
- Refrigerate the cake for 2 hours before slicing so the mousse softens to clean, silky layers. Finish with gold leaf just before serving if desired.