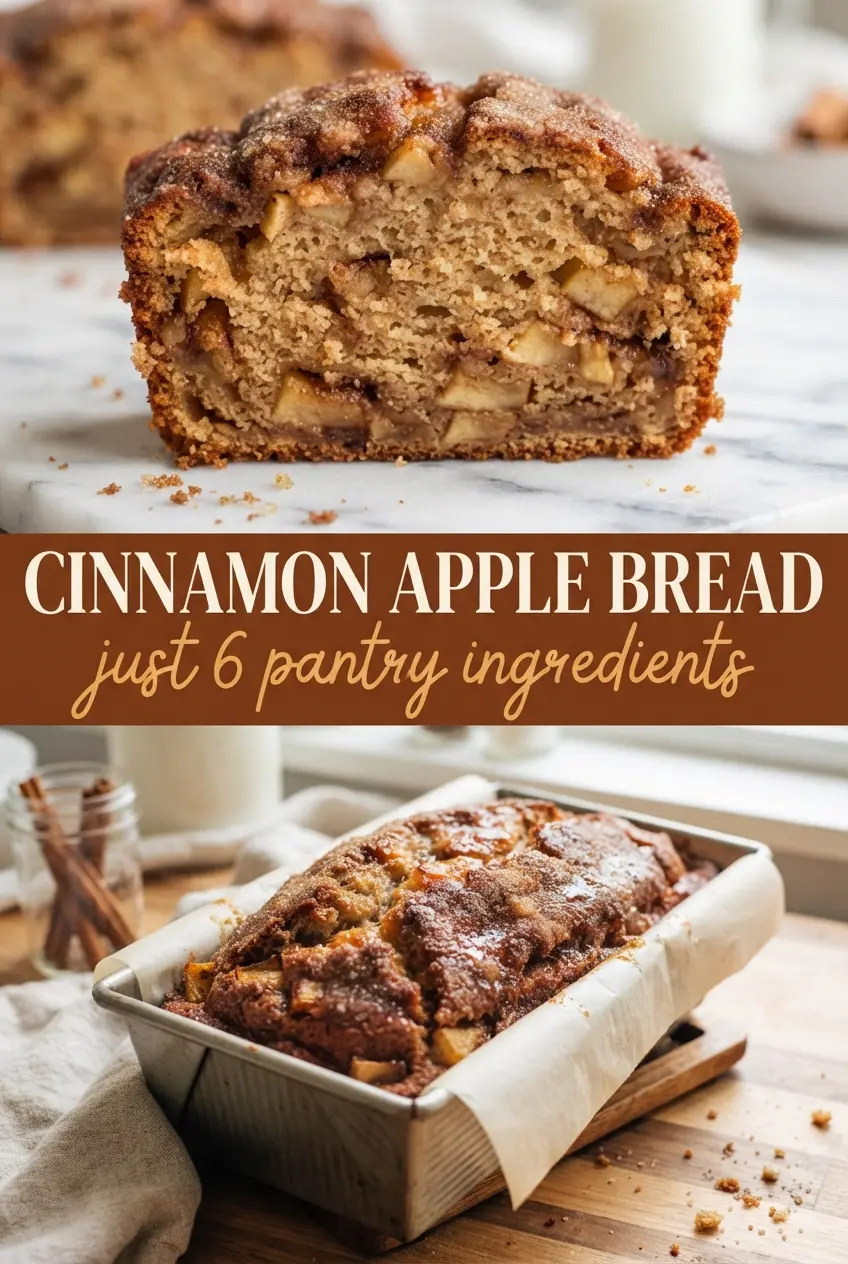
Toasty cinnamon apple bread earns a permanent spot on the counter because the loaf turns out moist, fragrant, and just sweet enough to eat plain. The top bakes into a thin sugar crust that cracks under the knife, while the inside stays tender with soft apple pieces scattered through every slice. It tastes like the best part of a coffee shop loaf, only fresher and less fussy.
The trick is keeping the batter lightly mixed and the apples cut small enough to melt into the crumb without turning the loaf heavy. Brown sugar brings more depth than white sugar alone, and the cinnamon belongs in the dry ingredients so it gets evenly distributed instead of clumping in one bite. The sugar on top matters too; it gives the crust that shattery finish that makes the first slice especially good.
Below, you’ll find the one detail that keeps the apples from sinking, plus a few smart swaps and storage notes so the loaf stays just as good on day two.
The loaf came out with a crackly top and the apples stayed evenly distributed instead of sinking to the bottom. I baked it right at 58 minutes and the middle was perfectly moist.
Save this cinnamon apple bread for the next time you want a tender loaf with a crackly sugar top and warm apple pieces in every slice.
The Small Trick That Keeps the Apples from Sinking
Quick breads fail in a few predictable ways. The batter gets overmixed and turns tough. The apples go in too large and drag the center down. Or the loaf bakes long enough to set the outside while the middle stays gummy. This version avoids all three by keeping the batter tender, using diced apples instead of chunks, and relying on a modest amount of sugar and butter to build a crumb that stays soft after baking.
The other detail that matters is the flour. A light toss of the diced apples in a spoonful of flour helps them grip the batter instead of sliding to the bottom. That tiny step keeps each slice balanced, with fruit in every bite instead of a dense layer hiding at the base of the pan.
- Apples — Use firm apples that hold their shape, like Honeycrisp, Granny Smith, or Fuji. Softer apples will disappear into the loaf and can make the center wet.
- Brown sugar — This gives the bread its deeper, almost caramel note. White sugar works in a pinch, but the loaf tastes flatter.
- Butter — Softened butter creams with the sugar to trap air, which helps the bread rise and keeps the texture from turning heavy. Margarine changes the flavor and can make the crumb less rich.
- Cinnamon — The spice is simple here, so fresh cinnamon matters. If yours has been sitting in the cabinet for years, the loaf will still work, but it won’t smell as warm or taste as vivid.
- Flour — All-purpose flour gives the bread enough structure to support the apples. If you swap in whole wheat flour, use half whole wheat and half all-purpose so the loaf doesn’t get dry.
Building the Batter Without Beating the Life Out of It
Start with the dry mix
Whisk the flour, baking soda, and cinnamon together first so the leavening and spice are evenly spread through the loaf. If the baking soda stays in one pocket, you’ll get uneven rise and a bitter spot. This step also breaks up any little clumps of cinnamon before they become streaks in the crumb.
Cream the butter and sugar until it looks pale
Beat the softened butter and brown sugar until the mixture looks fluffy and a little lighter in color. That means air is getting trapped in the fat, which gives the bread its lift before the eggs and flour go in. If the butter is too cold, it stays grainy and won’t cream properly; if it’s melted, the loaf loses structure.
Fold in the apples at the end
Add the dry ingredients in just until the flour disappears, then fold in the diced apples with a few gentle turns. Overmixing wakes up the gluten and turns quick bread chewy instead of tender. The batter should look thick and spoonable, with the apples evenly suspended rather than mashed into the mixture.
Bake until the center sets cleanly
Scrape the batter into the prepared loaf pan, sprinkle the top with sugar, and bake until a toothpick comes out with a few dry crumbs, not wet batter. The top will be deeply golden and the sugar crust will look set before the center is fully done. If the top browns too quickly, lay foil loosely over the loaf for the last stretch of baking so the middle can finish without burning the crust.
What to Change When You Want a Different Loaf
Gluten-Free Version
Swap the all-purpose flour for a 1:1 gluten-free baking blend that includes xanthan gum. The loaf will be a little more delicate when warm, but it still slices well after cooling completely. Let it rest before cutting so the crumb has time to set.
Dairy-Free Loaf
Use a plant-based butter block in place of the dairy butter. The texture stays close to the original, though the flavor is a little less rich. Avoid soft tub spreads here because they contain more water and can make the loaf softer in the wrong way.
Extra Spice and Crunch
Add a pinch of nutmeg or a little chopped pecan on top for a deeper bakery-style finish. The nutmeg warms the flavor without overwhelming the apples, and the nuts add texture without changing the batter structure. Keep the amount modest so the loaf stays soft, not dense.
Storage and Reheating
- Refrigerator: Store in an airtight container for up to 4 days. The crumb tightens a bit in the fridge, but the flavor stays good.
- Freezer: Freeze slices or the whole loaf tightly wrapped for up to 2 months. Slice first if you want easy single servings later.
- Reheating: Warm slices in a toaster oven or microwave just until the butter softens and the crumb loosens. Overheating dries quick bread out fast, so use short bursts rather than a long heat cycle.