
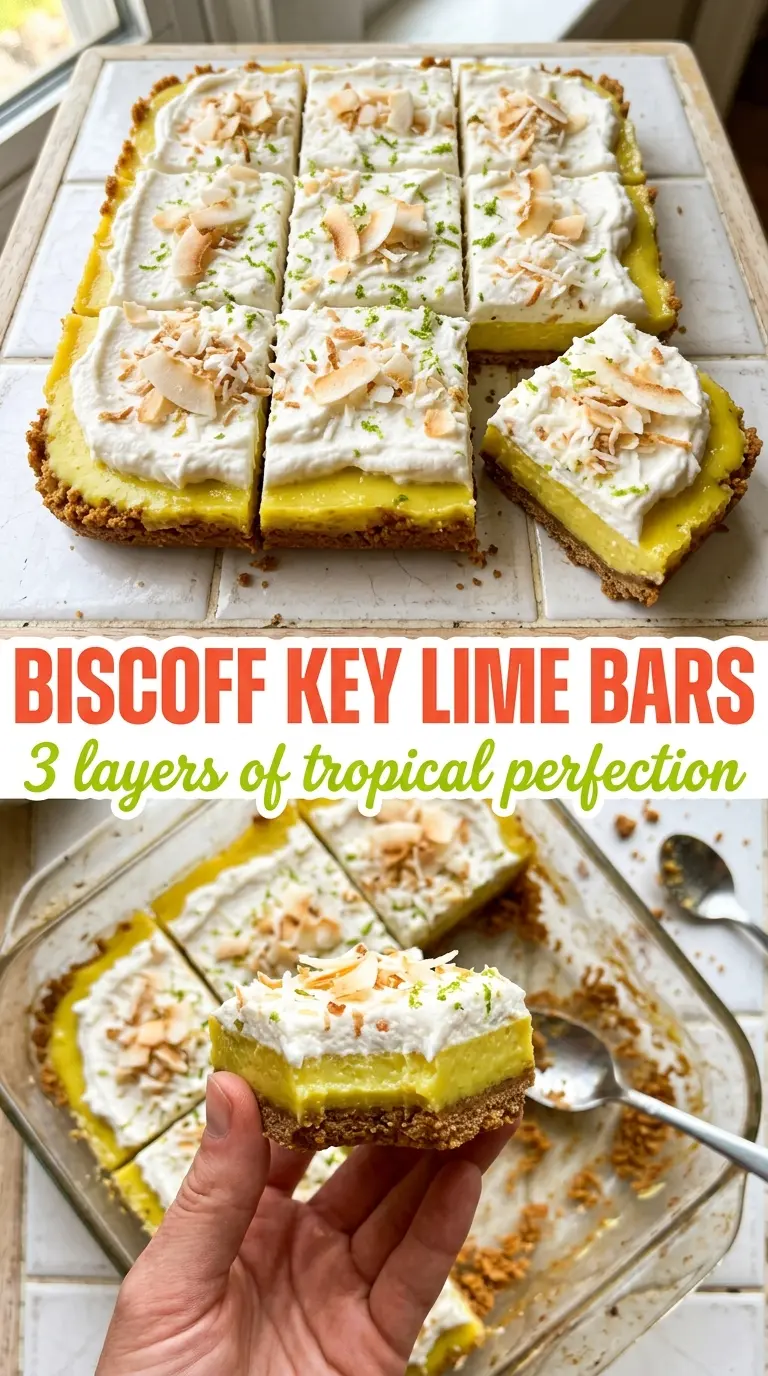
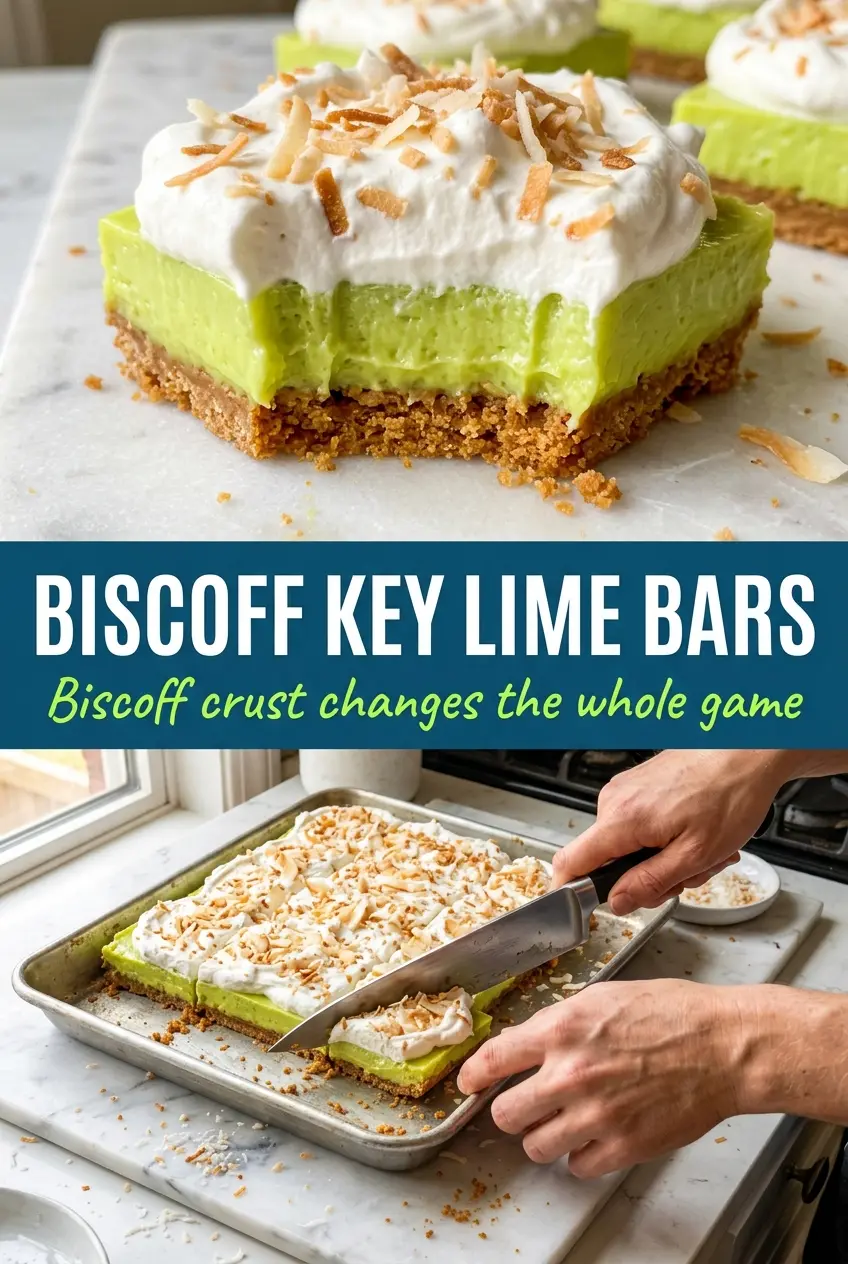
These key lime pie bars set up with a clean, creamy bite and a crust that holds together instead of crumbling the second you slice it. The filling lands between tart and sweet in that sharp, bright way key lime should, while the Biscoff base brings a warm spice note that keeps the whole pan from tasting one-note. The coconut topping finishes it with a soft, airy layer that makes each square feel a little more polished than the usual graham-cracker version.
What makes this version work is the balance. Sweetened condensed milk gives the custard its body without needing a fussy stovetop filling, and the egg yolks tighten everything just enough in the oven. The lime zest matters more than people think here; it pulls the flavor past plain sourness and into something that tastes fresh all the way through. And if you’ve only ever used graham crackers, Biscoff is the move that gives these bars their signature edge.
Below, I’ve laid out the small details that keep the filling smooth, the crust sturdy, and the coconut topping light instead of heavy. The difference is in the timing and the temperature, not extra steps.
The filling set up beautifully and the Biscoff crust stayed crisp even after chilling overnight. I also loved that the coconut topping wasn’t too sweet — my husband kept sneaking pieces straight from the fridge.
Love these key lime pie bars with that spiced Biscoff crust and coconut topping? Save them to Pinterest for the next time you want a bright, creamy dessert with a little extra personality.
The Reason the Filling Sets Cleanly Instead of Weeping
Key lime bars can go wrong in two opposite ways: underbaked and loose, or overbaked and grainy. The sweetened condensed milk gives this filling structure without needing cornstarch, but the eggs still need gentle heat to do their job. Once the center is just set with a slight wobble, stop baking. Carryover heat finishes the job as the pan cools, and that keeps the texture creamy instead of dry.
The other mistake is rushing the chill. If you cut these before they’ve had time in the refrigerator, the filling smears and the crust loses its clean edge. Give the pan at least two full hours, and longer if you want ultra-neat slices. A sharp knife wiped clean between cuts makes a bigger difference here than any special tool.
What Each Ingredient Is Actually Doing in This Dish
- Biscoff cookie crumbs — These bring a deeper, spiced base than graham crackers. If you swap them, plain graham crumbs still work, but you lose the warm cinnamon note that makes these bars stand out.
- Melted butter — This binds the crust and helps it bake into a firm layer. Use enough to make the crumbs feel like damp sand; too little and the crust falls apart when sliced.
- Egg yolks — The yolks give the filling its rich, custardy finish. Don’t replace them with whole eggs unless you want a firmer, less silky bar.
- Key lime juice and zest — The juice brings the tartness, but the zest is what makes the lime flavor taste complete. If you only have bottled juice, it will still work, but the zest is what keeps the bars bright instead of flat.
- Sweetened condensed milk — This is the backbone of the filling. There isn’t a good one-to-one substitute here; evaporated milk won’t give you the same sweetness or set.
- Heavy cream, powdered sugar, coconut extract, and toasted coconut flakes — This topping softens the tart filling and adds a light finish. Coconut extract is potent, so keep it measured; too much and it tastes perfumey instead of clean.
Building the Bars Without Breaking the Custard
Pressing and Prebaking the Crust
Mix the Biscoff crumbs with the melted butter until every crumb looks evenly moistened, then press it firmly into the lined pan. Use the bottom of a measuring cup to pack the corners and edges; loose crust is what falls apart on the first cut. Bake it just long enough to smell toasty and look slightly darker at the edges, about 8 minutes. If it goes too far, the spice in the cookies can turn bitter.
Whisking the Filling the Right Way
Beat the egg yolks and zest first, then add the sweetened condensed milk and key lime juice. The filling will thicken a little as soon as the acid hits it, which is what you want. Don’t overmix once the lime juice is in; you’re not trying to whip air into it, just bring it together smoothly. Pour it into the warm crust right away so the base and filling bake together evenly.
Baking Until Just Set
Slide the pan into the oven and watch for the center to lose its liquid shine while still giving a slight wobble when the pan moves. That small jiggle means the eggs have set without turning chalky. If the top starts to puff or crack, the oven is too hot or the bars have gone too long. Pull them out, cool them on the counter, then chill them until the filling is fully firm.
Finishing with Coconut Cream
Whip the cream with powdered sugar and coconut extract to soft peaks so it spreads like frosting instead of turning dense and grainy. A dry pan is the best way to toast the coconut flakes; stir them often because they go from pale to burnt fast. Spread the cream over the chilled bars only after the filling is fully cold, or it will slide around and melt at the edges. Finish with the coconut while the cream is still soft enough to catch it.
How to Adapt These Key Lime Pie Bars for Different Kitchens
Gluten-Free Crust Swap
Use a gluten-free spiced cookie crumb or a gluten-free graham-style crumb in place of the Biscoff. You’ll keep the same pressed-bar texture, but the warm caramel spice will be milder unless your replacement has its own seasoning.
Dairy-Free Version
Swap in a dairy-free cookie crust with plant-based butter, then replace the sweetened condensed milk with a coconut-based condensed milk. The bars will still set, but the flavor turns a little more coconut-forward and less classic key lime pie.
No Key Limes on Hand
Regular lime juice works in a pinch, and the bars will still taste bright and tart. The flavor is a little less floral and sharp, so keep the zest if you can; it helps the filling taste alive instead of just sour.
Storage and Reheating
- Refrigerator: Store covered for up to 4 days. The crust stays best on day one and two, but the bars still slice neatly after that.
- Freezer: These freeze well without the coconut topping. Wrap the chilled bars tightly, freeze them flat, and add the topping after thawing for the cleanest texture.
- Reheating: Don’t reheat these bars. They’re meant to be served cold, and warming them softens the filling too much and makes the crust lose its structure.
Answers to the Questions Worth Asking
BEST Key Lime Pie Bars
Ingredients
Equipment
Method
- Preheat the oven to 350°F and line an 8x8 pan for easy removal.
- Mix Biscoff cookie crumbs and melted butter, then press firmly into the pan in an even layer.
- Bake the crust for 8 minutes, then remove and keep the oven on.
- Beat the egg yolks with the key lime zest until smooth and slightly lighter in color.
- Mix in the sweetened condensed milk, then add the key lime juice and stir until fully combined.
- Pour the lime custard over the hot crust, then bake for 15 minutes until just set in the center.
- Chill the bars for 2+ hours until cold and firm enough to slice.
- Whip the heavy cream with powdered sugar and coconut extract to soft peaks, then spread over the chilled bars.
- Top with toasted coconut flakes and cut into bars to serve.