
Silky, scoopable salted caramel ice cream earns its place because it tastes like a custard-based dessert without the stove, the egg tempering, or the worry of overcooking anything. The texture lands in that sweet spot between dense and airy, with a ribbon of caramel that stays glossy instead of freezing into hard shards. A pinch of flaky salt on top keeps the whole thing from turning cloying.
The trick is in the structure: whipped cream gives the base enough body to freeze creamy, and sweetened condensed milk adds sweetness plus a little insurance against iciness. The caramel needs to be thick enough to swirl but not so stiff that it disappears into the base, which is why a brief warm-up helps. If you’ve ever ended up with ice cream that was crunchy with ice crystals or bland once frozen, this version fixes both problems with a very short ingredient list.
Below, you’ll find the exact swirl pattern that gives you visible caramel ribbons in every scoop, plus the one texture cue that tells you the base is ready before it goes into the freezer.
The caramel stayed ribboned instead of sinking, and after six hours it scooped cleanly without turning icy. I used a little extra flaky salt on top and it tasted like a fancy ice cream shop pint.
Make a batch of salted caramel ice cream with those thick caramel ribbons and flaky salt on top for an easy freezer dessert that still feels special.
The Reason This Ice Cream Stays Creamy Without an Ice Cream Maker
Ice cream usually gets icy when there isn’t enough fat, sugar, or air in the base to keep water from freezing hard. This version leans on whipped cream for structure and sweetened condensed milk for both sweetness and a softer freeze, which is why it stays scoopable straight from the freezer instead of turning into a block. The caramel swirl also helps because it interrupts the base with pockets of rich sauce, so each bite has a little variation instead of tasting flat.
The other detail that matters is the whipping stage. Stop at stiff peaks, not grainy overwhipped cream. If you push it too far, the folded mixture turns dense and can freeze with a heavier mouthfeel. You want the cream to hold shape when you lift the beater, but still look smooth and glossy.

What the Three Main Ingredients Are Doing Here
- Heavy whipping cream — This is the backbone of the texture. It traps air when whipped, which gives the finished ice cream body without an actual custard base. Lower-fat cream won’t whip up the same way, and half-and-half won’t hold enough structure.
- Sweetened condensed milk — This does the heavy lifting for sweetness and softness. It keeps the base from freezing rock hard and adds that dense, milky flavor that makes no-churn ice cream work. Don’t swap it for evaporated milk; the sugar content is what matters here.
- Salted caramel sauce — Use a caramel sauce that’s thick enough to ribbon through the mixture instead of disappearing. A good store-bought sauce keeps this recipe truly simple, and if yours is very stiff, warm it for a few seconds so it drizzles instead of clumping.
- Flaky sea salt — This isn’t decoration. It sharpens the caramel and keeps the sweetness balanced. Fine salt dissolves into the mix; flaky salt gives little bursts of contrast on top.
How to Build the Swirl So the Caramel Stays Visible
Whipping the Cream to the Right Point
Whip the heavy cream in a large bowl until you get stiff peaks that stand up when you lift the whisk. The surface should look smooth, not clotted or dry. If you stop too early, the base won’t have enough structure and it can freeze with a softer, slushier texture. If you go too far, the cream starts to lose that clean, airy feel and the final ice cream gets heavy.
Folding in the Condensed Milk
Use a spatula and fold the condensed milk in with broad, gentle strokes. The goal is to keep as much air in the cream as possible while blending the mixture until no white streaks remain. Scrape the bottom of the bowl, because a streak of unincorporated condensed milk will freeze into a gummy ribbon instead of a smooth base.
Layering the Caramel
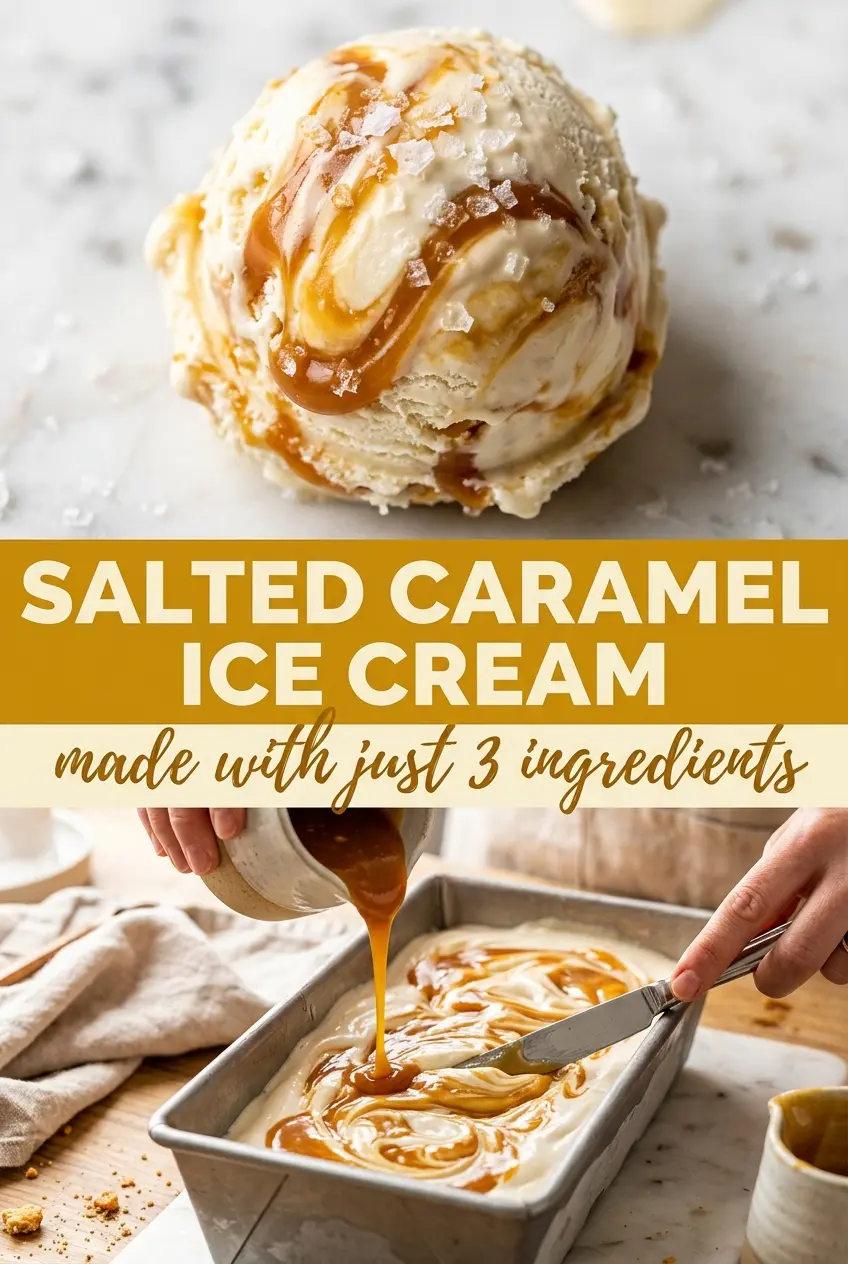
Pour half the base into the loaf pan, drizzle on half the caramel, then drag a knife through it once or twice. Don’t over-swirl or the caramel vanishes into the cream; you want visible ribbons, not a uniform tan mixture. Repeat with the remaining base and caramel, then finish with flaky salt so the top freezes with a little crunch.
Freezing Until Firm
Freeze the pan uncovered or lightly covered for at least six hours, and overnight is even better if you want clean scoops. The surface should feel firm to the touch and the center should no longer give when pressed. If you try to scoop too early, the edges may seem ready while the middle is still soft and messy.
Chocolate Caramel Swirl
Drizzle in a few spoonfuls of fudge sauce along with the caramel for a deeper, darker flavor. The ice cream gets richer and a little more dessert-shop styled, but the chocolate should stay in thin ribbons so it doesn’t overpower the caramel.
Dairy-Free Version
Use a full-fat coconut cream that whips well in place of heavy cream and a dairy-free condensed milk alternative. The texture will be a little softer and you’ll taste a faint coconut note, which works nicely with caramel but changes the flavor from classic to tropical-leaning.
Extra-Salty Finish
If you like a sharper salted caramel edge, sprinkle a little more flaky salt right before serving instead of mixing it into the base. That keeps the salt bright on top, where it hits first, instead of disappearing during freezing.
Storage and Reheating
- Refrigerator: Not applicable for long storage. This softens fast at room temperature, so serve it straight from the freezer.
- Freezer: Keeps well for about 2 weeks with plastic wrap pressed on the surface, though the caramel ribbon is best in the first few days. After that, it can pick up a little ice around the edges.
- Reheating: Don’t reheat it. Let the container sit on the counter for 5 to 10 minutes before scooping so the edges relax without melting the whole pan.
The Questions That Come Up With No-Churn Ice Cream
Salted Caramel Ice Cream
Ingredients
Equipment
Method
- Whip heavy whipping cream in a large bowl until stiff peaks form, scraping down as needed; it should hold firm ridges when you lift the whisk.
- Fold in sweetened condensed milk until fully combined, keeping the mixture thick and uniform with no visible streaks.
- Pour half the ice cream mixture into a loaf pan and drizzle with half the salted caramel sauce; swirl with a knife in broad zigzags to create ribbons.
- Add the remaining mixture, drizzle with the rest of the salted caramel sauce, and swirl again with the knife for a marbled effect.
- Sprinkle flaky sea salt over the top in an even layer so each scoop gets a salty crunch.
- Freeze for at least 6 hours before scooping, until firm and scoopable with clean edges.