
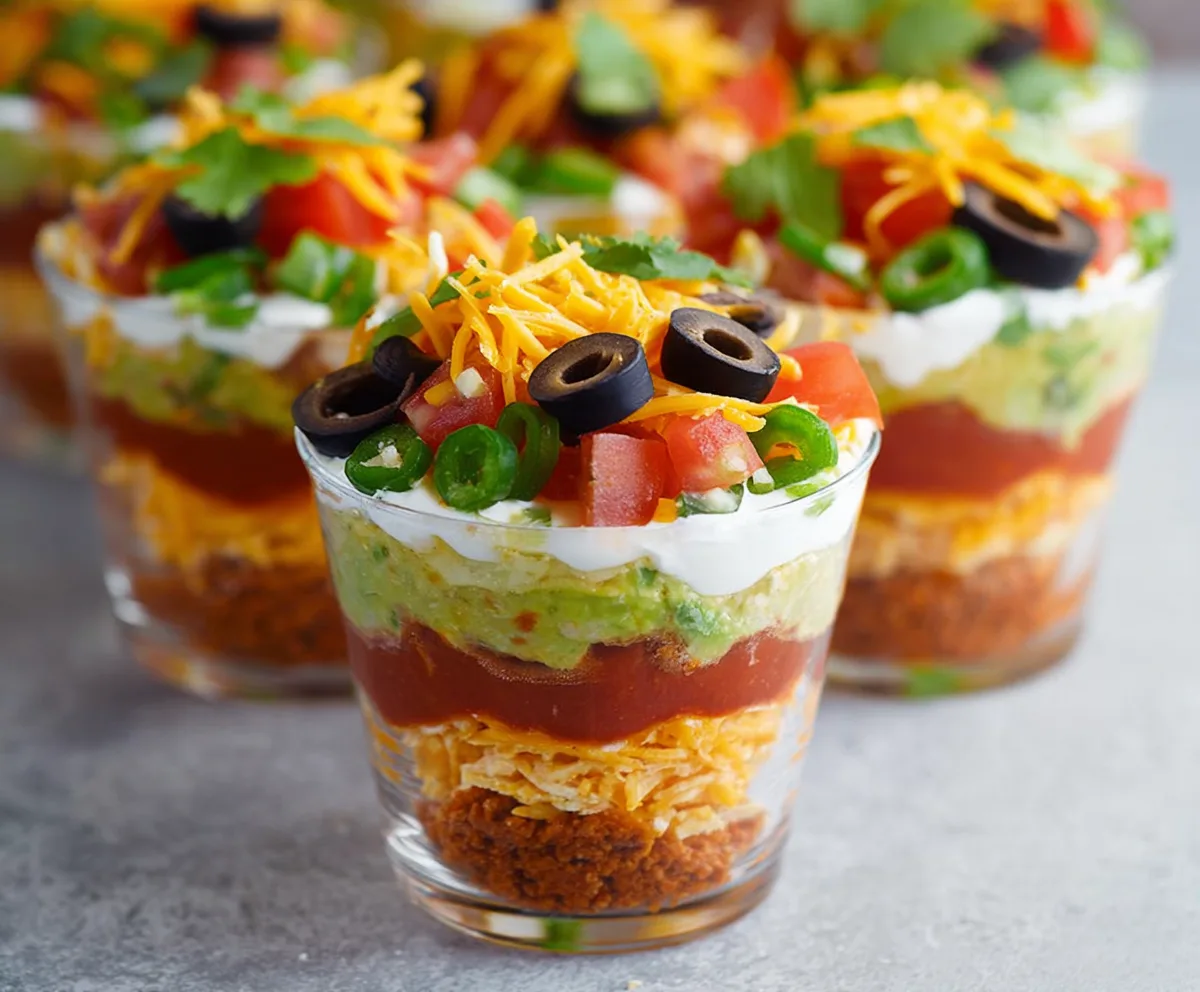
Seven Layer Dip Cups are a fun and tasty twist on the classic party dip you already know and love. These little cups are packed with layers of creamy beans, fresh guacamole, tangy salsa, melted cheese, and crunchy chips, all stacked one on top of the other. Each cup is like a mini flavor explosion that’s perfect for snack time or a casual get-together.
I love making these because they’re so easy to put together, and everyone can grab their own cup without the mess of double-dipping. Plus, you can customize the layers however you like—sometimes I add extra jalapeños or a big dollop of sour cream on top. It’s a simple recipe that always gets people smiling and coming back for more.
These cups are great served chilled, and I find they’re the perfect snack for movie nights or backyard barbecues. I also like to prep them ahead of time, so when guests arrive, all I have to do is set them out and watch everyone dig in. It’s a casual, no-fuss way to bring a bit of fiesta to any occasion!
Key Ingredients & Substitutions
Refried Beans: These create the hearty base of the dip. If you prefer, try black beans mashed with a little seasoning for a lighter twist.
Guacamole: Fresh guacamole adds creaminess and flavor. Store-bought works fine, but homemade with lime and cilantro tastes best. To skip avocado, use mashed peas for a different flair.
Sour Cream: Provides a cool, tangy layer. Greek yogurt is a great substitute for fewer calories and a protein boost.
Salsa: Adds zest and moisture. Mild, medium, or hot salsa works depending on your heat preference. Pico de gallo is also a fresh alternative.
Cheese: Sharp cheddar is classic, but you can swap in Monterey Jack or a Mexican cheese blend. For dairy-free, nutritional yeast adds cheesy notes.
Toppings: Tomatoes, olives, jalapeños, and cilantro add fresh crunch and color. Adjust toppings based on what you like—mild or spicy.
Tortilla Chips: Crushed chips form a crunchy base. You can also use crushed pita chips or corn chips for a different texture.
How Do I Layer Seven Layer Dip Cups Without Mixing the Layers?
Layering each ingredient carefully keeps the dip neat and tasty. Here are some easy tips:
- Use a spoon or small spatula to gently spread each new layer evenly across the cup.
- Let each layer settle slightly before adding the next—this helps prevent mixing.
- Don’t overload each layer; aim for about two tablespoons per layer for manageable cups.
- For loose toppings like tomatoes and jalapeños, add them carefully on top instead of mixing in.
- Chill the cups after assembling to let layers firm up, making them easier to eat.
With patience and gentle layering, your dip cups will look great and taste delicious every time.
Equipment You’ll Need
- Small clear cups or glasses – I like see-through containers so the colorful layers stand out beautifully.
- Spoons or small spatulas – makes layering each ingredient neat and easy without mixing everything.
- Measuring spoons – for consistent layers, about 2 tablespoons per layer work best.
- Chopping board and knife – for dicing tomatoes, slicing jalapeños, and chopping cilantro quickly.
- Optional: small garnish tools or toothpicks – handy for placing toppings like cilantro or olives precisely.
Flavor Variations & Add-Ins
- Swap sour cream for Greek yogurt to add a tangy flavor and more protein.
- Include chopped cooked chicken or beef for a meaty version of the dip.
- Add sliced avocado or extra guacamole between layers for creaminess and richness.
- Use spiced-up salsa or add a dash of hot sauce to boost heat and flavor.
- Try different cheeses like Monterey Jack or pepper jack for a melty, cheesy twist.
Seven Layer Dip Cups
Ingredients You’ll Need:
- 1 cup refried beans
- 1 cup guacamole (store-bought or homemade)
- 1 cup sour cream
- 1 cup salsa
- 1 cup shredded sharp cheddar cheese
- 1 medium tomato, diced
- 1/4 cup sliced black olives
- 1 jalapeño, thinly sliced
- 1/4 cup chopped fresh cilantro (optional)
- 1 cup crushed tortilla chips (for the base)
- Optional garnish: additional tortilla chips for sticking into the top
How Much Time Will You Need?
This recipe takes about 15 minutes to prepare and assemble. After layering the cups, chilling them in the fridge for at least 30 minutes helps the flavors come together and the layers set nicely.
Step-by-Step Instructions:
1. Prepare Your Cups and Base Layer:
Start by setting out clear small glasses or cups for your dip cups. Place about 2 tablespoons of crushed tortilla chips evenly in the bottom of each cup, pressing gently to create a firm base.
2. Layer the Dip:
Spoon about 2 tablespoons of refried beans over the chips in each cup. Then, gently spread 2 tablespoons of guacamole on top of the beans. Follow with 2 tablespoons of sour cream, smoothing it out evenly.
3. Add Salsa, Cheese, and Toppings:
Carefully add 2 tablespoons of salsa over the sour cream layer. Sprinkle 2 tablespoons of shredded cheddar cheese on top. Finally, top each cup with diced tomatoes, sliced black olives, and thin jalapeño slices. Add a sprig of cilantro if you like.
4. Garnish and Chill:
Optionally, insert a small tortilla chip wedge into the top of each cup for garnish and easy dipping. Place the cups in the fridge for at least 30 minutes to chill and let the layers set. Serve chilled and enjoy your colorful, delicious Seven Layer Dip Cups!
Can I Make Seven Layer Dip Cups Ahead of Time?
Absolutely! Prepare and assemble the dip cups up to a day in advance. Just cover them tightly with plastic wrap and keep them refrigerated. Add fresh toppings like tomatoes and jalapeños right before serving to keep them crisp.
Can I Use Store-Bought Ingredients?
Yes! Store-bought refried beans, guacamole, sour cream, and salsa work perfectly to save time. Homemade versions add extra freshness but aren’t necessary for a great-tasting dip.
How Should I Store Leftovers?
Cover any leftover dip cups tightly and refrigerate. They are best enjoyed within 2-3 days. Stir the layers together before eating if the chips have softened.
What Can I Substitute for Tortilla Chips?
If you’re out of tortilla chips, crushed pita chips or corn chips make great alternatives for the base layer. Just keep the texture crunchy for the best dip experience!