
Sweet peas with crisp pancetta and soft pear pieces land on the plate with the kind of balance that keeps people reaching for a second spoonful. The peas stay bright, the pancetta brings salt and crunch, and the pear cooks down just enough to turn the whole dish glossy without going mushy. It tastes like a side that belongs on a holiday table, but it comes together fast enough that you can still keep an eye on everything else in the oven.
What makes this version work is timing. The pancetta gets cooked first so the pan starts with rendered fat and browned bits, then the shallot and pear go in long enough to soften and pick up that savory base. The peas only need a few minutes in the skillet with a splash of broth, which keeps them tender and green instead of dull and wrinkled. Dice the pear small and you’ll get little pockets of sweetness in every bite instead of big soft chunks that disappear into the peas.
Below, you’ll find the trick for keeping the pear from turning to mush, plus a few ways to adapt the dish if you need to swap ingredients or make it ahead.
The pear kept its shape and gave the peas this subtle sweetness that worked so well with the pancetta. I made it for Thanksgiving and the pan was scraped clean before dinner even started.
Save these buttery Thanksgiving peas with pear and pancetta for a side dish that brings sweet, salty, and crisp together in one skillet.
The Reason the Pear Goes In at the Same Time as the Shallot
The pear in this dish should soften, not disappear. That means it needs a little time in the skillet with the shallot and butter so it can pick up the savory base and release just enough juice to glaze the peas later. If you add it too late, it stays raw and firm in a way that feels separate from everything else.
The other trap is crowding the pan with peas before the pancetta has done its job. Pancetta needs space to crisp, and the rendered fat is part of what makes the dish taste finished. If you rush that first step, you lose both texture and flavor.
- Pancetta — This is the salty backbone of the dish. Bacon works if that’s what you have, but pancetta tastes cleaner and renders with less smoke, which matters when the pear and peas are meant to stay bright.
- Pear — Use a firm pear like Bosc or Anjou. A ripe, soft pear will collapse before the peas are done, and you’ll lose the little golden cubes that make this side feel special.
- Frozen peas — Frozen peas are the right choice here. They’re picked at the right stage and stay sweet; fresh peas are fine when they’re in season, but they aren’t necessary for a dish this quick.
- Chicken broth — This does more than loosen the pan. It helps the butter and pear make a light glaze instead of a greasy coating, so the peas taste seasoned without getting heavy.
Building the Skillet So the Peas Stay Bright
Crisp the pancetta first
Cook the pancetta over medium heat until the fat has rendered and the pieces are deeply browned at the edges. You want actual crispness here, not just warmed-up meat, because soft pancetta turns flabby once it hits the peas. Lift it out with a slotted spoon and keep the fat in the pan.
Soften the shallot and pear in the butter
Add the butter to the hot pan, then stir in the shallot and diced pear. Cook just until the shallot looks translucent and the pear starts to lose its raw edge, about 3 minutes. If the heat is too high, the butter will brown before the pear softens, and the dish will taste scorched instead of buttery.
Warm the peas without overcooking them
Stir in the peas and chicken broth and cook until the peas are hot and glossy, about 5 minutes. The broth should mostly reduce, leaving just enough moisture to coat everything lightly. If the pan looks dry before the peas are tender, add another splash of broth rather than turning up the heat.
Finish with the pancetta and parsley
Return the pancetta to the skillet and toss everything together with the parsley. The pancetta goes in at the end so it stays crisp instead of softening in the steam from the peas. Taste and season with salt and pepper after that, because pancetta already brings a fair amount of salt.
Three Easy Ways to Adjust This Holiday Side Dish
Swap pancetta for bacon
Bacon gives you a smokier, more familiar flavor and works well if that’s what’s in the fridge. It can also release a little more fat, so drain off the excess if the pan looks greasy before you add the butter and pear.
Make it dairy-free
Use olive oil instead of butter. You’ll lose a little of the round, rich finish, but the pancetta still gives the dish enough body that it won’t taste thin.
Make it vegetarian
Skip the pancetta and use olive oil plus a pinch of smoked salt or a little smoked paprika for depth. The dish becomes lighter and sweeter, so the pear stands out more, but you’ll need that extra seasoning to replace the salty backbone.
Make it ahead for a holiday meal
Cook the pancetta and the pear-shallot base a few hours ahead, then add the peas and parsley just before serving. That keeps the peas from turning dull and keeps the pancetta crisp instead of soft.
Storage and Reheating
- Refrigerator: Store leftovers in an airtight container for up to 3 days. The peas soften a bit, but the flavor holds up well.
- Freezer: Freezing isn’t ideal here. The peas and pear both lose their best texture after thawing, so this one is better made fresh.
- Reheating: Warm gently in a skillet over low heat with a splash of broth. High heat can toughen the pancetta and make the peas wrinkled before the center is hot.
Questions I Get Asked About This Recipe
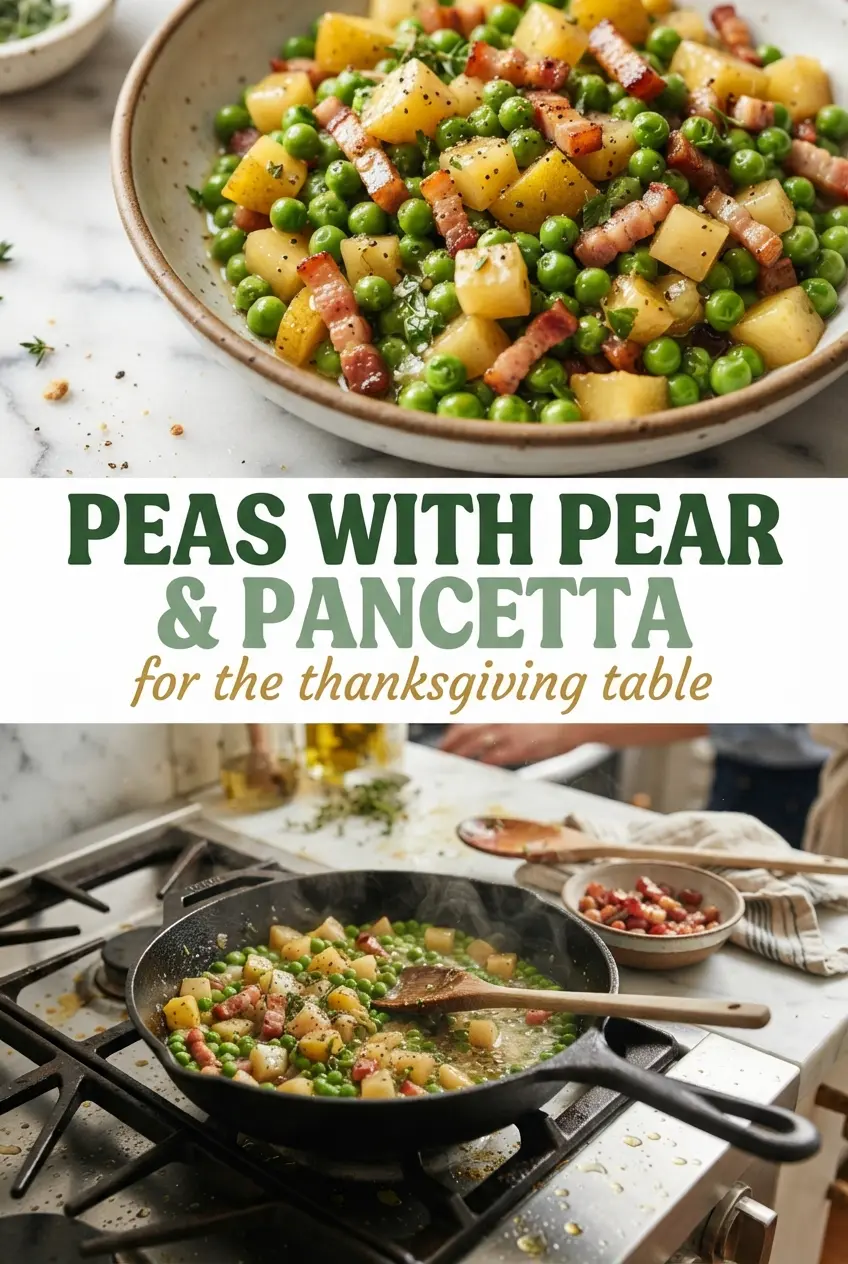
Thanksgiving Peas with Pear and Pancetta
Ingredients
Equipment
Method
- Heat a cast iron skillet over medium heat, add the diced pancetta, and cook until crisp, about 4 to 6 minutes, stirring as needed and then set the pancetta aside.
- Lower the heat to medium-low, add the butter to the skillet, and melt; cook the minced shallot and diced pear for 3 minutes, stirring until glossy and just starting to soften.
- Add the frozen peas and chicken broth, then cook for 5 minutes at a steady simmer, stirring occasionally until the peas are tender and bright green with a light glaze.
- Toss the cooked peas with the reserved pancetta until evenly distributed and warmed through for 1 to 2 minutes.
- Turn off the heat and stir in the chopped parsley; season with salt and pepper to taste and serve immediately.