
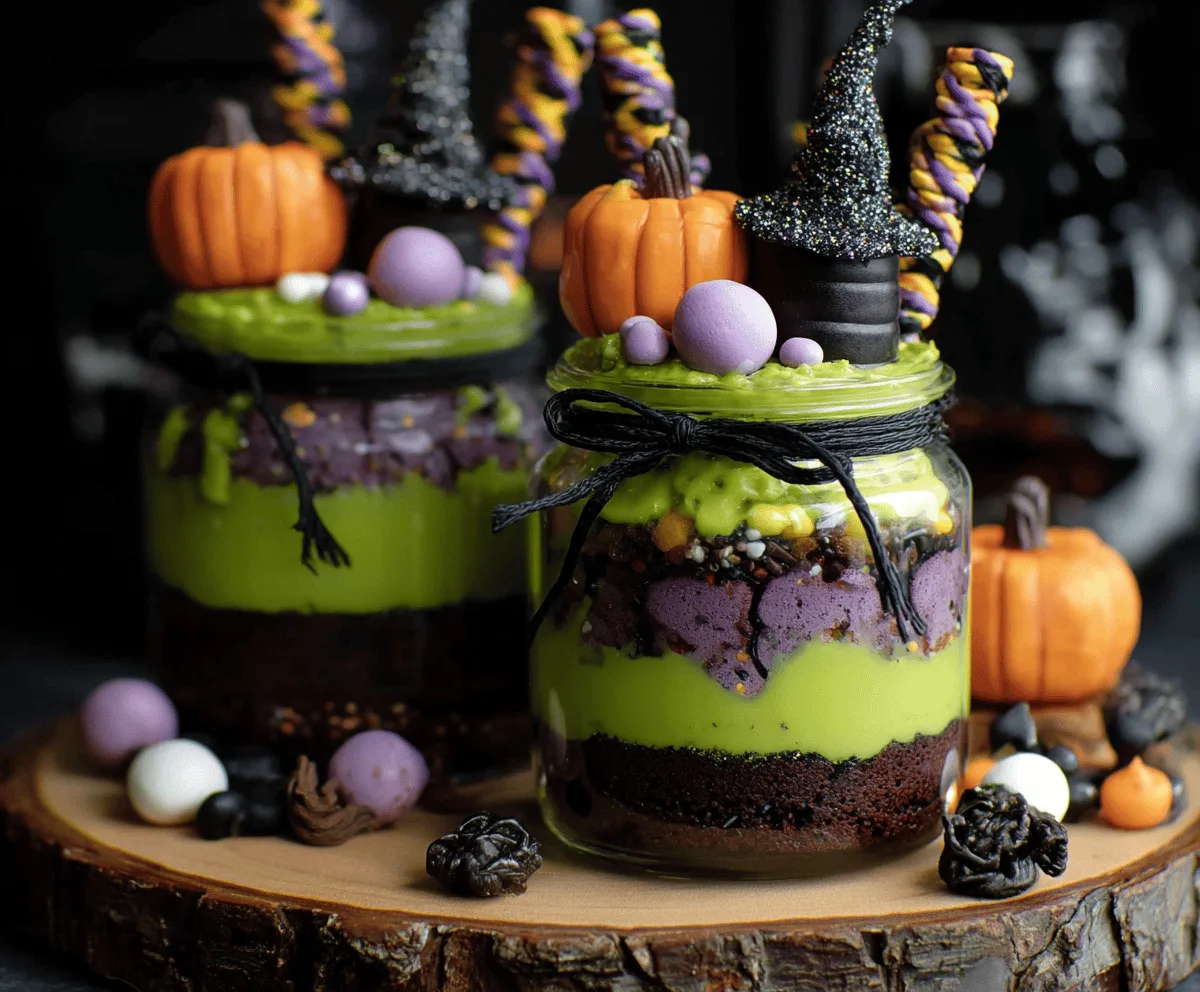
Witches’ Brew Halloween Cake Jars are a fun and festive treat that combine moist layers of cake with spooky, colorful frosting in a cute jar. Think rich chocolate cake, bright green and purple frosting swirls, and a sprinkle of Halloween-themed decorations that really make these jars pop. They’re perfect for bringing a little magic—and maybe a few friendly chills—to your Halloween celebration.
I love making these because they’re super easy to customize. You can pick your favorite cake flavors and frostings or even add little candies and edible decorations right on top. I find that assembling them in jars makes serving a breeze, and guests get to enjoy their own personal dessert. Plus, they look so cheerful sitting out on a table—it really sets the mood for the holiday.
These cake jars also hold up well if you want to make them ahead of time, which is great when you’re busy with Halloween parties or trick-or-treating plans. I like to imagine a group of friends or kids opening their jars and getting excited about what’s inside—it’s such a sweet, simple way to add a little extra fun to the spooky season.
Key Ingredients & Substitutions
Chocolate Cake: The base here is chocolate cake for a rich, moist flavor. You can use a box mix or homemade. For a gluten-free option, try a gluten-free chocolate cake mix or bake with almond flour.
Buttercream Frosting: The purple and green buttercream add festive color and creamy texture. Cream cheese frosting works too if you want a tangier taste. Use gel food coloring for bright colors without thinning the frosting.
Chocolate Sandwich Cookies: Crushed Oreos add the “witches’ dirt” look and a nice crunchy texture. You can swap for gluten-free cookies or use finely chopped chocolate chips if preferred.
Halloween Sprinkles & Decorations: Sprinkles and candy sticks bring the spooky theme to life. If you don’t have striped candy sticks, try licorice or mini pretzel rods dipped and drizzled with colored candy melts.
How Do You Get Those Perfect Colorful Layers and Decoration in Cake Jars?
Layering is key to making these jars look magical and neat. Here’s how I do it:
- Use a spoon or piping bag: Spoon cake crumbs and frosting carefully to avoid mixing layers.
- Chill between layers: If you have time, pop the jars in the fridge briefly to set each frosting layer.
- Crush cookies to a fine but textured crumb: This keeps the “dirt” effect without being powdery.
- Decorate on top last: Add candy sticks and sprinkles carefully to keep them standing or spread out nicely.
- Chilling before serving: Helps the frosting firm up so layers hold well, making it easier and prettier to eat.
Equipment You’ll Need
- 8 oz glass jars with lids – I like clear jars to show off the colorful layers.
- Mixing bowls – for preparing the frostings and cake crumbs.
- Electric mixer or hand whisk – makes mixing the buttercream smooth and fluffy.
- Food processor or plastic bag and rolling pin – for crushing cookies.
- Spoons or piping bags – for carefully layering the cake and frosting.
- Small decorating tools or toothpicks – helpful for placing the candy sticks and sprinkles nicely.
Flavor Variations & Add-Ins
- Use vanilla or pumpkin cake for different flavors, or swap with red velvet for a deeper color.
- Add mini chocolate chips or chopped candies in the layers for extra texture.
- Use flavored frostings like vanilla, pumpkin spice, or even black cocoa for a spooky dark look.
- Mix in edible glitter or shimmer spray for a magical, glistening effect.
Witches’ Brew Halloween Cake Jars
Ingredients You’ll Need:
For the Cake and Crumbs:
- 1 box chocolate cake mix (or homemade chocolate cake), baked and cooled
- 1 cup crushed chocolate sandwich cookies (e.g., Oreos)
For the Frostings:
- Purple Buttercream Frosting:
- 1 cup unsalted butter, softened
- 3-4 cups powdered sugar
- 2-3 tablespoons heavy cream or milk
- 1 teaspoon vanilla extract
- Purple gel food coloring
- Green Buttercream Frosting:
- 1 cup unsalted butter, softened
- 3-4 cups powdered sugar
- 2-3 tablespoons heavy cream or milk
- 1 teaspoon vanilla extract
- Green gel food coloring
Decorations:
- Halloween sprinkles (small round nonpareils in black, orange, purple, green)
- Small white marshmallows
- Orange and black striped candy sticks or candy canes (for decoration)
- Optional: candy eyeballs or mini candy pumpkins for garnish
How Much Time Will You Need?
This fun recipe takes about 30 minutes to prepare and assemble. Then, allow at least 1 hour to chill in the fridge so the layers set and the frosting firms up nicely. Perfect for prepping ahead of your Halloween party!
Step-by-Step Instructions:
1. Make the Frostings:
In two separate bowls, beat the softened butter until creamy. Gradually add powdered sugar, then vanilla and cream or milk, beating until smooth and fluffy. Add purple gel color to one bowl and green gel color to the other, a little at a time, until you reach bright, fun colors. Set both frostings aside.
2. Prep the Cake and Cookies:
Crumble the cooled chocolate cake into small pieces in a large bowl. For the “witches’ dirt,” crush the chocolate sandwich cookies finely by placing them in a plastic bag and rolling over with a rolling pin or pulsing a few times in a food processor.
3. Layer Your Jars:
Start by adding a layer of crumbled cake to the bottom of each 8-ounce jar. Gently spread a thin layer of purple buttercream frosting on top. Add a layer of crushed cookies mixed with Halloween sprinkles and small marshmallows. Next, spread a layer of green buttercream frosting over this. Repeat these layers — cake, purple frosting, cookies with sprinkles and marshmallows, then green frosting — until you almost fill the jar. Leave some space at the top for decoration.
4. Decorate the Top:
Pile a mound of crushed cookies on top for that spooky “witches’ dirt” effect. Stick in your orange and black striped candy sticks or candy canes to look like witches’ fingers reaching out. Sprinkle more marshmallows and Halloween sprinkles on top. If you like, add candy eyeballs or mini candy pumpkins to make it extra fun and festive.
5. Chill & Serve:
Place the jars in the fridge for at least 1 hour to let the frosting firm up. When ready, give out spoons and enjoy your colorful and spooky Witches’ Brew Halloween Cake Jars!
Can I Use Store-Bought Frosting Instead of Making Buttercream?
Yes, you can! Just choose plain vanilla frosting and divide it into two bowls to color with purple and green gel food coloring. This saves time and still gives vibrant colors for your cake jars.
How Far Ahead Can I Make These Cake Jars?
You can assemble the jars up to 2 days in advance. Keep them covered and refrigerated to keep the frosting firm and the cake moist. Just add candy decorations on top right before serving if possible.
Can I Substitute Other Cake Flavors?
Definitely! Feel free to use vanilla, red velvet, or pumpkin cake instead of chocolate for a different twist. Just make sure the cake is fully cooled before crumbling for layering.
What’s the Best Way to Store Leftovers?
Store the cake jars in airtight containers or with lids in the fridge for up to 3 days. When ready to eat, serve chilled or let them sit at room temperature for 10-15 minutes for a softer frosting texture.