
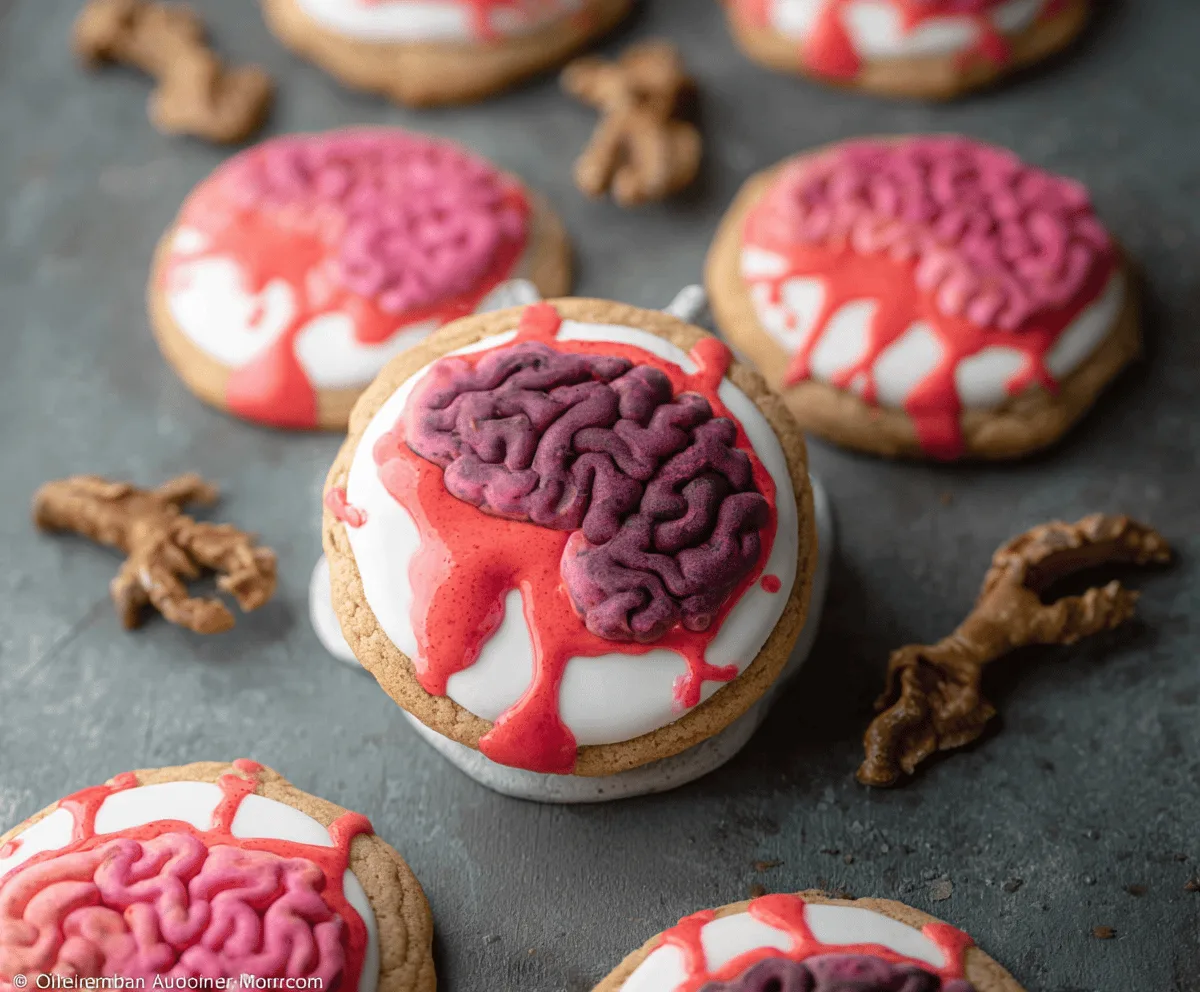
Zombie Brain Cookies are a fun, spooky treat perfect for Halloween or any time you want to add a little creepy fun to your baking. These cookies feature soft, chewy dough shaped and decorated to look like grisly brains, often with gooey icing or candy “veins” for that extra creepy touch. They’re as tasty as they are eye-catching, mixing classic cookie flavors with a playful twist that’s sure to get smiles and maybe a few playful shudders.
I love making Zombie Brain Cookies because they’re a great way to get creative with decorating. There’s something really satisfying about piping on little icing “brains” and watching the design come to life. Plus, this recipe is easy enough that even kids can join in, turning baking time into a fun and messy craft project. I always tell friends these cookies are the perfect mix of “icky” and delicious—just spooky enough but still a treat everyone can enjoy.
My favorite way to serve these is on a big Halloween platter alongside some cups of hot cider or tall glasses of milk. They make a great conversation starter at parties or a fun surprise in a lunchbox. If you want to scare things up a notch, try adding a drop of red food coloring to your icing for a fresh “bloody” look. No matter how you decorate, these Zombie Brain Cookies are sure to bring a little spooky fun to your day!
Key Ingredients & Substitutions
Butter & Sugar: Softened butter makes the base cookie tender and sweet. If you want a healthier version, try coconut oil or vegan butter, and swap granulated sugar for coconut sugar.
Cocoa Powder: Unsweetened cocoa gives a rich chocolate flavor. If you don’t have it, Dutch-processed cocoa works well, but adjust baking powder slightly as it’s less acidic.
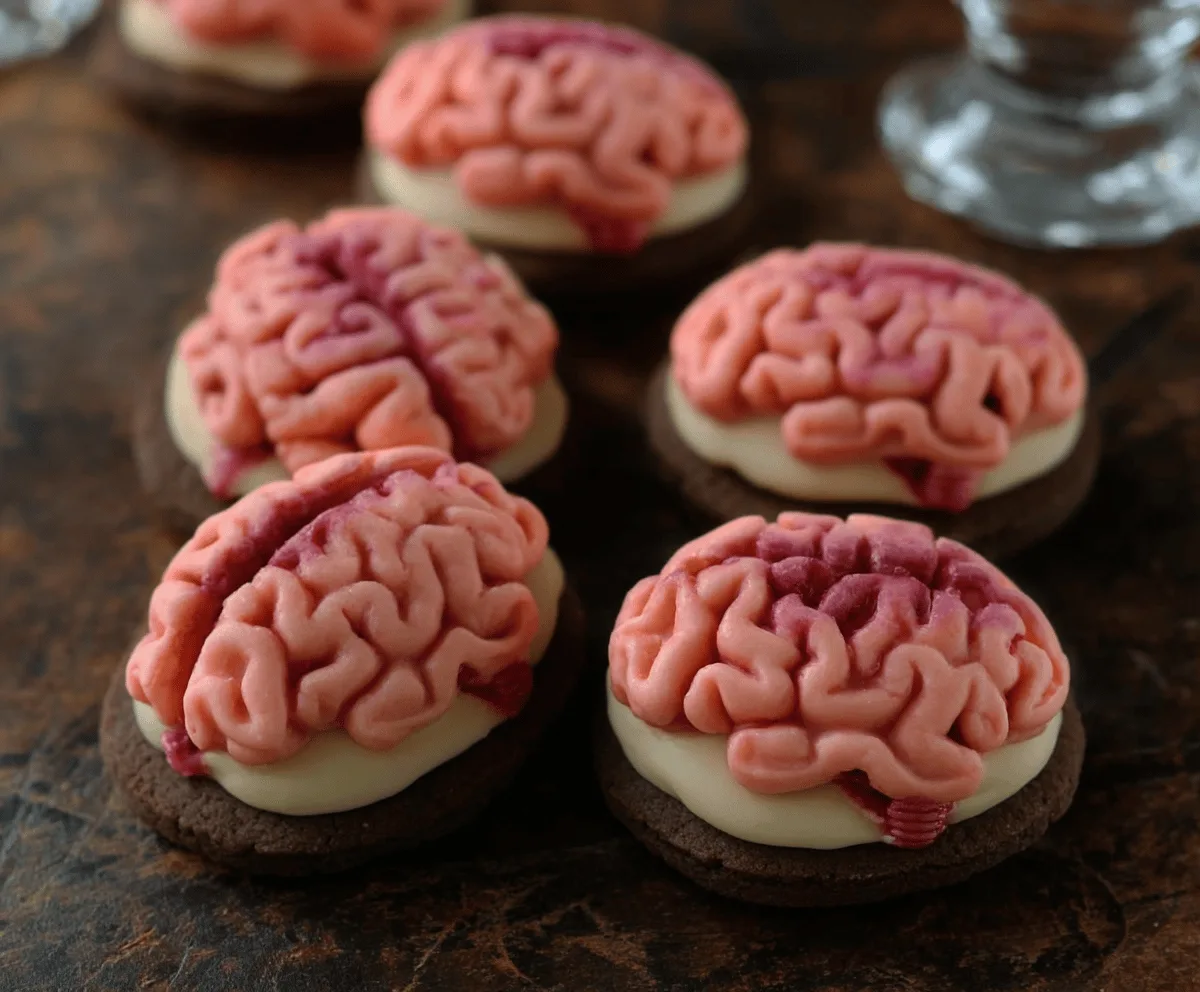
White Chocolate Ganache: White chocolate and heavy cream create a smooth, creamy topping. For dairy-free options, use coconut cream and dairy-free white chocolate.
Pink Fondant & Food Coloring: Fondant forms the brain folds. If you’re short on fondant, modeling chocolate can work for shaping. Use gel food coloring for vibrant colors without thinning the fondant.
How Do You Create the Realistic Brain Folds on Fondant?
Shaping the mind-looking squiggles is the trickiest part but very rewarding. Here’s how to get great results:
- Roll fondant into thin ropes about ¼ inch thick.
- Arrange ropes in looping, curvy patterns on top of the ganache, gently pressing to stick.
- Use fingers or a small tool (like a toothpick) to curl or pinch edges for depth.
- Add shading by dabbing purple-tinted coloring or lightly brushing in crevices to mimic shadows and bruises.
- Take your time—building up layers and curves makes the design look convincing.
Practice on a small piece first if you’re new to fondant work. It’s worth the effort for that cool creepy effect!
Equipment You’ll Need
- Mixing bowls and a hand or stand mixer – I find these make creaming butter and sugar quick and easy.
- Measuring cups and spoons – help you get the right amounts every time.
- Oven and baking sheets – for baking the cookies; parchment paper keeps things tidy.
- Rolling pin and small knives or fondant tools – essential for shaping and cutting the fondant decorations.
- Small paintbrush or toothpick – great for shaping fondant details and adding shading effects.
- Cooling racks – let your cookies cool evenly without getting soggy.
Flavor Variations & Add-Ins
- Use peanut butter or almond flour in the cookie dough for a nutty twist.
- Add a splash of peppermint or cinnamon extract to the dough for extra flavor.
- Decorate with gummy worms or candy eyes for more gross fun.
- Swap white chocolate ganache for colored icing or frosting to match different themes or intensities.
Zombie Brain Cookies
Ingredients You’ll Need:
For the Chocolate Cookie Base:
- 1 cup (226g) unsalted butter, softened
- 1 cup (200g) granulated sugar
- 1 large egg
- 1 teaspoon vanilla extract
- 1 ¾ cups (220g) all-purpose flour
- ½ cup (45g) unsweetened cocoa powder
- ½ teaspoon baking powder
- ¼ teaspoon salt
For the White Chocolate Ganache:
- 8 oz (227g) white chocolate, chopped
- ½ cup (120ml) heavy cream
For the Brain Fondant Decoration:
- 1 package (about 16 oz / 450g) pink fondant
- Red and purple gel food coloring
- 1-2 tablespoons water (to mix with food coloring)
How Much Time Will You Need?
This recipe takes about 20 minutes to prepare the dough and decorations, 10-12 minutes to bake the cookies, plus 15-20 minutes to prepare and set the ganache. Decorating with fondant may take an additional 30 minutes depending on your pace. Overall, expect about 1.5 to 2 hours including cooling and decorating time.
Step-by-Step Instructions:
1. Make the Chocolate Cookie Base:
First, preheat your oven to 350°F (175°C) and line baking sheets with parchment paper. In a large bowl, cream the softened butter and sugar together until the mixture is light and fluffy. Beat in the egg and vanilla extract until blended. In a separate bowl, sift together the flour, cocoa powder, baking powder, and salt. Gradually add the dry ingredients to the wet mixture, stirring until a dough forms. Roll the dough into balls about 1.5 inches in diameter, place them on the baking sheets spaced two inches apart, and gently flatten into discs. Bake for 10–12 minutes until set, then allow the cookies to cool completely on wire racks.
2. Prepare the White Chocolate Ganache:
Put the chopped white chocolate in a heatproof bowl. Heat the heavy cream in a small saucepan over medium heat until it just begins to simmer—do not boil. Pour the hot cream over the white chocolate and let it sit for 1–2 minutes. Then whisk gently until the mixture becomes smooth and glossy. Let the ganache cool slightly but stay pourable.
3. Assemble the Ganache Layer:
Spoon or gently spread a thin layer of the white chocolate ganache on top of each cooled cookie to create a smooth, white surface. Let the ganache firm up a bit at room temperature before decorating.
4. Prepare the Brain Fondant Decoration:
Tint the pink fondant with a little red gel food coloring to achieve a realistic flesh tone, kneading it well. Tint a small portion purple for shading. Roll the pink fondant into thin ropes about ¼ inch thick. Arrange or pipe these ropes on top of the ganache in squiggly, looping patterns that mimic the folds of a brain. Use your fingers or a small tool to shape and curve the fondant strips for depth and realism. Add shading by lightly brushing some purple-tinted fondant or diluted food coloring into the folds for a bruised effect.
5. Final Touches:
Optionally, mix a little red gel coloring with water to add drips or “bloody” spots on the fondant for a spooky look. Let the completed cookies set at room temperature or briefly chill in the fridge until the fondant is firm.
6. Serve and Enjoy:
Arrange your Zombie Brain Cookies on a platter for a creepy yet delicious treat. They’re perfect for Halloween parties or any time you want to add a bit of spooky fun to your baking!
Can I Use Store-Bought Cookies Instead of Baking from Scratch?
Yes! You can use plain chocolate cookies as your base. Just add the white chocolate ganache and decorate with fondant as described for the brain effect.
How Should I Store Zombie Brain Cookies?
Store them in an airtight container at room temperature for up to 3 days. If your kitchen is warm, keeping them in the fridge helps the ganache and fondant stay firm.
Can I Substitute Fondant with Something Else?
If you prefer, modeling chocolate or piped royal icing can be used to create brain folds, but fondant is easiest to shape and color for this design.
Is It Possible to Make These Ahead of Time?
Absolutely! You can bake and cool the cookies a day ahead, prepare the ganache the same day, and decorate with fondant a few hours before serving for best freshness.