
Birthday cake should slice into soft, even layers that hold together under a thick swipe of buttercream, with a fine crumb that stays tender instead of dry or gummy. The best version tastes like pure vanilla and butter, not just sugar, and it finishes with that familiar shower of rainbow sprinkles that makes the whole cake feel like a celebration before the first slice is cut.
What makes this one work is the balance of creaming, alternating the dry ingredients with milk, and stopping as soon as the batter comes together. The butter and sugar need enough time to trap air, which gives the cake its lift, while the flour goes in just enough to build structure without turning the crumb tight. Room-temperature eggs, butter, and milk matter here because cold ingredients fight the emulsion and can leave the batter looking curdled or uneven.
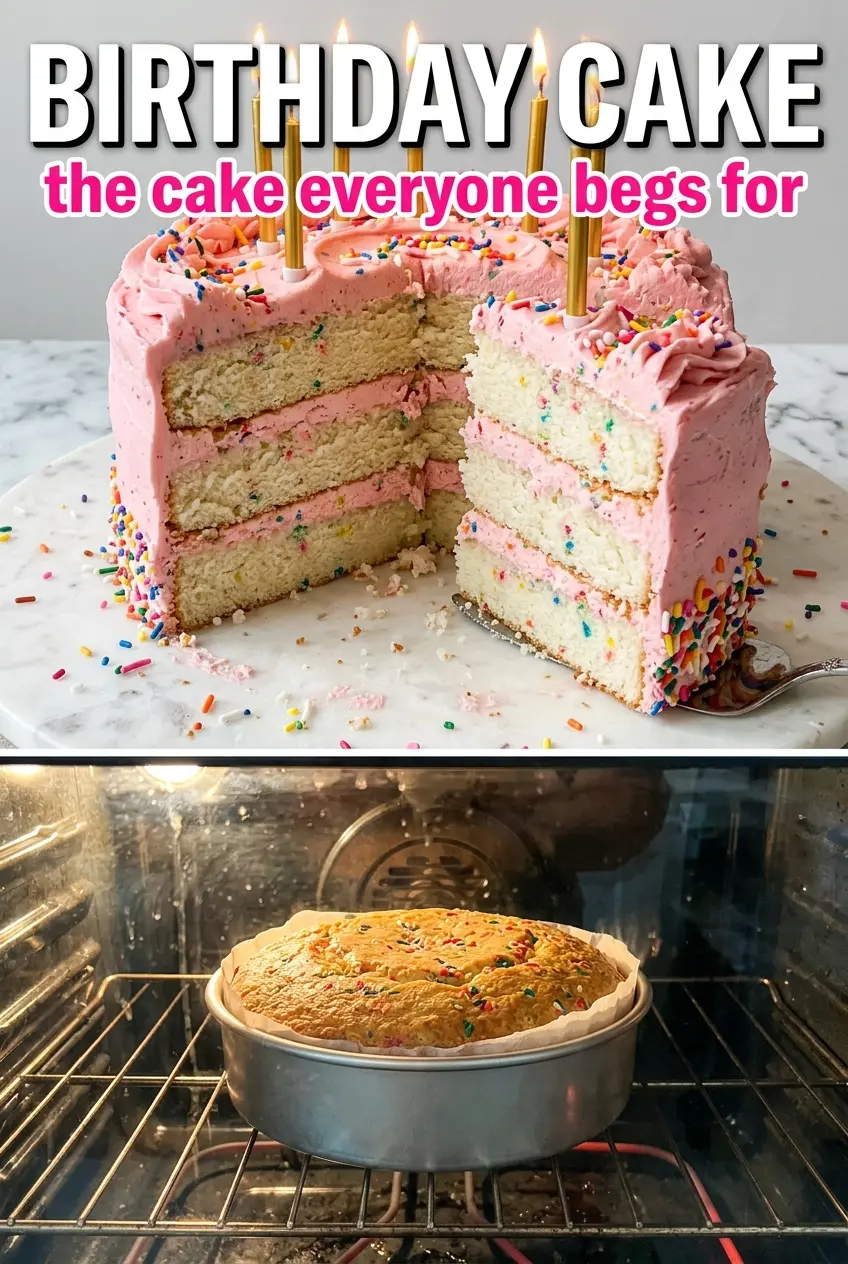
Below, you’ll find the cue I watch for so the layers bake up flat and tender, plus a few smart ways to adapt the cake if you need a different pan size, a different frosting, or a make-ahead plan for a party.
The layers baked up tall and even, and the crumb stayed soft after chilling. I loved that the vanilla flavor came through under the buttercream instead of getting lost in the frosting.
Save this birthday cake for the next celebration when you want soft vanilla layers, smooth buttercream, and a clean sprinkle finish.
The Reason This Cake Stays Tender Instead of Dense
The mistake that turns birthday cake heavy is rushing the batter once the flour goes in. After the butter and sugar are fully fluffed, the rest of the mixing should be gentle and brief. Overmixing develops too much gluten, and that’s how you end up with a cake that bakes up tight instead of cloud-soft.
The other place people go wrong is the bake itself. A birthday cake should leave the oven when the center springs back lightly and a toothpick comes out with a few moist crumbs, not when it’s baked until completely dry. If the layers pull away from the pan and the top looks set but still feels tender in the middle, that’s your cue.
- The butter-sugar base creates the lift, so cream it until it looks pale and almost fluffy.
- Adding the eggs one at a time keeps the batter smooth and prevents it from splitting.
- Alternating the dry ingredients with milk protects the crumb from getting tough.
- Cooling the layers completely keeps the frosting from melting and sliding.
What Each Ingredient Is Actually Doing in This Cake
- All-purpose flour — This gives the cake its structure without making it too delicate. Cake flour will make it softer and a little finer, but all-purpose still gives a tender crumb when you don’t overmix.
- Baking powder — This is the lift. It gives the cake its rise in the oven, so check that yours is fresh if the layers ever bake up flat.
- Unsalted butter — Butter carries the flavor and helps the cake stay rich. Salted butter works in a pinch, but the flavor is easier to control with unsalted.
- Granulated sugar — Sugar does more than sweeten. It helps whip air into the butter and keeps the crumb moist.
- Eggs — These bind the batter and add richness. Room-temperature eggs blend in smoothly; cold eggs can make the batter look curdled.
- Whole milk — The fat in whole milk keeps the crumb softer than lower-fat milk. If you only have 2%, it will still work, but the cake won’t be quite as plush.
- Vanilla extract — Use the good stuff here. Birthday cake is a vanilla cake first, and a flat vanilla flavor gets lost under the frosting.
- Buttercream frosting — This is the finish that turns the cake into a celebration cake. A stable buttercream spreads cleanly and holds the sprinkles without sliding.
- Rainbow sprinkles — Add them at the end so the colors stay bright. Press them gently into the frosting before it sets.
The Mixing Order That Keeps the Crumb Light
Start with a Proper Creaming
Beat the butter and sugar until the mixture turns pale and looks fluffy around the edges, about 4 minutes. That’s not just about blending; you’re building the air pockets that give the cake lift. If the butter is too cold, it won’t cream properly and the batter will stay heavy, so the butter should give slightly when pressed but not look greasy.
Add the Eggs Slowly
Drop in the eggs one at a time and let each one disappear before adding the next. This keeps the batter emulsified and smooth instead of curdled. If it starts to look separated, it usually means the eggs were too cold or were added too fast, and a few extra seconds of mixing at low speed usually brings it back together.
Alternate Dry Ingredients and Milk
Add the flour mixture in batches, alternating with the milk, and begin and end with the flour. That pattern keeps the batter from loosening too much and helps the flour hydrate evenly. Stop mixing as soon as you no longer see streaks of flour; the batter should look thick, smooth, and just a little glossy.
Bake Until the Center Springs Back
Divide the batter evenly between the pans and smooth the tops so the layers bake level. Pull them from the oven when the centers spring back lightly and a tester comes out clean or with a few crumbs. If you wait until they look deep golden all over, the cake will bake past tender and dry out by the time it cools.
How to Adapt This Cake for Different Pans, Frostings, or Diets
Make It Dairy-Free
Swap the butter for a good plant-based baking stick and use an unsweetened dairy-free milk with a little body, like oat milk. The cake will still rise well, though the flavor will be a little less rich and the crumb slightly lighter. Use a dairy-free buttercream that holds its shape well, or the sprinkles won’t stay put.
Use a 9×13 Pan Instead of Layer Pans
Bake the batter in a greased and floured 9×13-inch pan and start checking a little earlier than the layer cakes. The texture stays the same, but you lose the tall celebration look and gain a cake that’s easier to slice for a crowd. Frost it right in the pan for a more casual party dessert.
Swap the Frosting Without Losing the Birthday Cake Feel
Classic buttercream gives you the cleanest slice and the best sprinkle coverage, but cream cheese frosting adds tang if you want something less sweet. Whipped frosting makes the cake feel lighter, though it won’t hold sharp edges as well. Keep the frosting thick enough to support the layers or the cake will start to lean.
How to Store and Reheat Birthday Cake
- Refrigerator: Keep the frosted cake covered for up to 5 days. The crumb firms up a little in the fridge, but it stays sliceable and the frosting protects it from drying out.
- Freezer: Freeze unfrosted layers tightly wrapped in plastic and foil for up to 2 months. You can also freeze frosted slices, but the sprinkles may bleed a little once thawed.
- Reheating: Bring slices to room temperature before serving. Microwaving isn’t the move here, because it softens the frosting too much and can turn the crumb tacky instead of tender.
Answers to the Questions Worth Asking
Birthday Cake
Ingredients
Equipment
Method
- Preheat the oven to 350°F and grease and flour two 9-inch round cake pans.
- Whisk the all-purpose flour, baking powder, and salt until evenly combined.
- Beat the unsalted butter and granulated sugar until light and fluffy, about 4 minutes.
- Add the large eggs one at a time, then mix in the pure vanilla extract.
- Alternate adding the flour mixture and whole milk to the batter, beginning and ending with the flour.
- Divide the batter between the pans, then bake for 30–35 minutes until a toothpick comes out clean.
- Cool the cake completely before frosting.
- Stack the layers with buttercream frosting in between and decorate the top and edges with rainbow sprinkles.