
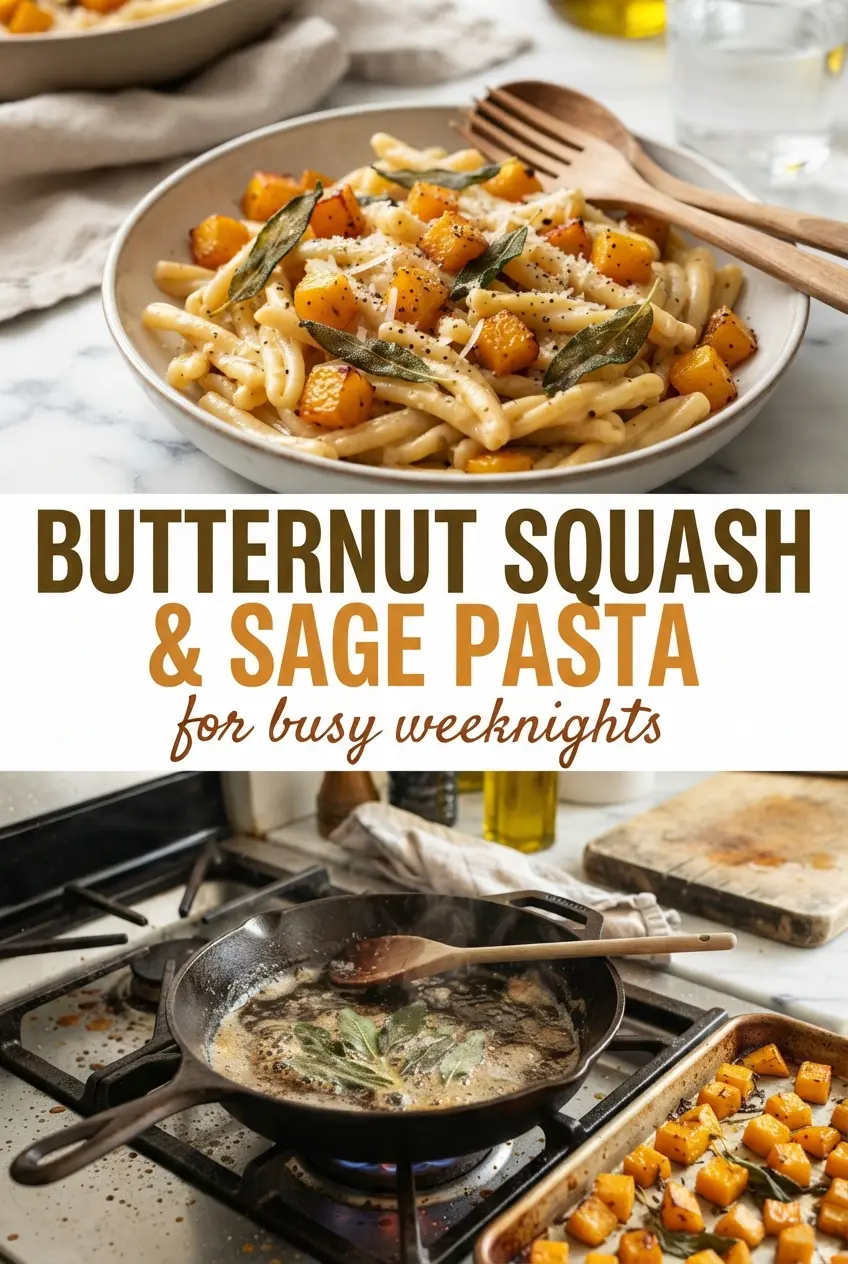
Roasted butternut squash and sage pasta hits that sweet spot between cozy and polished: tender pasta coated in a glossy brown butter sauce, sweet squash tucked into every bite, and crisp sage on top for a sharp, earthy finish. It eats like a restaurant dish, but it’s built from a handful of ingredients you probably already keep around. The best part is the contrast. The squash softens into the sauce, the butter turns nutty, and the sage gives you those little crackly leaves that make the whole bowl feel complete.
What makes this version work is timing. The squash needs enough heat to caramelize at the edges before it ever meets the pasta, and the butter needs to go past melted into true brown butter so it tastes toasted instead of just rich. That little bit of pasta water matters too. It loosens the sauce just enough to help the Parmesan cling without turning greasy or stiff. If you’ve ever had a squash pasta that ate flat or muddy, this method fixes that fast.
Below, I’ve laid out the small details that matter most: how to brown the butter without burning the garlic, why the sage goes in early and comes out fast, and the easiest way to keep the sauce silky from the pan to the bowl.
The brown butter and crispy sage took this from a basic squash pasta to something my husband asked for again the next night. The squash stayed tender without getting mushy, and the sauce coated everything instead of sitting in a puddle at the bottom.
Save this butternut squash and sage pasta for the nights when you want brown butter, caramelized squash, and crisp sage in one bowl.
The Reason the Sauce Stays Silky Instead of Turning Starchy
Most squash pastas go wrong when the pasta hits the pan too early or the sauce gets built with too much heat. The squash needs time to roast until the edges caramelize. That brings out sweetness and keeps the final dish from tasting watery. The brown butter does the heavy lifting here, but it only tastes right if you pull it the moment the milk solids turn amber and smell nutty. Go too far and it tastes burnt, not toasted.
The other mistake is skipping the pasta water. Parmesan thickens fast, and without that starchy water the sauce tightens up before it coats the noodles. A splash at the end gives you a glossy finish and helps the squash break down just enough to cling to the pasta instead of sitting in chunks around it.
- Butternut squash — Roasting is nonnegotiable here. Raw or steamed squash turns bland and soft in the wrong way. You want browned edges and a fork-tender center so it melts into the sauce without disappearing completely.
- Butter — This is where the nutty flavor comes from. Use real butter, not margarine, because browning depends on the milk solids. If you stop at melted butter, the dish tastes flatter and less layered.
- Sage — Fresh sage fries in seconds and gives the dish its signature edge. Dried sage won’t crisp, and it tastes dusty here. If you must substitute, use a smaller amount of fresh thyme, but the flavor will be less woodsy.
- Parmesan — Finely grated Parmesan melts into the sauce and helps it emulsify. Pre-grated cheese can work in a pinch, but it often clumps more and gives you a grainier finish. Grating it fresh is worth the extra minute.
Building the Squash Pasta in the Right Order
Roasting the Squash First
Spread the squash out in a single layer with olive oil and roast it at 425°F until the edges are browned and the centers give easily when pierced. If the cubes are piled up, they steam instead of caramelize, and the sauce loses that deep roasted flavor. You want color on the outside and tenderness inside before anything else touches the pan.
Cooking the Pasta and Saving the Water
Boil the pasta until it’s just shy of fully done, then scoop out half a cup of the cooking water before draining. That starchy water is what keeps the sauce loose enough to coat the noodles. If you drain the pot completely, the Parmesan and butter have nothing to emulsify with and the sauce turns clingy in the wrong way.
Brown Butter, Then Fry the Sage
Let the butter foam, crackle, and then turn golden brown with a toasted smell. Drop in the sage leaves and cook them only until they darken slightly and crisp up, then pull them out right away. Sage goes from crisp to bitter fast, so the second it stiffens, it’s done. Keep the heat moderate; high heat is how brown butter jumps straight to burnt butter.
Bringing Everything Together
Add the garlic to the warm butter for just a short minute so it softens without scorching, then fold in the roasted squash. Toss in the pasta with a splash of reserved water and the Parmesan, stirring until the sauce turns glossy and coats the noodles. If it looks tight, add another spoonful of water instead of more cheese. The sauce should move easily and still cling to the pasta.
Three Easy Ways to Work This Into Your Week
Make It Dairy-Free
Use olive oil instead of butter and finish with a dairy-free Parmesan-style alternative. You’ll lose the toasted richness of brown butter, but the roasted squash and sage still carry the dish. Add a little extra salt at the end, since dairy-free cheese substitutes are usually milder.
Make It Heartier With Protein
Stir in cooked chicken, crispy pancetta, or white beans after the sauce comes together. Chicken and pancetta bring salt and richness, while beans keep the dish vegetarian but more filling. Add them at the end so they warm through without breaking up the squash.
Use a Different Pasta Shape
Short shapes like rigatoni, shells, or fusilli trap little bits of squash and sauce in every bite. Long noodles work too, but they need a bit more pasta water to keep the sauce moving. If you use a ridged pasta, the sauce grips even better.
Storage and Reheating
- Refrigerator: Store leftovers in an airtight container for up to 3 days. The pasta will absorb some of the sauce, so it’ll look a little thicker the next day.
- Freezer: It freezes, but the texture softens after thawing and the squash can get a bit mushy. If you do freeze it, cool it completely and reheat gently from thawed for the best result.
- Reheating: Warm it in a skillet over low heat with a splash of water or broth. The mistake people make is blasting it in the microwave until the cheese separates and the pasta dries out. A little liquid and low heat bring the sauce back to life.
Answers to the Questions Worth Asking
Butternut Squash & Sage Pasta
Ingredients
Equipment
Method
- Heat oven to 425°F and spread cubed butternut squash on a sheet pan, then toss with olive oil. Roast for 25 minutes, turning once halfway, until tender and lightly browned.
- Boil a pot of salted water and cook pasta until al dente, reserving ½ cup pasta water before draining. Keep pasta warm while you make the sauce.
- In a cast iron skillet over medium heat, melt butter and continue cooking until it turns golden and smells nutty. Add fresh sage leaves and fry until crisp, about 45 to 60 seconds, then remove the sage to a plate.
- Add garlic cloves, minced to the skillet and cook for 30 to 60 seconds until fragrant. Add roasted cubed butternut squash and toss to coat.
- Add drained pasta to the skillet along with ½ cup pasta water and grated Parmesan, then toss until glossy and evenly coated. Season with Salt and pepper, to taste.
- Crush the reserved crisp fried sage with your fingers and top the pasta with it for crackly crunch. Serve immediately while the sage stays crisp.