
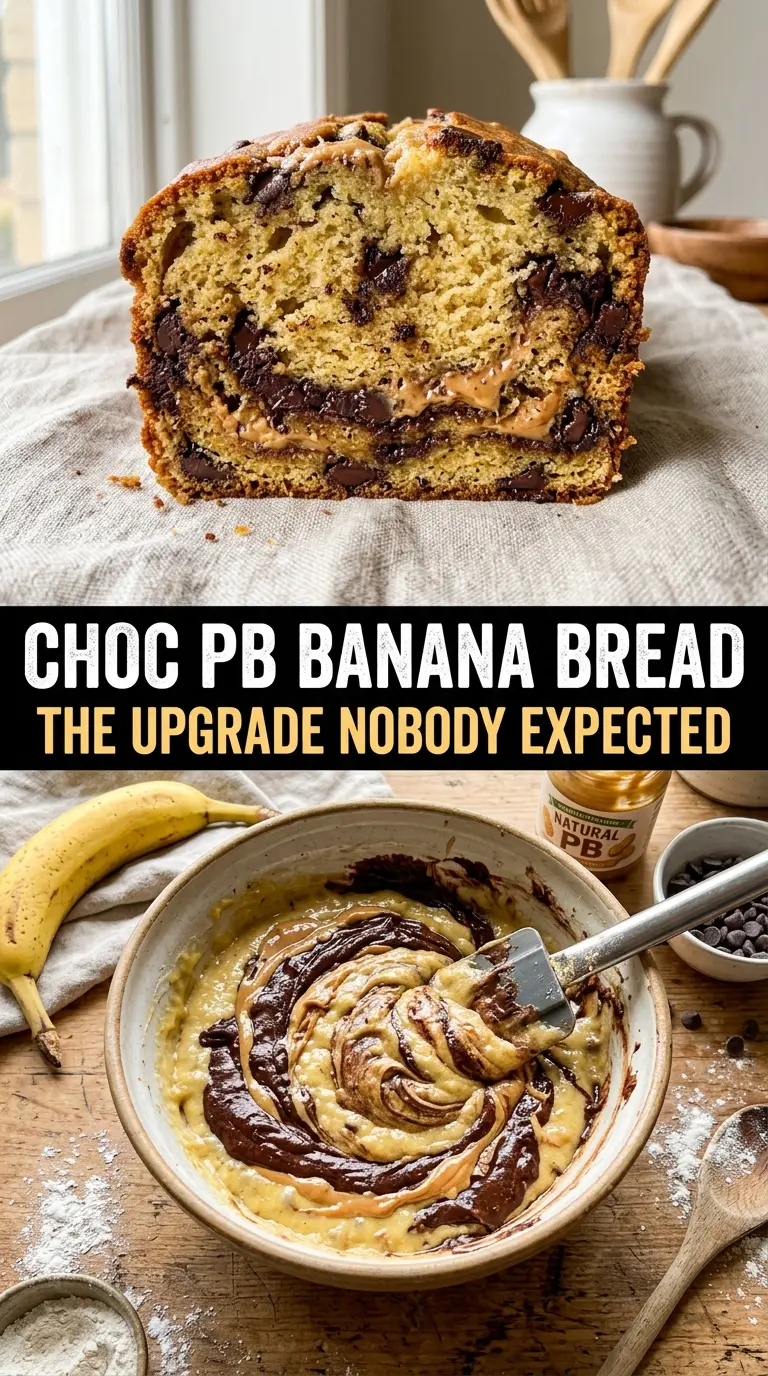
Chocolate peanut butter banana bread comes out dense in the best way: tender, deeply moist, and streaked with dark cocoa ribbons that keep every slice from tasting one-note. The banana brings softness and sweetness, the peanut butter adds a salty nuttiness, and the chocolate gives the loaf enough contrast to feel like a real treat instead of just another banana bread. It’s the kind of loaf that disappears one slice at a time, usually before it’s had a full day to cool.
The texture depends on two small choices. Very ripe bananas do the heavy lifting for moisture and sweetness, and the batter only needs a brief mix once the flour goes in. Overmixing turns banana bread tight and rubbery, especially when cocoa is involved. Swirling a portion of the batter with cocoa instead of stirring it all together keeps the chocolate flavor bold and gives you those dramatic marbled pockets in the finished loaf.
Below, I’ve included the part that matters most: how to keep the swirl distinct, how to avoid a dry center, and what to change if you want a stronger peanut butter finish on top.
The cocoa swirl stayed defined and the loaf was moist all the way through, not gummy in the middle. I added a little extra peanut butter on top and my kids asked for a second slice before it had even cooled.
Chocolate peanut butter banana bread with a cocoa swirl and a peanut butter finish is the kind of loaf worth saving for your next ripe-banana rescue.
The Reason the Cocoa Swirl Stays Bold Instead of Blending Away
The trick here is not treating the chocolate portion like a separate batter from scratch. You pull off a portion of the finished banana batter, stir in cocoa, and layer it back in rather than mixing cocoa through the whole bowl. That keeps the banana base soft and lets the chocolate stay dark and distinct instead of turning the loaf muddy.
The other important part is the knife swirl. A few passes are enough. If you keep dragging the blade through the pan, the layers merge and you lose the contrast. You want visible ribbons when the loaf goes into the oven, not a fully blended brown batter.
What Each Ingredient Is Actually Doing in This Loaf
- Very ripe bananas — These are the moisture source, the sweetness, and the banana flavor all at once. Blackened peels are ideal because the starch has already converted to sugar, which gives you a softer crumb and a deeper banana taste.
- Creamy peanut butter — This brings fat and salt, which make the loaf taste fuller and less sugary. Use a standard creamy peanut butter, not a natural one with a lot of separated oil, because the texture stays more predictable in the batter.
- Butter — Melted butter helps the loaf bake up tender without making it cakey. If you swap in oil, the bread will still be moist, but you lose a little of the rich, buttery finish that works so well with the peanut butter.
- Cocoa powder — This is what gives the chocolate portion its deep color and bittersweet edge. Unsweetened cocoa works best here because the banana bread already has enough sugar.
- Chocolate chips — They add pockets of melted chocolate through the crumb. If you only have chopped chocolate, that works too, but chips hold their shape a little better and give cleaner bites.
Building the Batter Without Beating the Texture Out of It
Mashing and Mixing the Wet Ingredients
Start by mashing the bananas until mostly smooth, with just a few small lumps left for texture. Stir in the melted butter, peanut butter, sugar, eggs, and vanilla until the mixture looks glossy and evenly combined. If the butter is hot enough to cook the eggs, let it cool for a few minutes first. The batter should smell strongly of banana and peanut butter before the flour goes in.
Adding the Dry Ingredients
Fold in the flour, baking soda, salt, and chocolate chips just until the flour streaks disappear. Stop there. Banana bread gets tough when it’s stirred like cake batter, and cocoa will amplify that dry, dense texture if you overwork it. The batter should still look a little rough when you divide it.
Creating the Chocolate Swirl
Scoop out about one-third of the batter and stir in the cocoa powder until it’s uniform and dark. Layer the plain batter and cocoa batter into the loaf pan, then drag a knife through once or twice to create ribbons. If you over-swirl, the loaf bakes up one flat color and the whole point of the marbling is gone.
Baking Until the Center Sets
Bake at 350°F until the top is set and a toothpick inserted in the center comes out with a few moist crumbs, not wet batter. The middle should no longer wobble when you gently shake the pan. If the top browns too fast before the center is done, tent it loosely with foil for the last stretch of baking. Letting it cool in the pan for a short time helps the crumb finish setting before you lift it out.
Three Ways to Change This Loaf Without Losing What Makes It Good
Extra Peanut Butter Swirl on Top
Warm a spoonful or two of peanut butter just until it loosens, then drizzle it over the layered batter before baking. This gives the top a saltier, nuttier finish and makes the loaf look even more marbled, but it does add a slightly richer bite in the first few slices.
Gluten-Free Version
Use a 1:1 gluten-free flour blend in place of the all-purpose flour. The loaf will still be moist and sliceable, though the crumb may be a little more delicate, so let it cool fully before cutting or it can crumble at the center.
Dairy-Free Swap
Swap the butter for melted coconut oil or a neutral oil and use dairy-free chocolate chips. You’ll lose a little of the buttery aroma, but the banana and peanut butter still carry the flavor, and the texture stays soft.
Storage and Reheating
- Refrigerator: Store tightly wrapped for up to 4 days. The crumb firms up a little in the fridge, but the flavor stays good.
- Freezer: It freezes well. Wrap individual slices or the whole cooled loaf in plastic, then foil, and freeze for up to 2 months.
- Reheating: Warm slices in the microwave for 10 to 15 seconds or in a low oven until just heated through. The common mistake is blasting it too long, which dries out the edges before the center softens.
Answers to the Questions Worth Asking

Chocolate Peanut Butter Banana Bread
Ingredients
Equipment
Method
- Preheat the oven to 350F and grease a loaf pan for easy release.
- Mash the bananas, then stir in the melted butter, peanut butter, sugar, eggs, and vanilla until smooth and combined.
- Fold in the flour, baking soda, and salt just until no dry streaks remain.
- Fold in the chocolate chips to distribute them evenly through the batter.
- Remove about 1/3 of the batter and stir in the cocoa powder until evenly colored.
- Layer the two batters in the loaf pan, then swirl with a knife for a marbled ribbon effect.
- Bake at 350F for 60-65 minutes, until a toothpick inserted near the center comes out clean or with a few moist crumbs.
- Cool the loaf before slicing, then drizzle with melted chocolate for a glossy finish.