
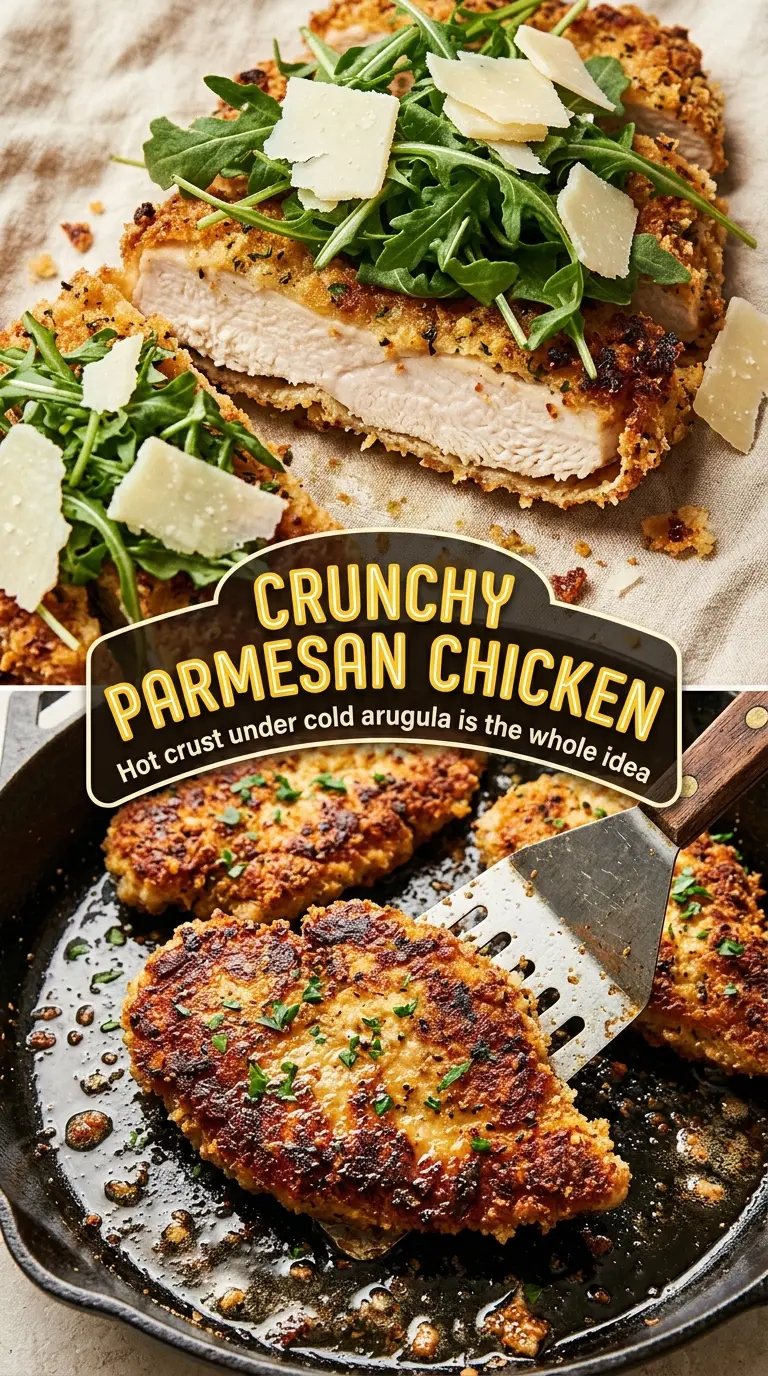
Crispy Parmesan chicken earns its place in the regular dinner rotation when the crust stays shatteringly crunchy and the chicken underneath still cooks up juicy. This version gets that balance by pounding the breasts thin, pressing the coating on firmly, and giving the breading a quick sear before it finishes in the oven. The result is a deep golden crust that doesn’t slide off the first time you cut into it.
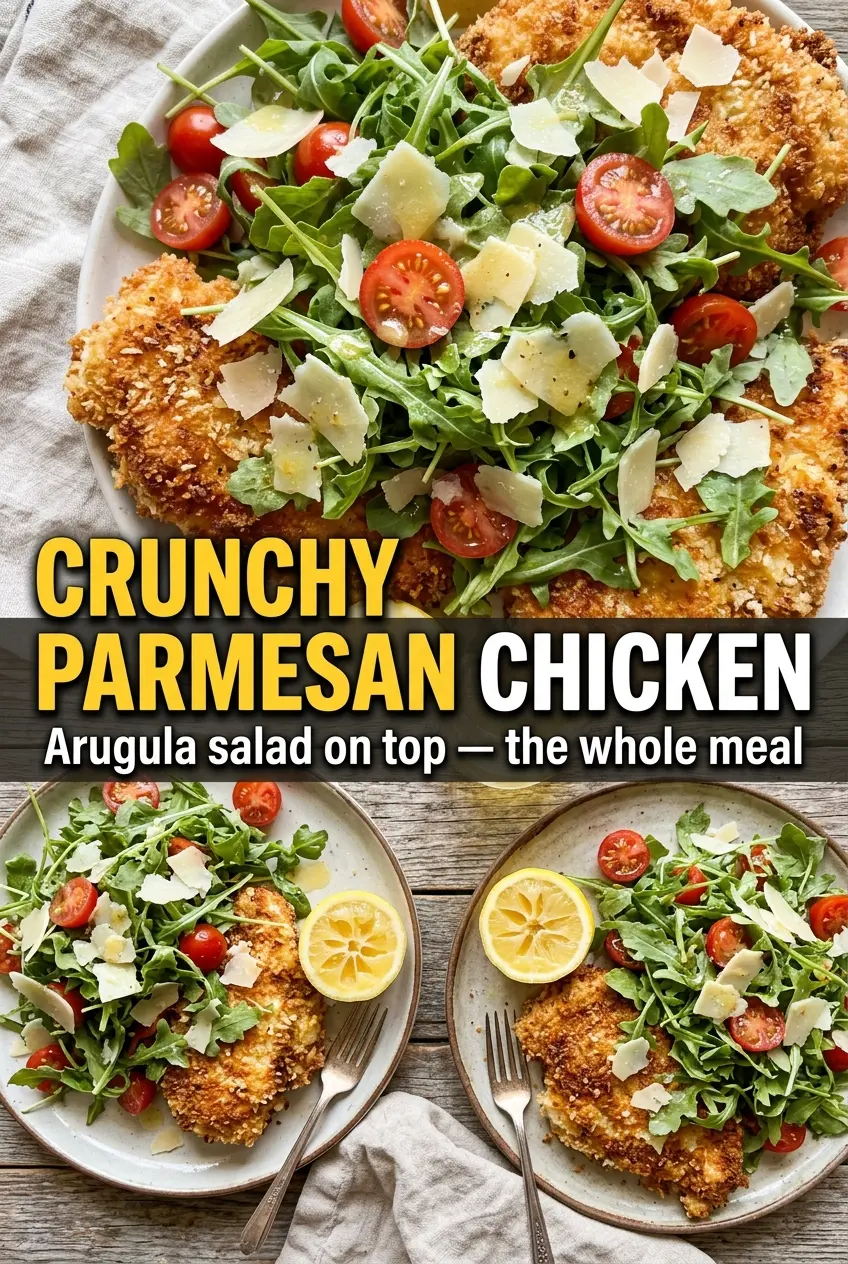
The arugula salad matters just as much as the chicken here. Peppery greens, cherry tomatoes, and a sharp lemon dressing cut through the richness of the Parmesan crust, and the heat from the chicken softens the leaves just enough to take the edge off without turning them limp. Grating the Parmesan fresh and using panko instead of finer breadcrumbs gives the coating a lighter, more craggy texture that browns beautifully in the pan.
Below you’ll find the part that makes this dinner work on a busy night: the exact order for breading so it sticks, the pan-searing cue that tells you the crust is ready for the oven, and a few smart variations if you want to change up the salad or make the dish gluten-free.
The crust stayed crunchy all the way through dinner, and the arugula salad on top gave it that fresh, peppery bite that kept it from feeling heavy.
Save this crunchy Parmesan chicken with its peppery arugula salad for a dinner that finishes crisp, fresh, and fast.
The Reason the Coating Stays Crisp Instead of Going Soggy
The biggest mistake with breaded chicken is rushing the crust. If the pan isn’t hot enough, the breadcrumbs soak up oil before they brown, and the coating turns dense instead of crisp. If you skip the oven finish, the outside can darken before the center reaches temperature. This recipe fixes both problems by using a quick sear for color and then moving the chicken to the oven to finish cooking evenly.
Pounding the breasts to an even thickness matters more than people think. Thick ends dry out while the thin middle overcooks, and that’s when you end up with breading that looks fine but eats like cardboard. Once the pieces are even, the coating has time to crisp while the chicken stays tender.
- Pound the chicken thin so each piece cooks at the same rate and the crust doesn’t burn while the center catches up.
- Press the breadcrumb mixture on firmly after the egg layer. Loose crumbs fall off in the skillet and leave bare patches.
- Use an oven-safe skillet so you can move straight from stove to oven without disturbing the crust.
What Each Ingredient Is Actually Doing in This Dish
- Chicken breasts — Pounding them to about 1/2-inch thickness is what keeps the meat juicy and lets the breading brown before the chicken dries out. If your pieces are especially large, split them horizontally after pounding for a more manageable portion.
- Flour, egg, and panko — This three-step breading is the backbone of the crust. The flour gives the egg something to grip, the egg acts like glue, and panko stays lighter and crunchier than regular breadcrumbs.
- Freshly grated Parmesan — Use the real stuff here, not the shelf-stable shaker cheese. Fresh Parmesan melts into the panko and helps the crust form those salty, lacy browned bits that make the coating taste rich.
- Garlic powder and Italian seasoning — These season the coating from the inside out, so every bite tastes complete even before the salad goes on top. Dried herbs work better than fresh in the breading because fresh herbs can scorch in the pan.
- Arugula, cherry tomatoes, and lemon dressing — The salad isn’t a side note. It cuts the richness of the chicken and adds brightness, and the heat from the crust wilts the arugula just enough to soften its bite without killing the texture.
Building the Crust in a Way That Holds Up to the Pan
Season and Flatten the Chicken
Lay the chicken between sheets of parchment or plastic and pound it to an even 1/2-inch thickness. Season both sides before breading so the meat itself tastes seasoned, not just the crust. If one end is much thicker than the other, keep pounding until it matches. Uneven pieces are the main reason one chicken breast finishes dry while the other still needs time.
Set Up a Breading Line That Stays Clean
Use one dish for flour, one for beaten eggs, and one for the panko-Parmesan mixture. Press the chicken into the breadcrumbs instead of just rolling it through, and then let it sit for a minute before moving it to the pan. That short pause helps the coating hydrate and cling better, which keeps the crust from shedding in the skillet.
Get Color in the Skillet First
Heat the olive oil until it shimmers, then lay the chicken in without crowding the pan. You want a steady sizzle the second the meat hits the oil. If the oil is barely moving, wait; if it’s smoking hard, back the heat down. Cook until the first side is a deep golden brown and releases easily, then flip and brown the second side before moving the skillet to the oven.
Finish Gently in the Oven
Transfer the skillet to a 400°F oven and cook just until the chicken reaches 165°F in the thickest part. The oven finish keeps the crust from burning while the center cooks through. Pull it out and rest it for a few minutes before serving so the juices settle and don’t run into the crust the second you slice it.
How to Adapt This for a Different Pantry or Diet
Gluten-Free Crunch
Swap the all-purpose flour for cornstarch or a 1:1 gluten-free flour blend, and use gluten-free panko. Cornstarch gives the crispest finish, while the flour blend behaves a little more like the original coating. The key is still pressing the crumbs on firmly so the crust doesn’t fracture in the pan.
Make It Dairy-Free
Leave out the Parmesan in the coating and add 2 to 3 tablespoons of nutritional yeast for a savory edge. You won’t get the same salty melt from the cheese, but the crust still browns well and stays crunchy. Finish with a squeeze of lemon over the salad to replace some of the richness the cheese would have brought.
Turn It Into Cutlets for a Crowd
Cut the chicken into smaller cutlets before breading if you’re serving a larger group. They cook faster, brown more evenly, and are easier to serve with the salad on top. Just watch the oven time closely; thin cutlets can go from perfect to dry in a couple of minutes.
Storage and Reheating
- Refrigerator: Store the chicken for up to 3 days. The crust softens in the fridge, but it still reheats well if you use the right method.
- Freezer: Freeze the breaded, uncooked chicken on a tray, then transfer to a bag for up to 2 months. Cook from frozen at a lower oven temperature after searing the first side, or thaw before cooking for the most even crust.
- Reheating: Warm in a 375°F oven or air fryer until the coating crisps back up. The common mistake is using the microwave, which steams the breading and turns it leathery.
The Things That Trip People Up With This Dish
Crunchy Parmesan Chicken
Ingredients
Equipment
Method
- Pound chicken breasts to about 1/2-inch thickness, then season with salt and pepper. Aim for even thickness so the crust browns while the center cooks through.
- Dredge the chicken in flour, shaking off excess. This creates a dry base that helps the next layers cling.
- Dip the floured chicken into the beaten eggs. Let excess egg drip off so the coating stays crisp.
- Press the chicken into the mixture of panko breadcrumbs, grated Parmesan, garlic powder, and Italian seasoning. Press firmly so the crust forms an even, textured coating.
- Heat olive oil in an oven-safe skillet over high heat, then sear the chicken for 3-4 minutes per side until deep golden. You should see a thick, browned crust on both faces.
- Transfer the skillet to the oven at 400°F and bake for 8-10 minutes until cooked through. The crust should remain golden while the chicken reaches doneness.
- Rest the chicken for 3 minutes before serving. This helps juices settle so the crust doesn’t instantly soften.
- Serve the chicken immediately topped with arugula salad and extra Parmesan shavings. The peppery arugula will wilt slightly from the heat of the chicken—intentionally—while lemon dressing brightens the richness.