
As the apples soften in the oven, the tall mound you built in the crust settles noticeably. That’s exactly what you want with Dutch Caramel Apple Pie: slices that start out piled high turn into a generous, tender filling instead of a thin layer under the topping.
I toss the apples with cinnamon, sugar, flour, and lemon juice so each slice is coated before it goes into the crust. A little caramel goes over the apples, while the rest waits until the pie is cool. The oat topping adds a crisp, buttery contrast, and the two-stage bake gives the apples time to turn tender while the crumb turns golden.
There’s one bit of timing worth planning around: the pie needs at least three hours to cool before you slice it. That rest lets the filling settle, so the first piece holds together instead of sliding apart.

Kitchen Note
Keep the butter cold while you work it into the topping. Stop when you have coarse crumbs; if the mixture turns smooth and pasty, the finished topping won’t have the same crumbly texture.
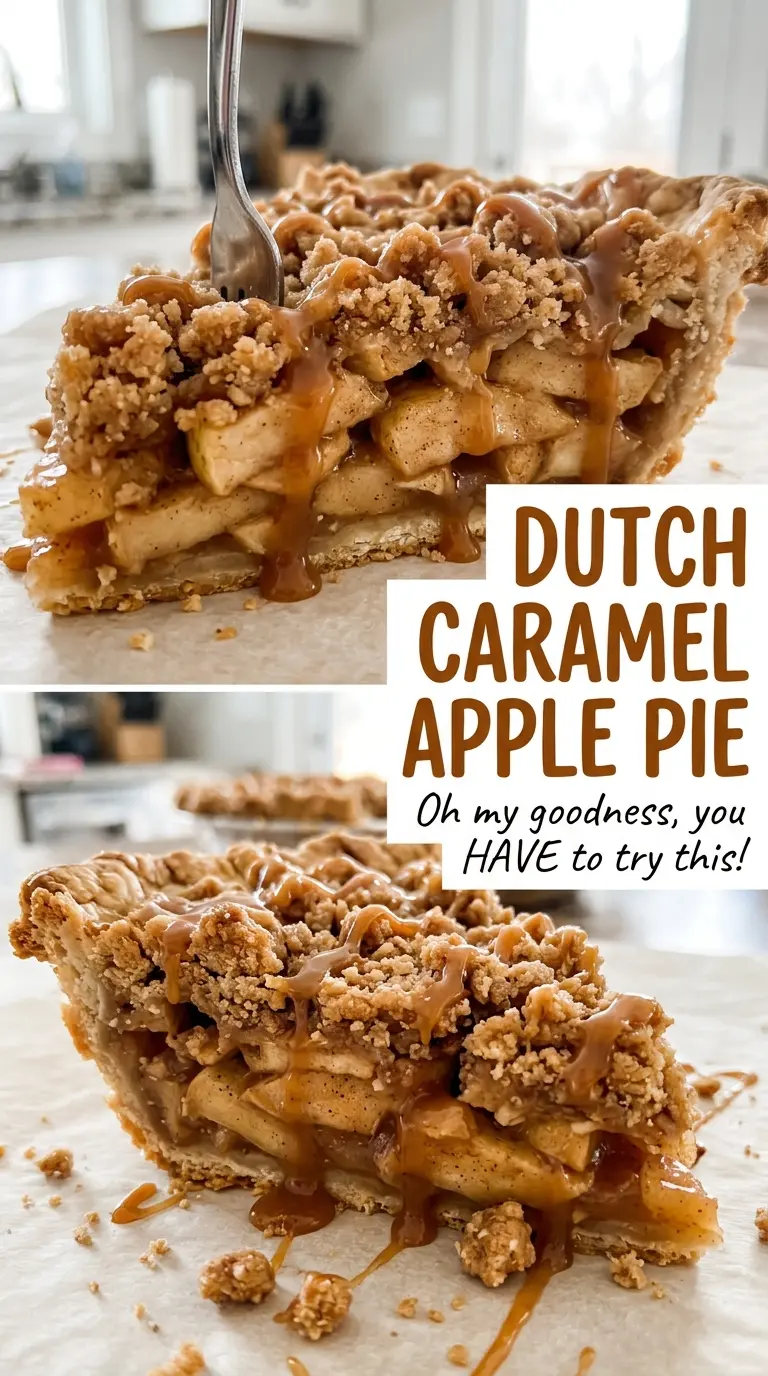
Save this Dutch Caramel Apple Pie for a bake with tender cinnamon apples, a buttery oat crumb, and caramel drizzled over the top.
Why the Apple Mound Needs to Look Too High
Apples lose volume as they bake, so a level layer of raw slices can leave you with a skimpy filling once the pie is done. Mound the coated apples in the center rather than pressing them flat. They’ll settle as they soften, and that extra height gives the finished pie a fuller slice beneath the crumb topping.
Even slicing matters here, too. Pieces close to the same thickness soften at a similar rate; a mix of very thin and thick slices can leave you with some apples nearly melting while others still feel firm. The flour in the filling helps thicken the juices released during baking, but it can’t make unevenly cooked apples tender. Toss everything well so the flour and cinnamon cling to the slices instead of collecting in a dry patch at the bottom of the bowl.
Once the filling is in place, drizzle the first portion of caramel over the apples before adding the topping. That puts caramel through the pie, not just on its surface, while leaving a separate portion for a clear finishing drizzle after the pie has cooled.
What the Apples, Flour, and Oats Do in This Pie
- Apples — Firm baking apples hold their shape better than soft eating apples. Granny Smith gives the pie a sharper, tart edge; a mix with a sweeter firm apple makes the filling rounder. Peel, core, and slice them evenly so they cook at the same pace.
- All-purpose flour — Flour thickens the apple juices and gives the crumb topping structure. A cup-for-cup gluten-free baking blend is the most practical swap if you need a gluten-free pie; use it in both places where flour appears.
- Caramel sauce — A smooth sauce is easiest to drizzle between the apple layer and over the cooled pie. A thick sauce still works, but warm it just enough to make it pourable; avoid adding it while the pie is hot for the final drizzle.
- Old-fashioned oats — Rolled oats give the topping distinct, chewy-crisp bits. Quick oats can stand in, but the crumb will be finer and less textured. Use whichever kind you have if a more compact topping is welcome.
- Cold unsalted butter — Cold butter helps form separate crumbs instead of a greasy paste. If salted butter is all you have, leave the salt out of the topping so it doesn’t become overly salty.
- Refrigerated pie crust — A ready-made crust keeps this pie straightforward; choose one intended for a 9-inch pie plate. If you’re buying a gluten-free crust, check that it fits the same plate size.
Build the Pie in Four Stages, Then Let It Set
Chill the Crust While the Oven Heats
Heat the oven to 400°F and set a rack in the lower third. Fit the refrigerated crust into a 9-inch pie plate and crimp the edge, then return the plate to the refrigerator while you prepare the filling. Keeping the crust chilled gives you time to work without leaving it sitting on the counter. Use the lower-third rack position for the bake that follows.
Coat the Apples Before They Go Into the Crust
Toss the sliced apples with the granulated sugar, filling flour, cinnamon, salt, and lemon juice until the slices are evenly coated. If dry flour is still visible in the bowl, keep tossing rather than transferring it as a clump. Pile the apples in the crust with the center higher than the edges, then drizzle on half of the caramel sauce. The rest is reserved for the cooled pie.
Make Coarse Crumbs, Not a Dough
Combine the topping flour, oats, brown sugar, and salt in a medium bowl. Work in the cold butter with your fingertips until the mixture forms coarse crumbs; a few varied-size pieces are fine. If you keep rubbing until it becomes a smooth dough, the topping won’t scatter as a crumb layer. Distribute the crumbs evenly over the apples without packing them down.
Bake Until the Apples and Juices Give You a Clear Cue
Set the pie on a rimmed baking sheet and bake at 400°F for 20 minutes. Reduce the oven to 350°F and continue baking for 45 to 55 minutes, until the topping is golden, the apples are tender when pierced, and the juices bubble. If the crust edge starts browning too quickly, cover that edge with foil. Cool the pie on a rack for at least 3 hours so the filling can set, then drizzle with the remaining caramel sauce before serving.
Two Useful Ways to Adapt Dutch Caramel Apple Pie
Make the Pie Gluten-Free
Use a refrigerated gluten-free crust sized for a 9-inch pie plate and replace both portions of all-purpose flour with a cup-for-cup gluten-free baking blend, keeping the listed amounts the same. The crumb may be a little more delicate, so scatter it gently rather than pressing it into place.
Use a Mix of Tart and Sweet Apples
Choose a blend of tart baking apples and sweeter firm apples rather than using only one kind. The tart fruit keeps the cinnamon-caramel filling from tasting flat, while the sweeter apples soften the sharp edge. Keep the slices close in thickness so the mix bakes evenly.
Storage and Reheating
- Refrigerator: Cover the cooled pie and refrigerate for up to 4 days. The crumb topping softens as it sits.
- Freezer: Freeze the cooled pie tightly wrapped for up to 3 months. Thaw it in the refrigerator before serving; the topping may be softer than it is on the day it’s baked.
- Reheating: Warm slices in a low oven until heated through to bring back some crispness in the topping. A microwave warms the filling quickly but leaves the crumb softer.
Questions That Come Up While Baking This Apple Pie
Dutch Caramel Apple Pie
Ingredients
Equipment
Method
- Heat the oven to 400°F and set a rack in the lower third of the oven.
- Fit the pie crust into a 9-inch pie plate and crimp the edge.
- Refrigerate the crust while you prepare the filling.
- In a large bowl, toss the apples with the granulated sugar, 1/4 cup flour, cinnamon, salt, and lemon juice until evenly coated.
- Transfer the apples to the crust, mounding them in the center.
- Drizzle 1/4 cup caramel sauce over the apples.
- In a medium bowl, combine the 3/4 cup flour, oats, brown sugar, and salt.
- Work in the butter with your fingertips until coarse crumbs form.
- Scatter the crumb topping evenly over the apples.
- Set the pie on a rimmed baking sheet.
- Bake at 400°F for 20 minutes.
- Reduce the oven to 350°F and bake for 45 to 55 minutes, until the topping is golden, the apples are tender when pierced, and the juices bubble.
- Cover the crust edge with foil if it browns too quickly.
- Cool the pie on a rack for at least 3 hours to let the filling set.
- Drizzle with the remaining 1/4 cup caramel sauce before serving.