
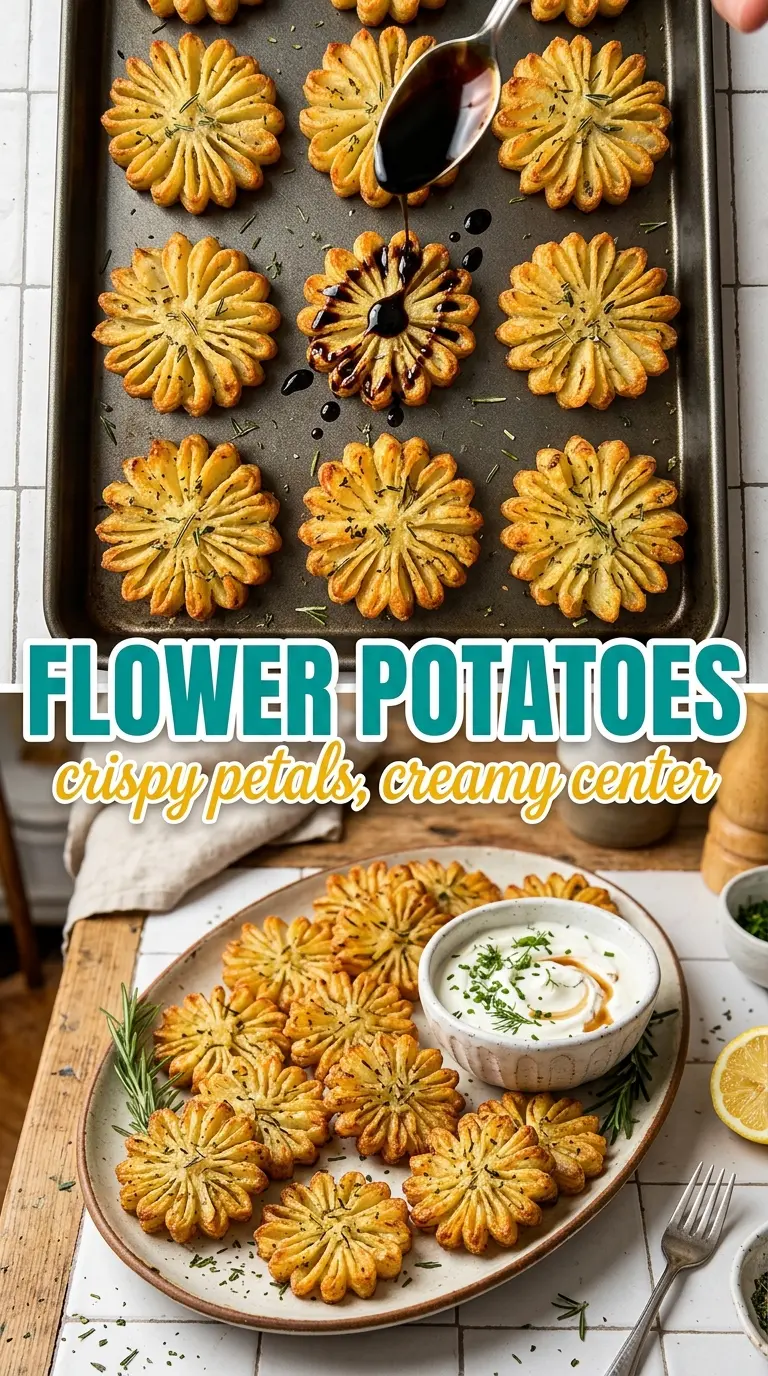
Flower Potatoes turn an ordinary baking sheet of potatoes into something crisp, buttery, and a little bit dramatic in the best way. The thin slices fan out like petals, so every ridge catches the herb butter and roasts into a deep golden edge while the center stays soft and creamy. They’re the kind of side dish that looks like you fussed far more than you did, which is exactly why they keep showing up on repeat.
What makes this version work is the balance between structure and fat. Yukon gold potatoes hold their shape without turning dry, and the melted butter mixed with olive oil gives you enough richness for flavor plus enough insurance to keep the butter from scorching. Brushing the mixture between the slices before and during roasting is what gets every layer seasoned, not just the top. That’s the difference between a pretty potato and one people actually remember eating.
The slices opened up beautifully and the butter soaked into every layer. I brushed them halfway through like you said and the edges got crisp without the centers drying out at all.
Crispy, butter-glazed Flower Potatoes are the side dish worth saving for dinner when you want something beautiful and deeply savory.
The Trick to Getting the Slices to Fan Instead of Collapse
The big failure point with flower potatoes is slicing too far through the base. Once the potato loses that little 1/4-inch hinge, the slices flop apart in the oven and you end up with roasted wedges instead of a bloom. A skewer or chopstick on either side of the potato gives you a physical stop, which is one of those small kitchen tricks that changes the whole result.
Spacing matters too. If the potatoes are crowded, they steam at the bottom and the petals go soft before they have a chance to crisp. Give them breathing room on the pan, and roast them long enough for the edges to dry slightly and turn lacy and browned. That’s when they start to look like flowers instead of sliced potatoes.
What Each Ingredient Is Actually Doing in This Dish
- Yukon gold potatoes — These are the right potato for this job because they stay creamy in the center and still hold the thin cuts without falling apart. Russets can work, but they dry out faster and their texture is fluffier than you want here.
- Butter and olive oil — Butter brings the flavor, while olive oil keeps the butter from burning before the potatoes are done. If you only use butter, the edges can go dark too quickly; if you only use oil, the potatoes lose that rich, glazed finish.
- Garlic, rosemary, thyme, and smoked paprika — This is the seasoning layer that gives the petals depth. Fresh herbs taste best here because they perfume the butter, but if you only have dried thyme, use about one-third the amount and rub it between your fingers before mixing it in.
- Flaky sea salt — Use it at the end, not just before roasting. The finishing salt gives you little sharp pops on the crisp edges, which is what makes each bite taste brighter.
- Sour cream or aioli — Not required, but useful if you want a cool, creamy dip alongside the hot potatoes. Aioli adds more garlic; sour cream keeps the finish lighter and tangier.
How to Build the Butter Between the Petals Without Tearing Them
Set the shape first
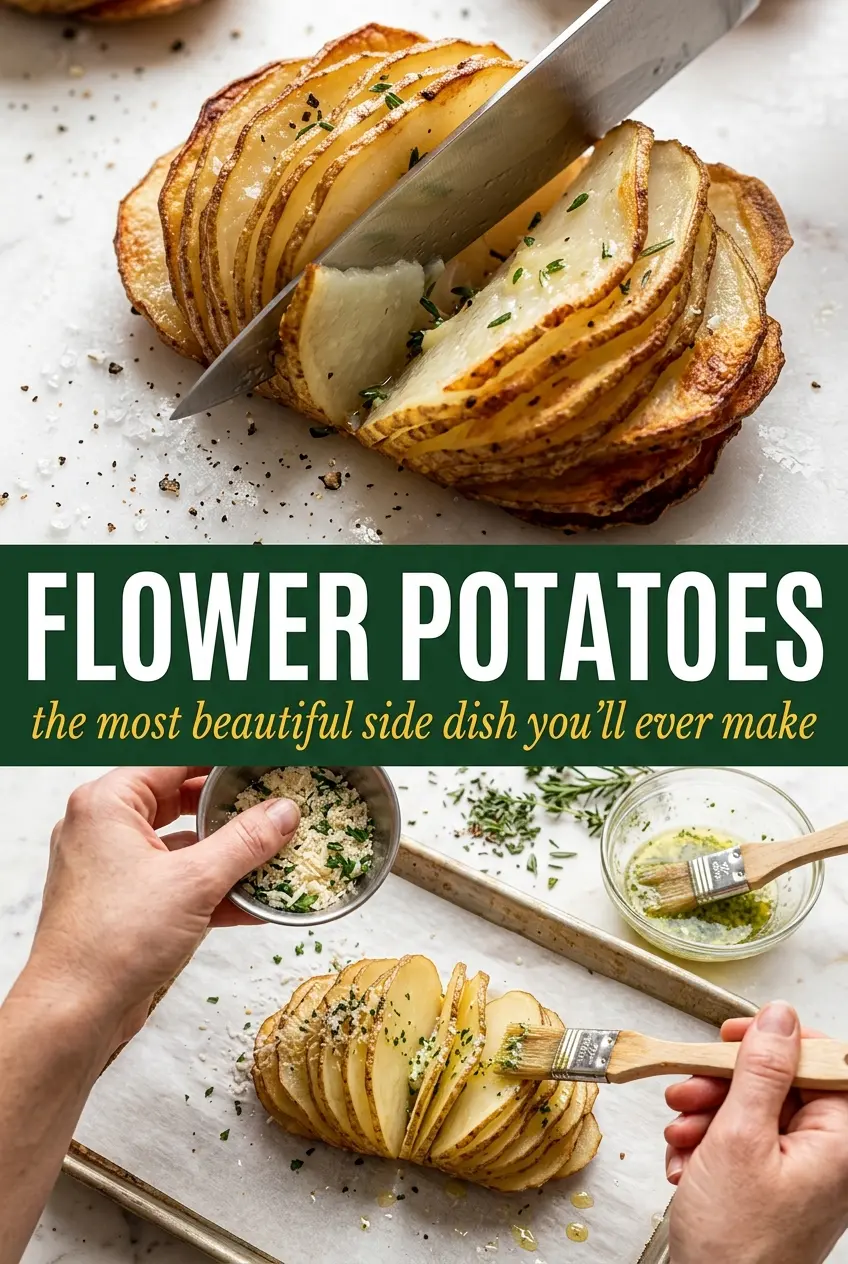
Slice each potato thinly, stopping before the blade hits the base. The slices should stay connected at the bottom so the potato opens like a fan. If one starts to wobble, press it gently back into shape before it goes on the pan. That small hinge is what keeps the bloom intact through roasting.
Brush the seasoning into the layers
Mix the melted butter, olive oil, garlic, herbs, paprika, salt, and pepper, then brush it generously between every slice. A pastry brush works best because it slips into the gaps without forcing the petals apart. If the butter starts to thicken, warm it briefly so it stays fluid and can seep into the cuts. The goal is not just coating the top; it’s seasoning the whole potato.
Roast until the edges dry and crisp
Bake at 400°F until the outer slices are deeply golden and the centers give easily when pierced, usually 45 to 55 minutes. Brush again halfway through so the tops don’t dry out before the insides are tender. If the edges brown before the centers soften, tent the pan loosely with foil for the last stretch. You want crisp petals, not burnt ones.
Finish while they’re hot
The last sprinkle of flaky salt and extra herbs goes on the second they come out of the oven. That’s when the butter is still glossy and the salt clings to the ridges instead of sliding off. Serve them right away with sour cream or aioli so the contrast between hot potato and cool dip stays sharp.
How to Adapt These Flower Potatoes for Different Tables
Dairy-Free Flower Potatoes
Swap the butter for more olive oil or a good dairy-free butter substitute. You’ll lose a little of the rich, rounded flavor, but the potatoes still crisp up nicely as long as the fat is brushed between the slices and not just over the top.
More Garlicky, More Savory
Add an extra clove or two of garlic, but keep the pieces finely minced so they don’t burn on the pan. If you want a deeper savory edge, add a little grated Parmesan during the last 10 minutes; it will brown on the ridges and give you a salty crust.
Herb Swap for What’s in the Fridge
Rosemary and thyme are the classic pair, but chopped parsley, chives, or dill can step in if that’s what you have. Fresh dill gives the potatoes a lighter, sharper finish, while parsley keeps the flavor cleaner and less piney.
Storage and Reheating
- Refrigerator: Store leftovers in an airtight container for up to 4 days. The petals soften after chilling, but the flavor stays good.
- Freezer: They don’t freeze well. The sliced structure turns mealy and the petals lose their crisp edges after thawing.
- Reheating: Warm them in a 400°F oven or air fryer until the edges wake back up. The common mistake is microwaving them, which makes the layers limp instead of crisp.
Answers to the Questions Worth Asking
Flower Potatoes
Ingredients
Equipment
Method
- Preheat the oven to 400°F and line a sheet pan with parchment. Set it up so the potato blooms can go in right after slicing.
- Slice each Yukon gold potato thinly, stopping 1/4 inch from the bottom to prevent cutting through. Use a skewer beside the potato as a guide if needed to keep the base intact.
- Gently fan the slices into a flower bloom shape on the sheet pan. Arrange them so they stand up in their natural fan without collapsing.
- Mix the melted butter, olive oil, minced garlic, rosemary, thyme, smoked paprika, garlic powder, and salt and black pepper. Stir until evenly combined so every slice gets coated.
- Brush the herb butter mixture between every potato slice. Work carefully so the glaze reaches the gaps for flavor and crisping.
- Roast the potatoes at 400°F for 45–55 min, brushing with the butter halfway through. Cook until the edges are crispy and the blooms are golden.
- Finish the flower potatoes with flaky sea salt and extra herbs. Let the aromatics sit for a minute before serving.