
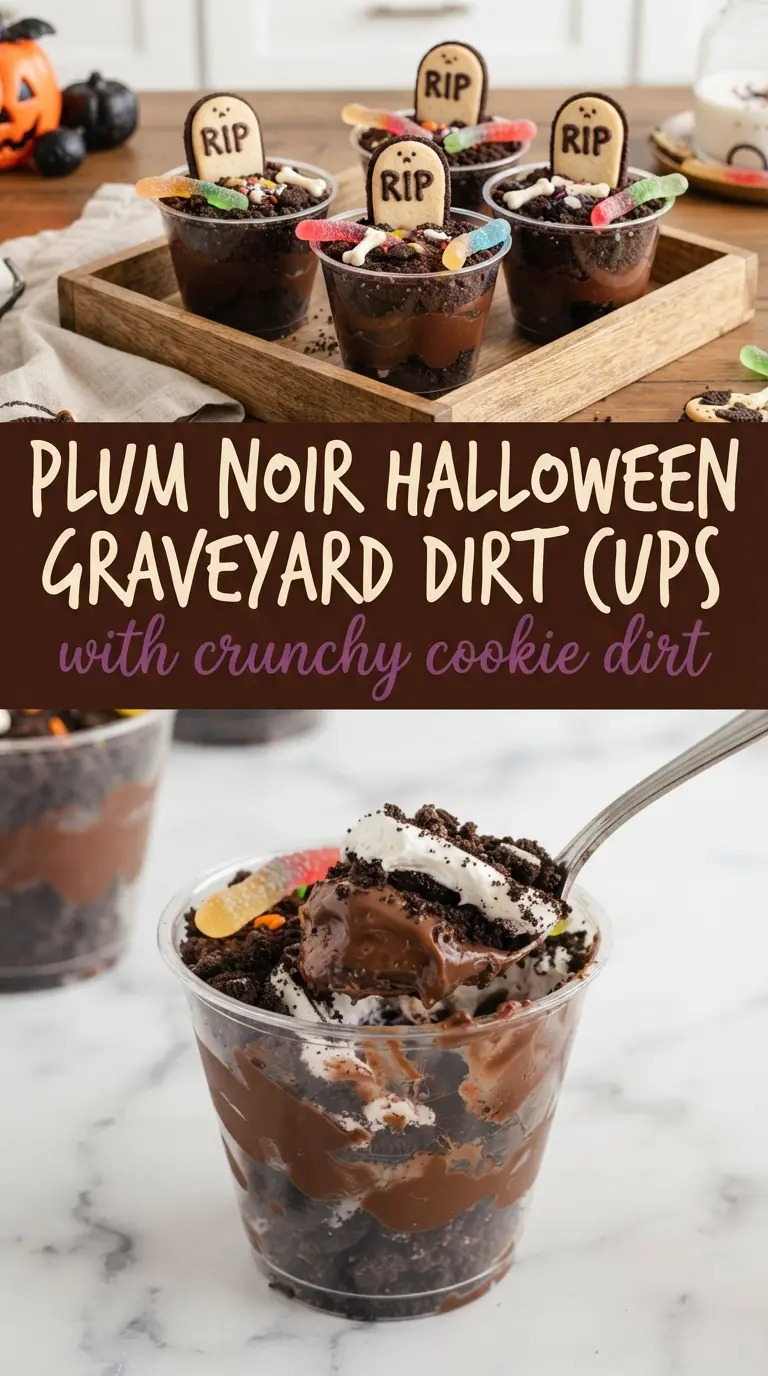
Chocolate pudding, cookie dirt, and little cookie tombstones turn these graveyard cups into the kind of Halloween treat people grab before they even finish reading the label. The best part is the contrast: smooth, cool pudding underneath, then a thick layer of crushed Oreos that stay a little crunchy instead of disappearing into the filling. It looks playful on the table, but it eats like a real dessert, not just a gimmick.
This version works because the pudding gets a short chill before the whipped topping goes in, which helps it thicken just enough to hold those layers instead of slumping. Folding in the whipped topping keeps the filling light and mousse-like, and using Milano cookies for tombstones gives you a clean, sturdy topper that stands up in the cups. The crushed Oreos go on at the end so they keep their dirt-like texture instead of softening too early.
Below, I’ve included the small details that make these cups hold together for a classroom party or a Halloween dessert tray, plus a few smart swaps if you need to work with what you’ve got.
The pudding set up fast and the Oreo crumbs stayed crunchy even after sitting out for the party. I wrote the tombstone names with icing like you suggested, and the kids loved it.
Save these Halloween Graveyard Dirt Cups for the party dessert that comes together fast and still looks like you planned it days ahead.
The Reason the Oreo Dirt Stays Crunchy Instead of Melting Into the Pudding
The mistake with dirt cups is building them too far ahead and letting the cookie crumbs sit directly against a loose filling. Once the cookies absorb too much moisture, the whole thing turns muddy in the wrong way. This version keeps the pudding thick enough to support the layers, so the Oreos stay defined and give you that sharp chocolate crunch when the spoon breaks through.
The short chill on the pudding mix matters more than people think. It gives the base enough body to fold with whipped topping without turning soupy. If your filling looks thin at that point, it will never hold clean layers in the cups, and the tombstones will lean before the dessert even reaches the table.
What Each Ingredient Is Actually Doing in These Graveyard Cups
- Chocolate pudding mix — This gives you the dark, custardy base that reads as “graveyard” without any extra work. Instant pudding is the right choice here because it sets fast and stays stable in cups. Cook-and-serve pudding takes longer and usually ends up too soft for neat layering.
- Cold milk — Cold milk helps the pudding thicken quickly and cleanly. Warm milk slows the set and leaves you with a looser filling, which is the last thing you want in a layered dessert. Whole milk gives the richest result, but 2% works fine.
- Whipped topping — Folding this in turns the pudding from plain and dense into something lighter and spoonable. Stir it too hard and you’ll knock out the air, so use a folding motion and stop when the mixture is uniform. If you swap in homemade whipped cream, use it right away because it won’t hold as long as stabilized topping.
- Oreos — These create the dirt layer and bring the texture contrast that makes the cups worth eating. Crush them into small crumbs, not powder, so they still look like soil and don’t disappear into the pudding. Double Stuf cookies work too, but standard Oreos crush a little more cleanly.
- Milano cookies — These are sturdy enough to stand in as tombstones and give the dessert its graveyard look. Their shape matters more than the brand, so any crisp, rectangular butter cookie can work. If you want the writing to stay visible, add the icing after the cookies have been inserted and the cups have settled.
- Gummy worms — They add the Halloween hit without changing the structure of the dessert. Put them on last so they stay glossy and don’t sink into the pudding. If you chill them too long on top, they can get firm, so add them close to serving for the best texture.
Building the Cups So They Hold Their Shape
Mixing the pudding to the right thickness
Whisk the pudding mix with the cold milk until it starts to thicken, then let it sit for about 5 minutes. You want it soft-set, not runny. If it still pours like cream, it hasn’t had enough time to hydrate, and the layers will slip around in the cups. Once it looks glossy and thickened, fold in the whipped topping gently so the filling stays light.
Layering for a clean graveyard effect
Spoon a layer of pudding into each cup, then add a layer of crushed Oreos. Repeat if your cups are tall enough, but keep the top layer as cookie crumbs so the surface reads like dirt. Pressing the crumbs down too hard will make them sink into the filling. Leave a little room at the top for the tombstones and worms so the cups don’t look overcrowded.
Setting the tombstones and finishing the top
Slide the Milano cookies into the crumb layer while the pudding is still thick enough to support them. If the cookies lean, the filling is too loose or the crumbs are too shallow. Write the tombstone words with icing after the cookies are in place, not before, so the letters don’t smear while you’re handling them. Add the gummy worms at the end, crossing a few over the crumbs for the best spooky look.
How to Adapt These Cups for the Crowd You’re Feeding
Make Them Dairy-Free
Use a dairy-free instant pudding mix if you can find one, then replace the milk with the unsweetened non-dairy milk the pudding package recommends. Fold in a dairy-free whipped topping so the texture stays light. The result is a little less rich than the original, but the cups still layer well and hold their shape.
Make Them Gluten-Free
Use a gluten-free chocolate sandwich cookie for the dirt and check that your pudding mix is certified gluten-free. The texture will be slightly softer depending on the cookie brand, but the dessert still gives you the same graveyard look. Choose a cookie that crushes into distinct crumbs instead of sandy bits.
Turn It Into a Bigger Party Tray
Layer the pudding and cookie crumbs in a 9×13-inch dish instead of individual cups, then stand the tombstone cookies along one edge like a little cemetery row. This saves time for a classroom party and makes scooping easier. The tradeoff is that the cookie layer softens a bit faster, so serve it the same day.
Storage and Reheating
- Refrigerator: Store covered for up to 2 days. The cookie crumbs will soften a little, but the dessert still tastes good.
- Freezer: I don’t recommend freezing these cups. The pudding can turn grainy when thawed, and the cookie layers lose their texture.
- Reheating: No reheating needed. Serve them straight from the fridge, and add the gummy worms close to serving so they stay soft and bright.
Answers to the Questions Worth Asking

Halloween Graveyard Dirt Cups
Ingredients
Method
- Whisk the chocolate pudding mix and cold milk until smooth. Chill for 5 minutes in the refrigerator until slightly thickened.
- Fold the whipped topping into the chilled pudding until no streaks remain. Keep it cold while you crush the Oreos and prepare the cups.
- Layer the chocolate pudding and crushed Oreos in cups, alternating for visible “dirt” layers. Press lightly to help the layers settle.
- Top each cup with a generous layer of crushed Oreos for cookie dirt. Make the surface look uneven for a graveyard effect.
- Place Milano cookie tombstones into each cup. Set them upright so they look like standing headstones.
- Add gummy worms on top and around the tombstones. Arrange them to peek out from the cookie dirt for a spooky finish.