
Hot Italian sub sliders hit the table with the kind of pull-apart, melty center that makes people reach for a second one before they’ve finished the first. The sweet Hawaiian rolls go soft underneath all that savory salami, ham, and provolone, while the buttery garlic-herb topping bakes into the tops until they’re shiny, bronzed, and just crisp enough to hold their shape. The banana peppers keep the whole thing from tasting heavy. You get heat, salt, tang, and a little sweetness in one bite.
The trick here is keeping the rolls connected and baking the sliders covered long enough for the cheese to melt all the way through before the tops brown. That foil step matters. It lets the filling heat evenly without drying out the bread, and it keeps the butter from scorching before the center is ready. A cast iron pan helps because it holds heat well and gives the bottoms a better finish than a loose baking sheet usually does.
Below, I’ve laid out the parts that matter most: how to keep the sliders from going soggy, which ingredient swaps actually work, and what to do when you want to make them ahead for a crowd.
The rolls stayed soft in the middle but the tops got this perfect buttery crust, and the banana peppers kept every bite from tasting too heavy. I baked them for a game day crowd and there wasn’t one left after ten minutes.
These hot Italian sub sliders bake up with a buttery garlic top and a melty, savory center — perfect for game day or any night you want a tray that disappears fast.
The Reason These Sliders Stay Melty Without Getting Soggy
The biggest mistake with baked sliders is loading them up and then baking them long enough to dry out the bread before the cheese melts. With these, the top and bottom buns each have a job. The bottom half catches the juices from the meat and peppers, while the top gets brushed with flavored butter so it bakes into a crisp, fragrant lid instead of just staying soft.
Covering the pan for the first stretch does most of the work. It traps steam, which melts the provolone and warms the meats through without over-browning the rolls. Then the last few minutes uncovered give you that golden top. If your sliders ever came out pale on top and cold in the middle, that usually means they were baked uncovered the whole time or pulled too early.
What Each Layer Is Doing in These Hot Italian Sub Sliders
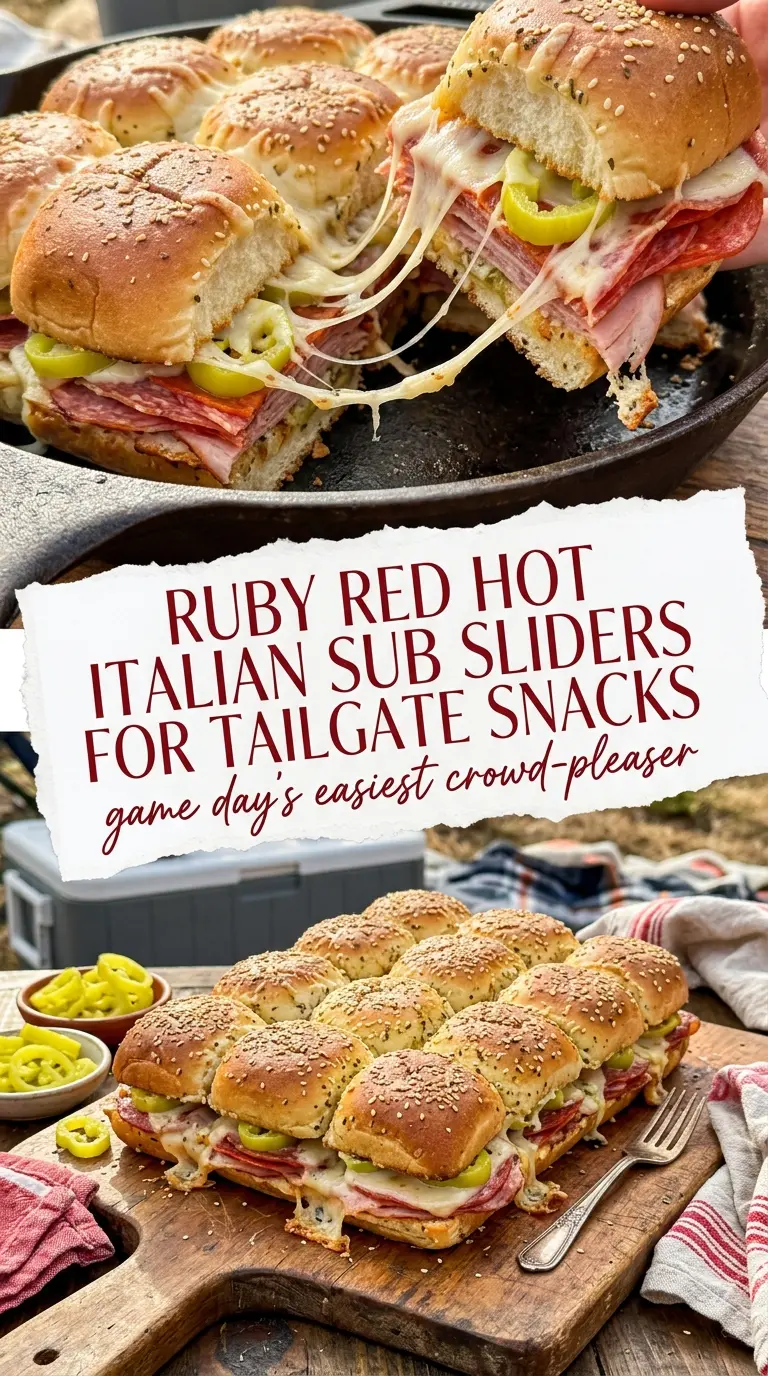
- Hawaiian rolls — The slight sweetness plays against the salty meats and sharp cheese. Keep them connected so the sliders hold together when you slice and serve them. Day-old rolls can work, but fresh ones give the softest pull-apart texture.
- Salami and ham — This is where the Italian sub flavor comes from. Salami brings spice and salt; ham softens the edges and keeps the filling from tasting too one-note. Any sliced deli meat that’s thin enough to layer evenly will work, but thicker cuts make the sliders harder to bite through.
- Provolone — It melts cleanly and gives you that stretchy, savory finish without turning greasy. Mozzarella can work in a pinch, but you’ll lose some of the sharpness that makes these taste like an actual sub instead of just a ham sandwich.
- Banana peppers — They cut through the richness and keep each bite bright. If you like more heat, pepperoncini are the best swap and bring a sharper, more vinegary bite.
- Butter, garlic, Italian seasoning, and Parmesan — This mixture flavors the tops and helps them bake to a glossy, seasoned crust. Parmesan adds a little nuttiness and salt; if you skip it, the topping still works, but it tastes flatter.
Building the Tray So the Bottoms Don’t Go Soft
Prepare the pan and the rolls
Heat the oven to 350°F and grease the cast iron pan so the bottoms release cleanly. Slice the connected rolls in half horizontally, keeping the top and bottom sheets intact, then set the bottom half into the pan. If you separate the rolls too early, the layers shift while you build them and the filling slides out when you cut the finished sliders.
Layer the filling in an even blanket
Spread the salami and ham across the bottom rolls in an even layer, then tuck the provolone on top and scatter the banana peppers over the cheese. The goal is coverage, not height. If the filling piles up in the center, the ends bake faster than the middle and you get uneven sliders.
Brush on the butter mixture
Stir the melted butter with Italian seasoning, garlic, and Parmesan, then brush it generously over the top rolls. Use all of it. The butter mixture doesn’t just add flavor; it helps the tops brown and gives the rolls that bakery-style sheen. If the garlic sits in one clump, it can burn in spots, so keep the mixture moving as you brush.
Bake covered, then uncover for color
Cover the pan with foil and bake for 15 minutes so the cheese melts and the center heats through. Uncover and bake for about 5 more minutes until the tops are golden and the edges look crisp. Pull them when the cheese is fully melted and the butter has soaked into the bread, not when the tops are dark.
How to Change the Flavor Without Losing the Structure
Swap in pepperoni for a sharper, saltier bite
Use pepperoni in place of some or all of the salami if you want a more pizza-shop kind of flavor. It crisps at the edges and brings more spice, but it’s also saltier, so the slider tastes bolder and a little less mellow.
Make them gluten-free with sturdy gluten-free rolls
Use gluten-free rolls that can hold up to melted butter and steam, not soft buns that collapse the second they heat through. You’ll still want to keep them connected if the package allows it, because individual rolls can dry out faster in the oven.
Go dairy-free with a meltable alternative
Swap in a dairy-free sliced cheese that melts well and use plant-based butter for the topping. The texture will be close if you choose the right cheese, but the flavor will be milder, so the garlic and Italian seasoning matter even more.
Make them ahead for a crowd
Assemble the sliders, cover the pan, and refrigerate them until baking time, then add the butter topping right before they go in the oven. If the butter goes on too early, the rolls soak up too much and the tops can bake up a little heavy instead of crisp.
Storage and Reheating
- Refrigerator: Store leftovers covered for up to 3 days. The rolls soften a little, but the flavor stays strong.
- Freezer: These freeze best before baking. Assemble, wrap tightly, and freeze for up to 1 month, then thaw in the fridge before baking.
- Reheating: Warm covered in a 325°F oven until the cheese loosens again and the center is hot. The microwave will make the bread gummy, so skip it if you want the tops to stay intact.
Answers to the Questions Worth Asking
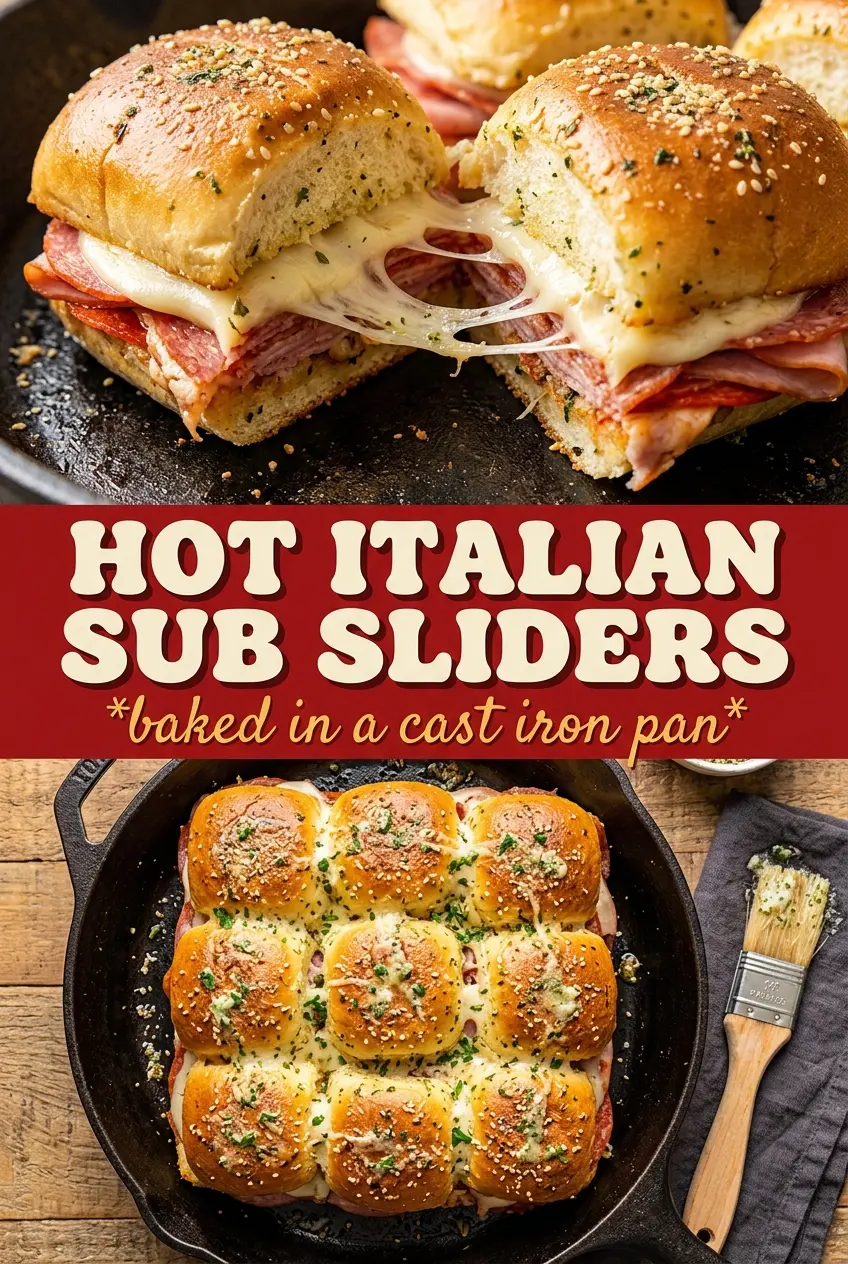
Hot Italian Sub Sliders
Ingredients
Equipment
Method
- Preheat the oven to 350°F and grease a cast iron pan.
- Slice the connected Hawaiian rolls in half horizontally and place the bottom halves in the pan.
- Layer the sliced salami, sliced ham, provolone cheese, and banana peppers over the bottom rolls.
- Place the top halves of the rolls over the filling.
- Whisk together the melted unsalted butter, Italian seasoning, minced garlic, and grated Parmesan until combined.
- Brush the butter mixture generously over the tops of the rolls, letting it run slightly down the sides.
- Cover with foil and bake for 15 minutes at 350°F, until the cheese is starting to melt visibly.
- Uncover and bake for 5 more minutes at 350°F until the tops are golden.
- Slice into individual sliders and serve warm.