
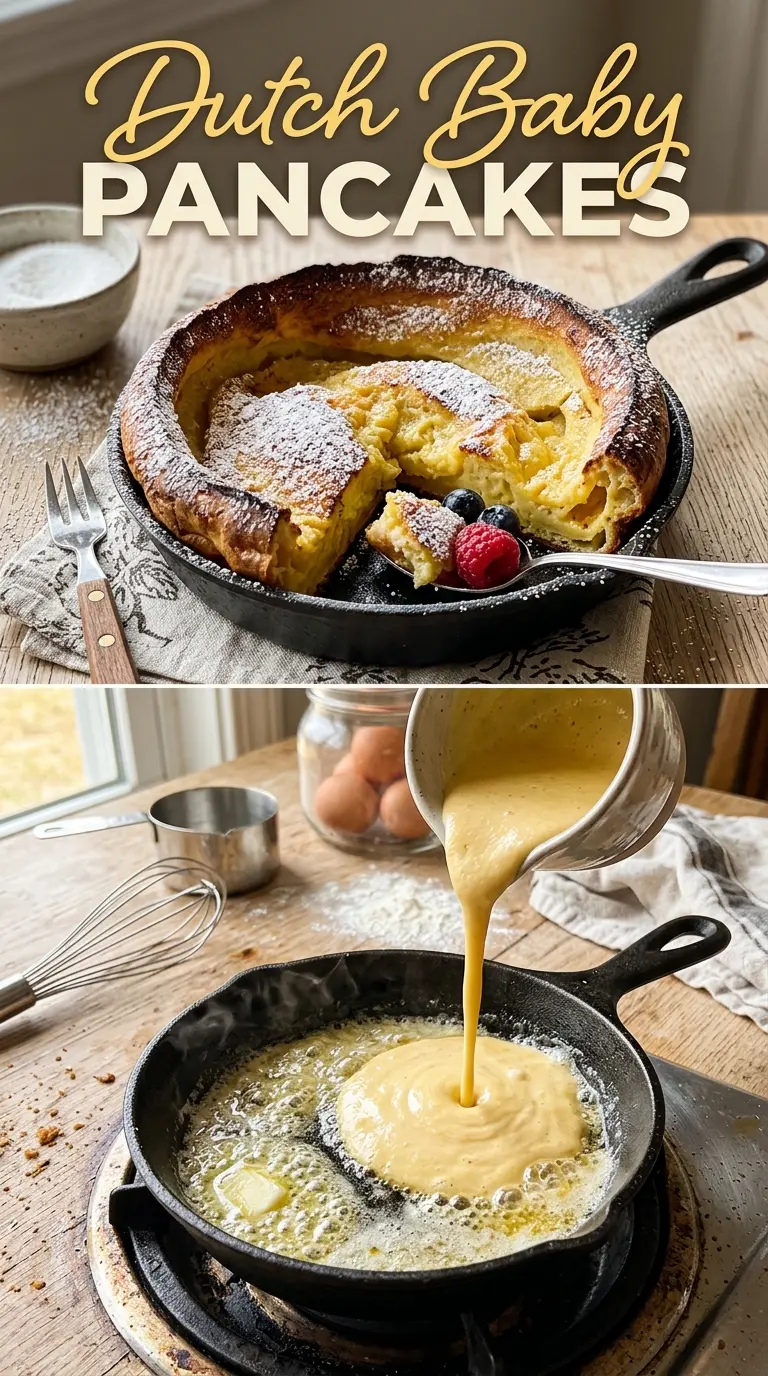
Dramatically puffed mini Dutch baby pancakes are the kind of brunch that gets people talking before they’ve even taken a bite. The edges climb high and lacey in the oven, the centers stay tender and custardy, and the whole pan lands on the table looking far fancier than the effort it took to make it. They’ve got that sweet spot between a popover and a crepe, with crisp buttered edges and a soft vanilla-scented middle that disappears fast.
What makes these work is the contrast: a hot pan, a cold batter, and a batter that’s blended smooth enough to rise without stray flour streaks weighing it down. The oven has to be fully hot before the pans go in, because that initial blast of heat is what forces the dramatic puff. If the pans cool too much before the batter hits them, you’ll still get a tasty pancake, but not the towering edges that make this recipe worth repeating.
Below, I’ve laid out the timing that matters most, the ingredient swap that still keeps the texture on track, and the one serving tip that keeps these from collapsing before they reach the table.
The batter came together in the blender in under a minute, and the pancakes puffed straight up in the hot pans. Mine had crisp, buttery edges and the centers stayed soft underneath the berries and powdered sugar.
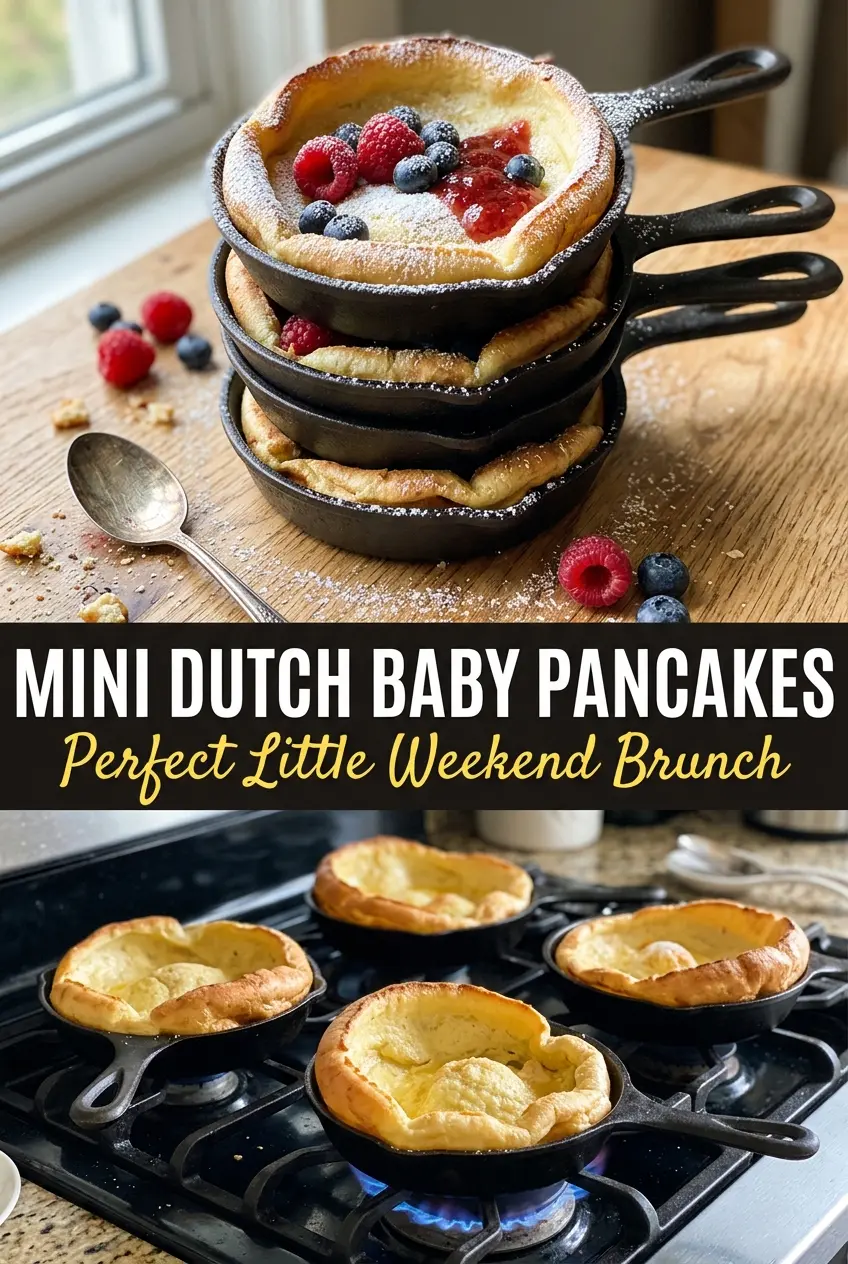
Save these mini Dutch baby pancakes for the mornings when you want dramatic puffed edges, a custardy center, and almost no fuss.
The Hot Pan Is What Gives You the Puff, Not Extra Flour
The biggest mistake with mini Dutch babies is starting with a pan that isn’t screaming hot. These pancakes depend on immediate steam when the batter hits the buttered pan, and that steam is what lifts the edges into those crisp, airy walls. If the pans cool down while you’re pouring, the batter spreads before it sets and you lose the dramatic rise.
Another trap is overcomplicating the batter. You want it smooth and thin enough to pour quickly, not thick like traditional pancake batter. A blender does the job well because it removes flour lumps fast without overmixing the rest of the ingredients. That matters here because the structure comes from egg and heat, not from beating in a lot of air by hand.
What Each Ingredient Is Actually Doing in This Dish
- Eggs — They provide the lift, structure, and custardy center. Large eggs at room temperature blend a little more smoothly, but cold eggs still work because the pans are already hot.
- Milk — Whole milk gives the richest texture and the best browning, but 2% will still bake up well. Non-dairy milk can work in a pinch if it’s unsweetened and plain; just know the center may be a little less tender.
- All-purpose flour — This is enough flour to hold the puff without turning the pancakes dense. Don’t swap in cake flour here; it can make the structure too delicate for the rise to hold.
- Butter — The butter in the pans is doing more than greasing. It creates those crisp, nutty edges and helps the pancakes release cleanly. Use real butter, not a spread, if you want the best browning.
- Vanilla — It rounds out the egginess and makes the kitchen smell like you worked much harder than you did.
Mix Fast, Bake Hot, Serve Before They Sink
Blend the batter until it’s fully smooth
Put the eggs, milk, flour, vanilla, and salt in a blender and blend just until the batter looks uniform and pourable. You’re looking for a thin, smooth batter with no flour pockets stuck to the bottom or sides. If you don’t have a blender, whisk hard until the mixture is completely smooth, then rest it a few minutes so the flour hydrates. A lumpy batter won’t rise evenly and can leave you with dense spots in the finished pancakes.
Heat the pans until they’re ready to react
Set the mini cast-iron pans in the oven while it preheats to 425°F. That preheating step is the whole trick. When the pans are hot enough, the butter melts and foams the second it hits the metal, and the batter starts cooking at the edges before it can spread flat. If the pans aren’t truly hot, the pancakes bake up flatter and less dramatic.
Pour quickly and get them back in the oven
Remove the pans, add about 1/2 teaspoon butter to each one, and swirl to coat the bottoms and sides. Pour the batter in right away and return the pans to the oven without waiting around. That short window matters because the batter begins to set as soon as it touches the hot buttered surface. Bake until the pancakes are deeply puffed and golden around the edges, with centers that look set but still soft.
Serve the second they leave the oven
Dust with powdered sugar, add berries and jam, and bring them out hot. Mini Dutch babies deflate fast as the steam escapes, and that’s normal. They still taste excellent after they fall, but the tall edges and showstopper look are best in the first few minutes. If you’re serving a group, have the toppings ready before the pancakes come out so you can move quickly.
How to Adapt These Mini Dutch Babies Without Losing the Rise
Dairy-Free Version That Still Browns Well
Use an unsweetened plain non-dairy milk and a neutral plant butter for the pan. You’ll lose a little of the classic buttery flavor, but the puff and crisp edges still happen as long as the pans are hot. Skip flavored milks, which can throw off both browning and taste.
Gluten-Free Swap for the Flour
Use a good 1:1 gluten-free baking flour blend in place of the all-purpose flour. The texture will be a touch more delicate, but the pancakes still rise nicely if the batter stays smooth and the pans stay hot. I wouldn’t use almond flour here; it changes the structure too much and the pancakes won’t puff the same way.
Making Them More Dessert-Like
Add a little citrus zest to the batter or top them with warm fruit compote instead of jam. That leans the flavor brighter and more dessert-like without changing the bake. Heavy fillings should go on after baking, not before, or they’ll weigh down the center.
Storage and Reheating
- Refrigerator: Store leftovers in an airtight container for up to 2 days. They’ll lose their puff and the edges soften, but the flavor stays good.
- Freezer: They freeze well for up to 1 month if you wrap them tightly and stack with parchment between layers. Thaw in the refrigerator before reheating.
- Reheating: Reheat in a 350°F oven for 5 to 8 minutes until warmed through and the edges crisp back up a little. The common mistake is using the microwave, which makes them rubbery and collapses what little texture is left.
Answers to the Questions Worth Asking
Mini Dutch Baby Pancakes
Ingredients
Equipment
Method
- Preheat oven to 425F with mini cast-iron pans inside. Heat until the pans are very hot so the batter puffs on contact.
- Blend eggs, milk, flour, vanilla, and salt until smooth. Stop as soon as the batter looks uniform with no flour streaks.
- Remove the hot pans; add 1/2 tsp butter to each and swirl to coat. Work quickly so the butter sizzles immediately in the hot cups.
- Pour batter in quickly and return pans to the oven. Fill promptly so the rise starts right away.
- Bake 12-15 minutes until dramatically puffed and golden. The centers should look set while the edges develop a lacy browned rim.
- Serve immediately with powdered sugar, berries, and syrup. Dust on top right before serving because the puffs deflate quickly.