
No Bake Oreo Cheesecake Cups are a simple, fun treat that combines creamy cheesecake filling with the crunchy, chocolatey goodness of Oreo cookies. These little cups are perfect for anyone who loves the classic Oreo flavor but wants it in a soft, creamy dessert form. They’re quick to put together and don’t need an oven, which makes them a great choice for hot days or last-minute guests.
I love making these because they’re so forgiving—you just crush up the Oreos, mix the filling until smooth, and layer everything in small cups or jars. It feels like a little celebration every time I scoop into one and get a bit of crumbly cookie and rich cheesecake in the same bite. Plus, it’s easy to make these ahead of time and let them chill in the fridge while you get everything else ready.
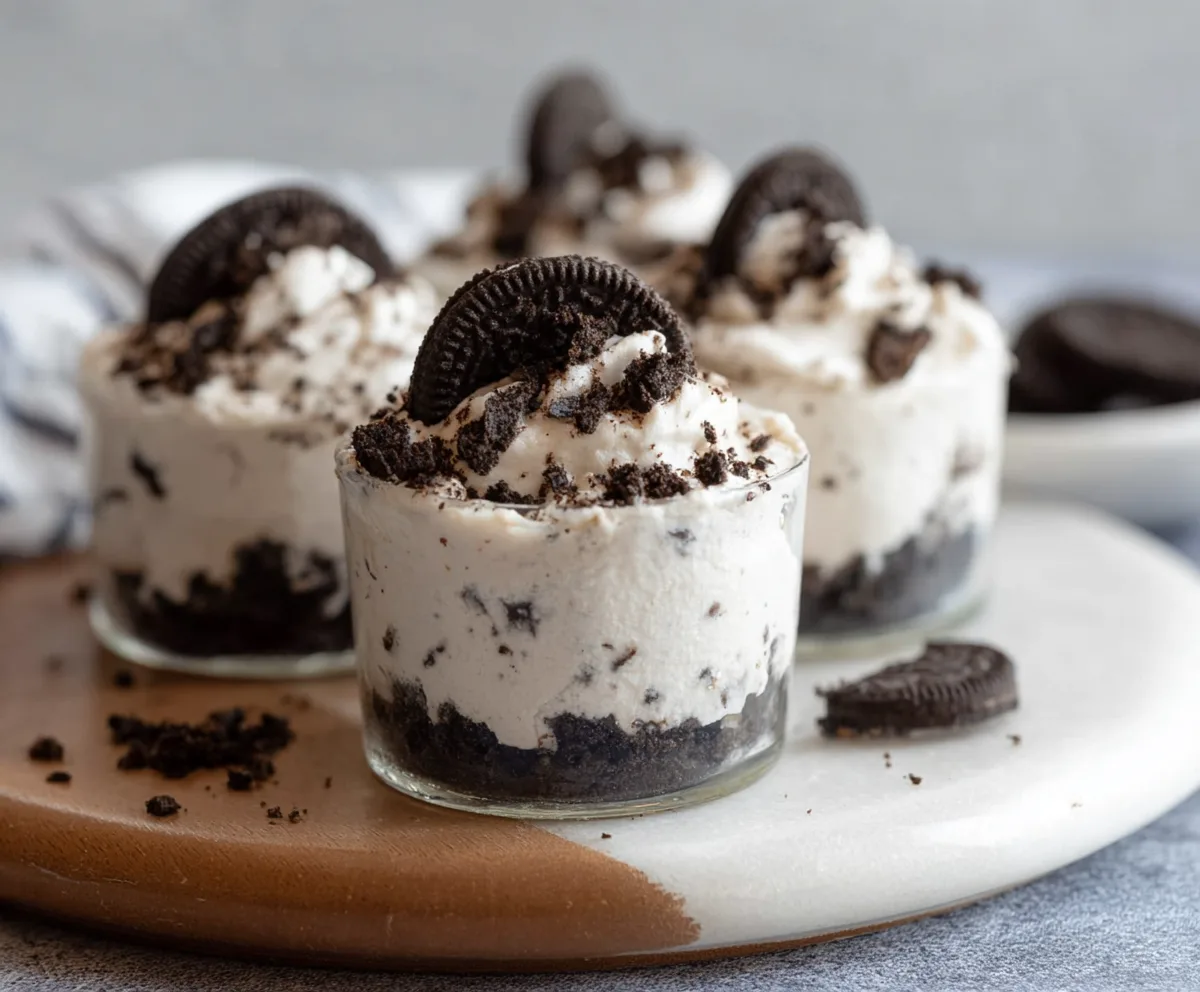
One of my favorite ways to serve these cheesecake cups is with a few extra Oreo pieces on top for a little crunch and maybe a drizzle of chocolate or some fresh berries when I want to get fancier. They always vanish quickly whenever I bring them to parties or share them with friends. If you want a delicious dessert that’s straightforward to make but always a crowd-pleaser, these no bake Oreo cheesecake cups might just become your new go-to!
Key Ingredients & Substitutions
Oreos: Oreos bring that classic chocolate and cream combo that’s essential here. If you want a twist, try chocolate sandwich cookies from other brands or gluten-free versions if needed.
Cream Cheese: This gives the filling its creamy texture and rich tang. For a lighter option, you can use Neufchatel cheese, which is lower in fat but tastes similar.
Heavy Whipping Cream: Whipping cream adds lightness and fluffiness when folded into the filling. If you’re avoiding dairy, coconut cream is a good non-dairy substitute that whips well.
Powdered Sugar: It sweetens the filling smoothly without any graininess. If you prefer less sweetness, reduce the amount or swap for a sugar substitute like erythritol.
Butter: Melting butter helps bind the crushed Oreos into a firm crust. You can swap this with coconut oil for a slightly different flavor and a dairy-free option.
How Do You Get a Smooth, Fluffy No Bake Cheesecake Filling?
The key to a great no bake cheesecake filling is mixing and folding properly:
- Start by beating the softened cream cheese until perfectly smooth. This stops lumps and gives a nice creamy base.
- Add powdered sugar and vanilla and beat until fully mixed and creamy.
- Whip cold heavy cream separately to stiff peaks, meaning it holds strong peaks when lifting the whisk.
- Fold the whipped cream gently into the cream cheese mixture using a spatula. Take your time—folding keeps the air in and results in a light, fluffy texture instead of a dense one.
- Fold in crushed Oreos carefully, so they spread evenly without deflating the mix.
Chilling for several hours lets the mixture set into a smooth, scoopable filling that pairs perfectly with the crunchy Oreo crust. Patience at this stage makes all the difference!
Equipment You’ll Need
- Mixing bowls – I use large bowls to beat and fold the ingredients easily.
- Electric hand or stand mixer – makes whipping the cream and mixing the filling quick and smooth.
- Food processor or zip-top bag and rolling pin – perfect for crushing Oreos into fine crumbs.
- Measuring cups and spoons – help add just the right amounts of ingredients.
- Small serving cups or jars – ideal for layering and serving these cheesecake cups.
- Spatula or spoon – for spreading and folding mixtures gently.
- Refrigerator – to cool and set the cheesecake before serving.
Flavor Variations & Add-Ins
- Chocolate Chips: Mix in mini chocolate chips into the filling for extra chocolate bites.
- Peanut Butter: Swirl a spoonful of peanut butter into the filling for a nutty flavor.
- Fruit Toppings: Top with fresh strawberries, raspberries, or sliced bananas for a fresh, fruity twist.
- Different Cookies: Use graham crackers, chocolate digestives, or even flavored Oreos like mint or peanut butter for variety.
No Bake Oreo Cheesecake Cups
Ingredients You’ll Need:
For the Crust:
- 20 Oreo cookies (about 24 total, reserving 4 whole for garnish)
- ¼ cup unsalted butter, melted
For the Cheesecake Filling:
- 8 oz (225g) cream cheese, softened
- 1 cup powdered sugar
- 1 tsp vanilla extract
- 1 ½ cups heavy whipping cream, cold
- 8 Oreo cookies, finely chopped or crushed (for folding into the filling)
For Topping (optional):
- Whipped cream
- Whole Oreo cookies and crushed Oreos for garnish
How Much Time Will You Need?
This recipe takes about 15 minutes to prepare, plus at least 4 hours to chill in the refrigerator for the cheesecake cups to set perfectly. You can also prepare them the night before for best results.
Step-by-Step Instructions:
1. Prepare the Oreo Crust:
Separate 24 Oreo cookies, setting aside 4 whole Oreos for garnish. Crush the remaining 20 Oreos finely in a food processor or place them in a zip-top bag and crush with a rolling pin. Mix the crushed Oreos with the melted butter until combined. Press about 2 tablespoons of this mixture into the bottom of each serving cup or jar, pressing firmly to create a compact crust layer. Set aside.
2. Make the Cheesecake Filling:
In a large bowl, beat the softened cream cheese until smooth. Add powdered sugar and vanilla extract, and continue beating until creamy and well combined. In a separate bowl, whip the cold heavy cream until stiff peaks form. Gently fold the whipped cream into the cream cheese mixture to create a fluffy filling.
3. Add Oreos and Assemble:
Fold finely chopped or crushed Oreos into the cheesecake mixture. Spoon or pipe half of the cheesecake filling over the prepared crust layers in each cup. Add a thin layer of crushed Oreos on top of the filling. Then, add the remaining cheesecake filling, smoothing the top.
4. Chill and Garnish:
Refrigerate the cups for at least 4 hours or overnight to let the cheesecake set. Before serving, add a dollop of whipped cream on top, garnish with half a whole Oreo cookie, and sprinkle with crushed Oreo crumbs.
Enjoy these creamy, crunchy, and delicious no bake Oreo cheesecake cups!
Can I Use Frozen Oreos for This Recipe?
Yes, you can use frozen Oreos, but let them thaw completely before crushing to ensure an even texture in the crust and filling.
How Long Can I Store No Bake Oreo Cheesecake Cups?
Store them in an airtight container in the refrigerator for up to 3 days. They taste best fresh but will stay creamy and delicious for a few days.
Can I Make These Cheesecake Cups Ahead of Time?
Absolutely! Prepare and assemble the cups a day ahead, then refrigerate overnight. This actually helps the cheesecake set better and enhances the flavors.
What Can I Use Instead of Heavy Whipping Cream?
If you don’t have heavy cream, you can try whipping coconut cream as a dairy-free alternative, or use a ready-made whipped topping, although the texture may vary slightly.