
Spider-Man cake turns a simple layer cake into the kind of centerpiece that gets people grinning before the first slice is cut. The best versions keep the crumb soft and the colors bold, but they still taste like a proper homemade cake instead of a dyed box mix in disguise. This one does that balance well: tender layers, vanilla-rich batter, and buttercream that spreads smoothly without dragging crumbs everywhere.
The trick is treating the red and blue batters like separate little cakes instead of dumping color into one bowl and hoping for the best. Gel coloring gives you strong color without thinning the batter, and buttermilk keeps the crumb moist and fine. Baking the layers until the centers spring back and a toothpick comes out clean gives you a cake that stays sturdy enough to stack, but not dry.
Below, I’ve included the small timing and frosting details that matter most, plus the storage note that helps if you want to bake the layers ahead and finish the cake later.
The layers baked up even and stayed moist, and the buttercream went on clean after I chilled them like you suggested. My kids thought the red and blue slices were the coolest thing ever.
Save this Spider-Man cake for the next birthday party or superhero movie night — those red and blue layers look sharp in every slice.
The One Thing That Keeps the Colors Bright Instead of Muddy
Spider-Man cake looks simple until the colors start blending into a grayish mess. That happens when the batter is overmixed after the food coloring goes in or when the colored batter gets folded too aggressively with the dry ingredients. Keep the red and blue batters separate until the flour is almost fully incorporated, then stop as soon as the batter looks smooth. The less you work it, the cleaner the color stays and the more tender the crumb stays too.
The other thing that matters is using gel food coloring, not liquid. Liquid color adds extra moisture and can thin the batter enough to change the bake. Gel gives you saturated red and blue without messing with the structure, so the layers hold their shape and the frosting sits neatly on top.
What Each Ingredient Is Actually Doing in This Cake
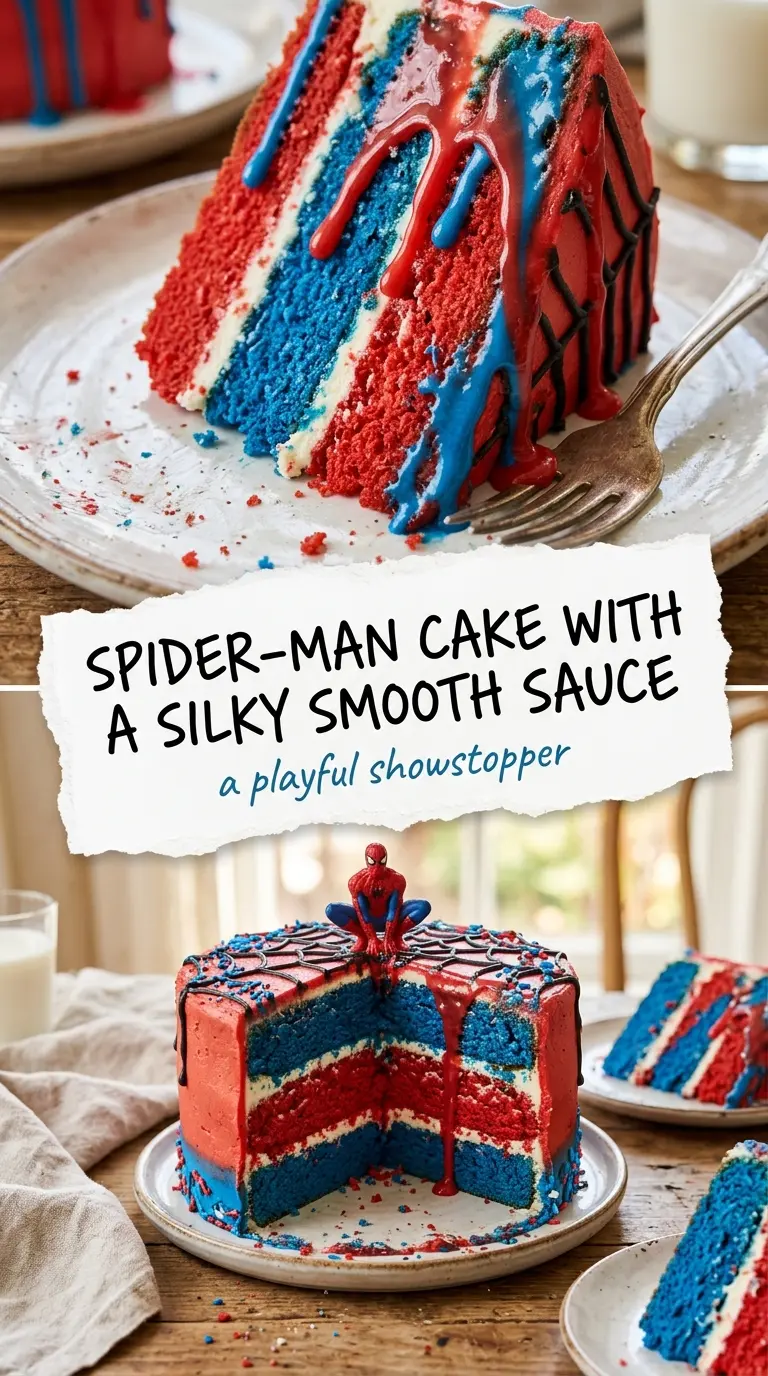
- Flour — All-purpose flour gives the cake enough structure to stack without turning heavy. Cake flour will make it a touch softer if that’s what you have, but the layers may be a little more delicate when you frost them.
- Butter — Softened butter is what gives the cake its rich, even crumb and helps the batter trap air when you cream it with sugar. Don’t use melted butter here; you’ll lose that lift and the texture turns denser.
- Buttermilk — This keeps the cake moist and adds a slight tang that balances the sweet buttercream. If you’re out of it, mix 1 cup milk with 1 tablespoon lemon juice or vinegar and let it sit for 5 minutes before using.
- Gel food coloring — This is the ingredient that makes the theme work. It gives strong red and blue color without thinning the batter, which is why the layers bake up with clean, vivid slices instead of streaky ones.
- Buttercream frosting — A smooth buttercream covers the cake cleanly and gives you enough body to chill and slice well. If your frosting is too loose, beat in a little more powdered sugar until it holds soft peaks on the spatula.
Building the Layers Without Losing the Color
Creaming the Base
Start by beating the butter and sugar until the mixture looks pale and fluffy, almost like whipped frosting. That air is part of what gives the cake lift. If the butter is too cold, the mixture will look grainy and won’t lighten properly, so let it soften until it dents easily under your finger.
Dividing and Tinting
Split the batter evenly before adding color, then tint one portion red and the other blue with gel coloring. Add the color a little at a time so you can stop when the shade looks bold enough. Stir just until the color is even; if you keep mixing after that, the batter can tighten up and the colors can start looking dull.
Baking to a Clean Center
Pour each colored batter into its own pan and bake until the centers spring back when touched lightly and a toothpick comes out clean. Pull them at the right moment, not when the tops look dark. Overbaking dries out the edges first, which makes stacking harder and leaves you with a crumb that breaks under the frosting.
Cooling and Frosting
Let the layers cool completely before you even think about frosting. Warm cake melts buttercream and slides around on the plate, which turns a neat layer cake into a shifting mess. Chilling the layers for a short time before frosting makes the crumbs firmer and the whole cake easier to finish with clean edges.
Three Ways to Make This Cake Fit the Party
Gluten-Free Spider-Man Cake
Use a good 1:1 gluten-free flour blend that includes xanthan gum. The cake will be slightly more tender, so let the layers cool fully before moving them, and chill them before frosting so they don’t crumble under the spatula.
Dairy-Free Version
Swap the butter for a plant-based baking stick and use a dairy-free buttermilk substitute made with unsweetened non-dairy milk and lemon juice. The crumb stays soft, though the frosting may set a little differently depending on the butter alternative you choose.
Cupcake Version
Turn the batter into cupcakes for easier serving. Fill the liners about two-thirds full and start checking them a few minutes early, since they bake faster than full cake layers and can dry out if you leave them too long.
Storage and Reheating
- Refrigerator: Store covered for up to 4 days. The frosting firms up in the fridge, so the cake slices cleaner the next day.
- Freezer: The unfrosted layers freeze well for up to 2 months. Wrap each layer tightly in plastic and then foil so the surface doesn’t dry out.
- Reheating: Let slices sit at room temperature for 20 to 30 minutes before serving. Microwaving softens the frosting too much and can make the crumb greasy instead of tender.
The Things That Trip People Up With This Cake
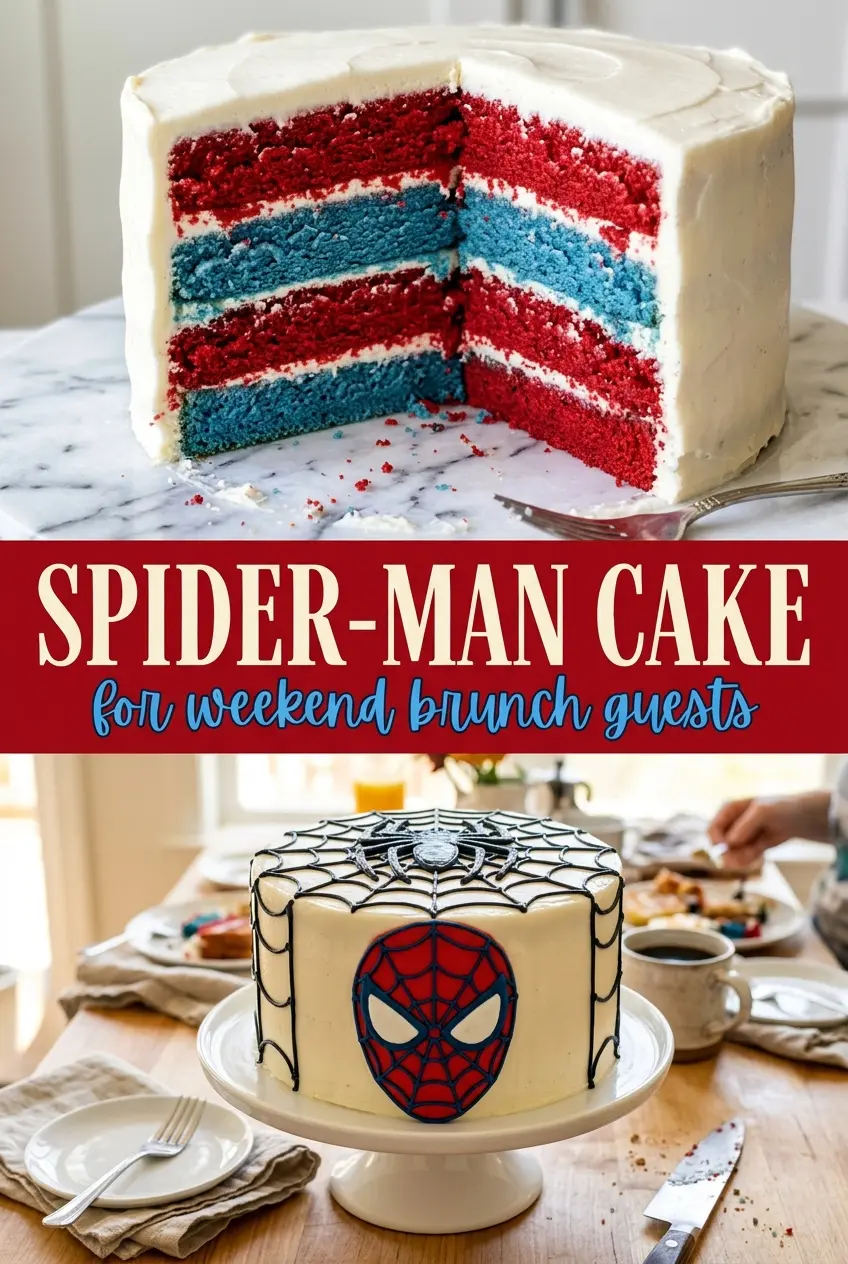
Spider-Man Cake
Ingredients
Equipment
Method
- Preheat oven to 350°F and grease two cake pans. Set them aside so they’re ready for batter as soon as it’s mixed.
- Cream butter and sugar until fluffy, then beat in eggs and vanilla. Mix just until the batter looks smooth and evenly combined.
- Divide batter in half; tint one half red and one half blue with gel food coloring. Stir each half until the color is uniform.
- Fold in flour, baking powder, and buttermilk into the red batter separately. Stop mixing when no dry streaks remain for a tender crumb.
- Fold in flour, baking powder, and buttermilk into the blue batter separately. Keep mixing gentle so both batters bake up moist.
- Pour red and blue batter into the prepared pans. Bake 25-30 minutes until a toothpick comes out clean.
- Cool completely, then layer and frost with buttercream frosting. For clean, sharp slices, chill the cake layers before frosting.