
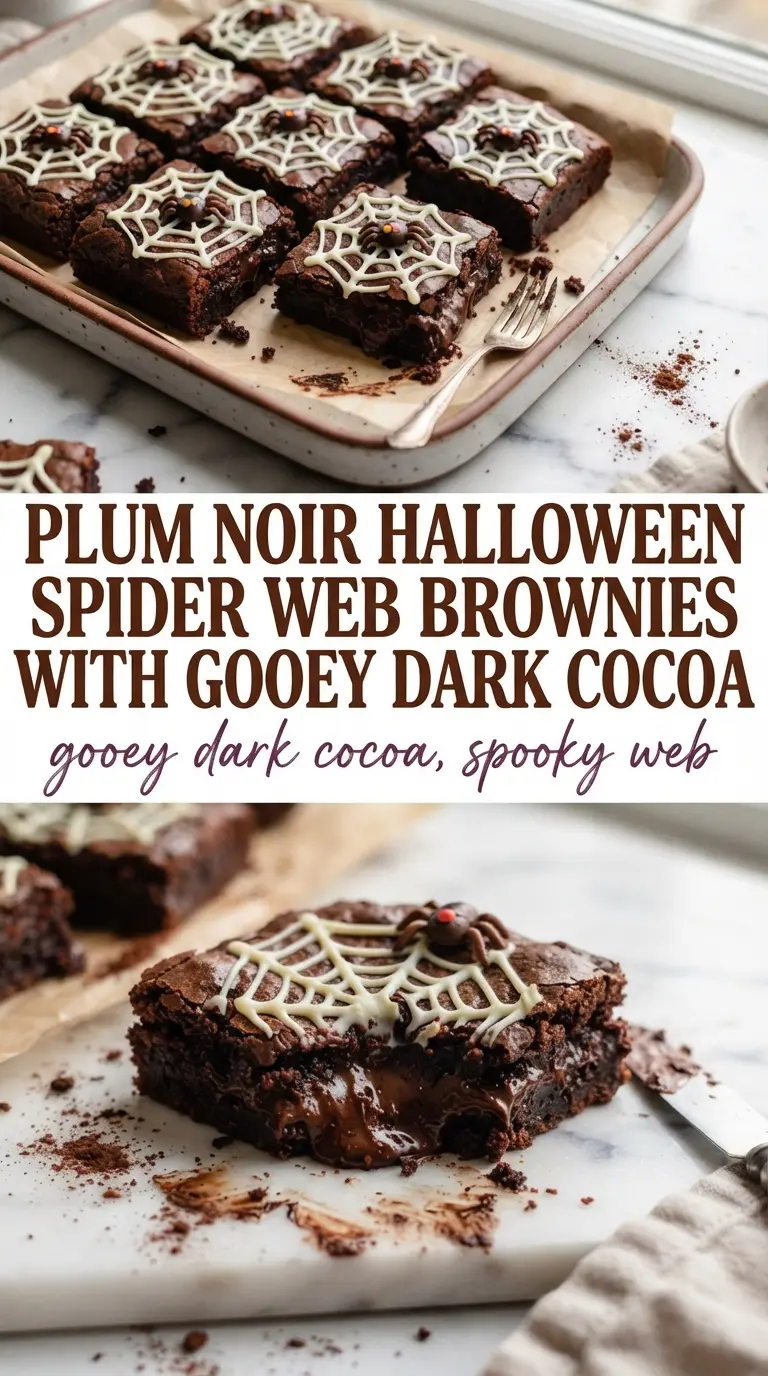
Fudgy brownies with a sharp dark cocoa edge and that crisp white chocolate web on top get attention fast, but the best part is how dependable they are. The base bakes up dense and chewy instead of cakey, so each square cuts cleanly and holds the design without crumbling into a mess on the plate.
The brownie layer starts with melted butter, which gives you a richer chew than creaming softened butter ever does. Dark cocoa keeps the flavor deep and not overly sweet, which matters because the white chocolate web brings its own sweetness. The design works best on fully cooled brownies; if the top is even a little warm, the chocolate lines blur and the web turns muddy instead of sharp.
Below, I’ve included the timing detail that keeps the brownies fudgy, the easiest way to get an even web pattern, and a few swaps if you want to use what you already have in the pantry.
The brownies came out thick and fudgy, and the white chocolate web set up cleanly once they were fully cool. My kids thought the decorating part was the best thing ever, and the pan disappeared by the next day.
Save these Halloween Spider Web Brownies for the night you want a fudgy pan dessert with a web design that comes together in minutes.
The Secret to a Web That Stays Sharp on Fudgy Brownies
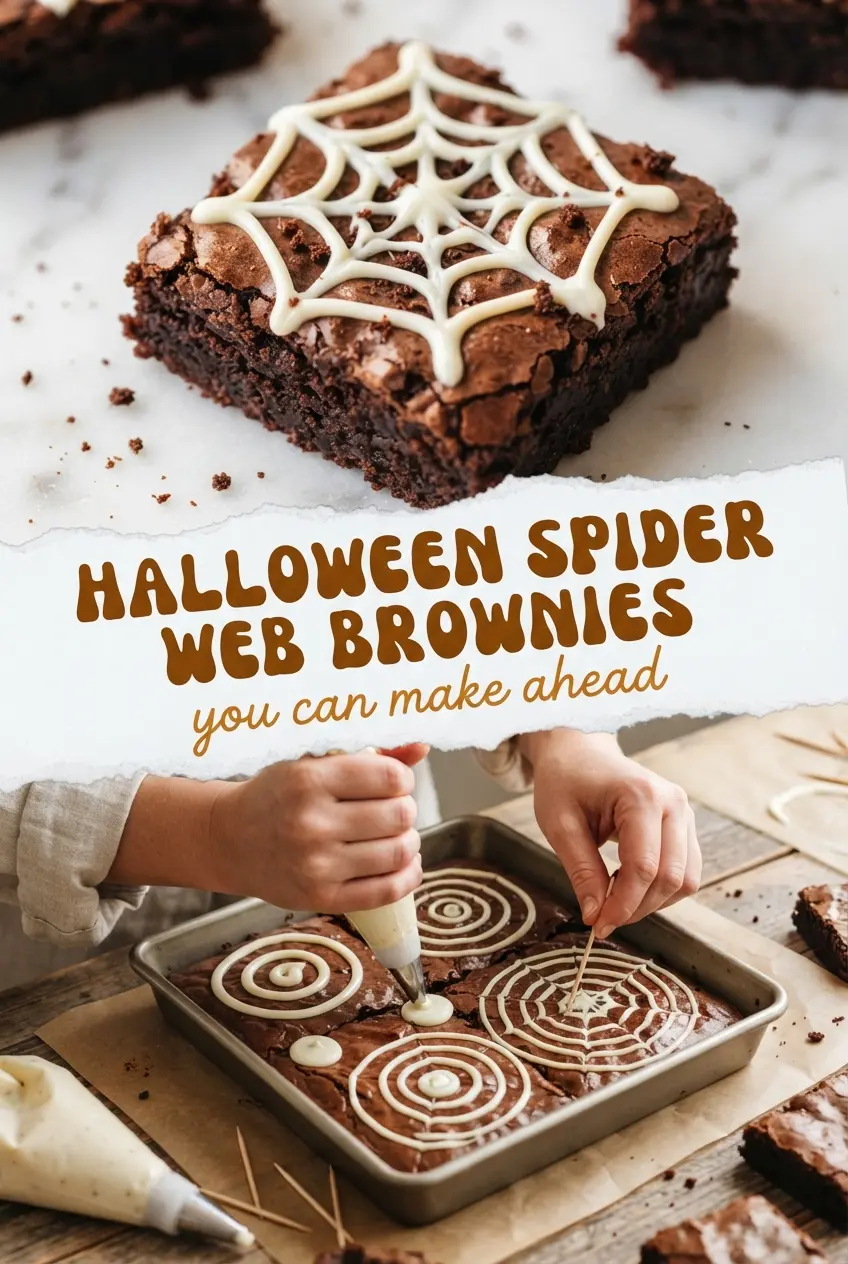
The web design only looks clean when the brownie surface is fully cooled and set. If you try to pipe on warm brownies, the white chocolate sinks into the top and leaves pale streaks instead of crisp rings. That’s the mistake that turns a cute pan dessert into a blotchy one.
These brownies also need the right texture on top. A shiny, slightly crackly crust gives the chocolate something to sit on, while an underbaked center stays fudgy beneath it. Pull them when the center is set but still soft; overbaking dries out the edges and makes the squares crumble when you drag the toothpick through the chocolate.
What the Cocoa, Butter, and White Chocolate Are Each Doing Here
- Butter — Melted butter gives these brownies their dense, chewy texture. You can use salted or unsalted, but if you use salted butter, keep the added salt at the lower end so the cocoa stays front and center.
- Dark cocoa powder — This is what makes the brownies taste deep and balanced instead of one-note sweet. Dutch-process or dark cocoa gives the best color and flavor here; regular cocoa works in a pinch, but the brownies will taste lighter and the web design won’t pop as dramatically.
- White chocolate chips — These are for the web, so quality matters more than people think. Chips that melt smoothly will give you clean lines; if yours seize up or stay grainy, stir in a teaspoon of neutral oil and warm them gently until fluid.
- Vanilla — It doesn’t make the brownies taste like vanilla. It rounds out the cocoa and keeps the flavor from reading flat.
- Flour — Just enough to hold everything together without turning the brownies cakey. If you pack in too much, the middle bakes up dry and the web topping feels out of place on a less fudgy base.
Building the Brownie Base Before the Web Goes On
Mixing the Batter Without Overworking It
Whisk the melted butter, sugar, eggs, and vanilla until the mixture looks glossy and a little thick. That glossy look matters because it helps create the thin crackly top that makes these brownies look polished. Once the flour, cocoa, and salt go in, stir just until no dry streaks remain. If you keep mixing after that, the batter tightens up and the brownies bake heavier than they should.
Knowing When the Pan Is Done
Spread the batter in an even layer and bake at 350°F until the center is set and a toothpick comes out with moist crumbs, not wet batter. You want the middle to look slightly soft when you pull the pan, because brownies keep setting as they cool. If the toothpick comes out clean, you’ve gone a touch too far for a truly fudgy result.
Cooling Before the Decoration
Let the brownies cool completely in the pan before you touch the white chocolate. Not warm, not mostly cool, completely cool. This is the part that decides whether the web sits neatly on top or melts into the surface. If you’re impatient, put the pan in a cool spot and wait it out; decorating too early is the fastest way to lose the design.
Three Ways to Make These Halloween Brownies Work for Your Kitchen
Gluten-Free Brownies That Still Cut Cleanly
Use a 1:1 gluten-free flour blend in place of the all-purpose flour. The brownies will still be fudgy, but the top may be a little less crackly, so let them cool fully before slicing or decorating. The web design still works the same once the surface is set.
Dairy-Free Version With the Same Dense Bite
Swap the butter for a good plant-based butter that melts cleanly, then use dairy-free white chocolate for the web. The texture stays close to the original if you pick a fat-rich substitute rather than a watery one. Expect the flavor to be a little less rich, but the brownies will still slice well.
Extra Spooky Halloween Finish
If you want a stronger contrast, dust the cooled brownies with a light veil of cocoa before piping the web. It darkens the background just enough to make the white chocolate pattern stand out more. Keep the dusting light or you’ll hide the shiny top that makes these brownies look polished.
Storage and Reheating
- Refrigerator: Store in an airtight container for up to 4 days. The brownies firm up a little in the fridge, which actually helps the web hold its shape.
- Freezer: They freeze well without the web becoming messy. Wrap individual squares tightly and freeze for up to 2 months, then thaw at room temperature before serving.
- Reheating: If you want a softer brownie, let a square sit at room temperature for 20 to 30 minutes. Don’t microwave decorated brownies for long or the white chocolate web will smear and lose its clean lines.
Answers to the Questions Worth Asking
Halloween Spider Web Brownies
Ingredients
Equipment
Method
- Preheat the oven to 350°F and line a 9x13-inch pan.
- Melt the butter, then whisk in the sugar, eggs, and vanilla until smooth.
- Stir in the flour, dark cocoa powder, and salt until no dry streaks remain, then spread into the pan.
- Bake at 350°F for 30 minutes, until the center looks set and a toothpick comes out with moist crumbs.
- Cool the brownies completely before decorating, so the white chocolate doesn’t melt or smear.
- Draw concentric white chocolate circles over the top, then drag a toothpick outward to make a spider web pattern.