
Puff pastry chicken pot pie lands on the table with the kind of contrast that makes people pause for a second before digging in: a shatter-crisp top, a silky chicken filling, and just enough richness to feel special without turning heavy. The best versions hold their shape when sliced, but the filling still flows slightly around the chicken and vegetables instead of setting up dense or gluey. That balance is what keeps this dish in regular rotation.
The trick is treating the filling like a sauce first and a pie second. The flour needs to cook briefly with the butter and vegetables so it loses that raw taste, and the broth plus cream should thicken before the chicken goes in. If the filling is hot when it hits the pastry, the bottom layer softens before it ever has a chance to puff, which is why cooling it a bit pays off.
Below, I walk through the part that matters most: keeping the crust flaky while the filling stays creamy. There’s also a storage note that helps if you want to assemble ahead, which is one of the nicest things about this pie for a busy table.
The filling set up creamy but not runny, and the puff pastry stayed crisp all the way around the edges. I followed the cooling step and it made a huge difference.
Save this puff pastry chicken pot pie for the nights when you want a golden crust and a creamy filling without babysitting the oven.
The Reason Puff Pastry Stays Crisp While the Filling Turns Creamy
Puff pastry and a wet filling are natural enemies if you rush them together. The pastry needs hot oven air to lift, and that lift disappears when the bottom layer gets soaked by steaming-hot sauce. That’s why the filling should be thick enough to mound on a spoon before it goes into the dish, not pour like soup.
The other mistake is skipping the brief cook on the flour. Raw flour tastes flat and can leave the sauce pasty instead of silky. Cooking it for a minute or two in butter with the onions and carrots gives the sauce a cleaner finish and helps it cling to the chicken and peas instead of sliding around the pan.
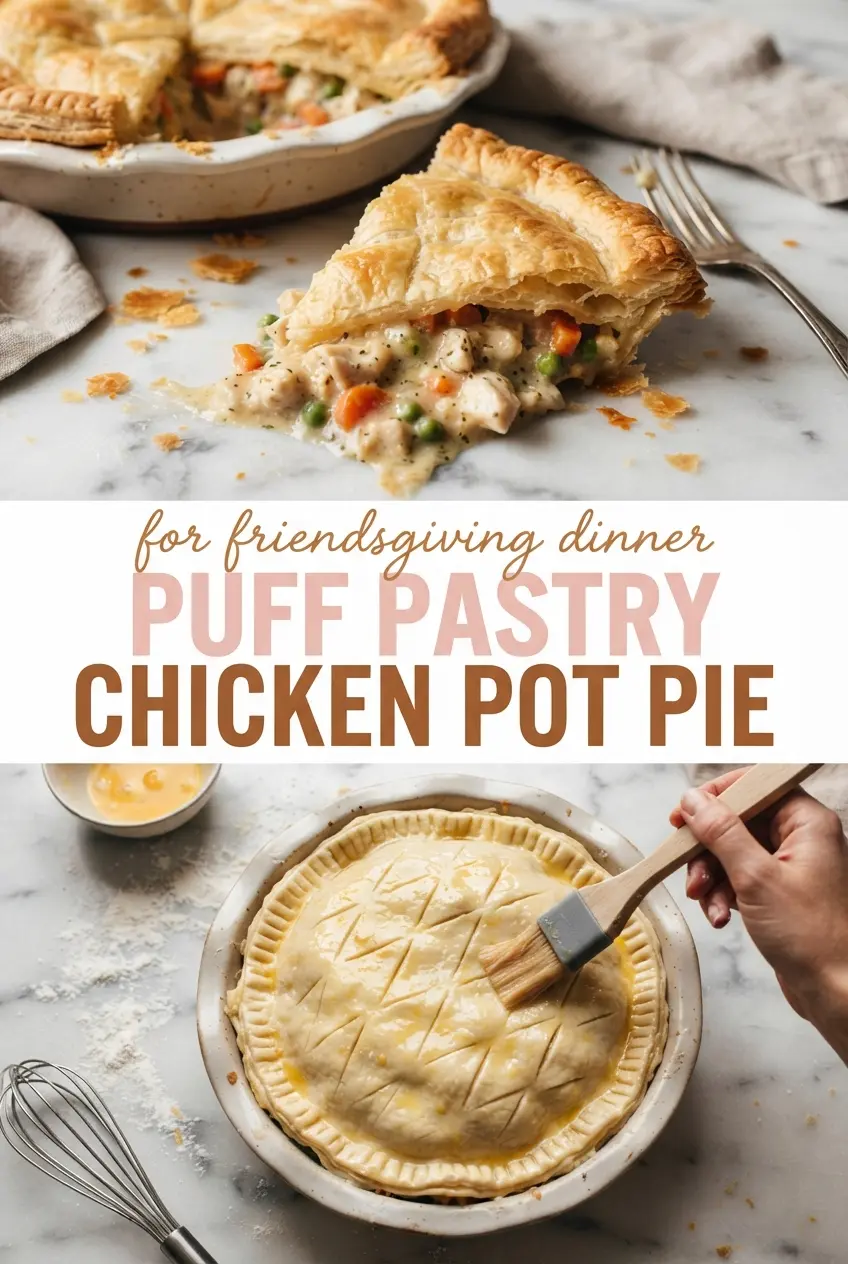
The egg wash matters too. It gives the top pastry that deep golden color and helps seal the edges so the filling stays where it belongs while the crust puffs into layers.
What the Filling Ingredients Are Doing Here
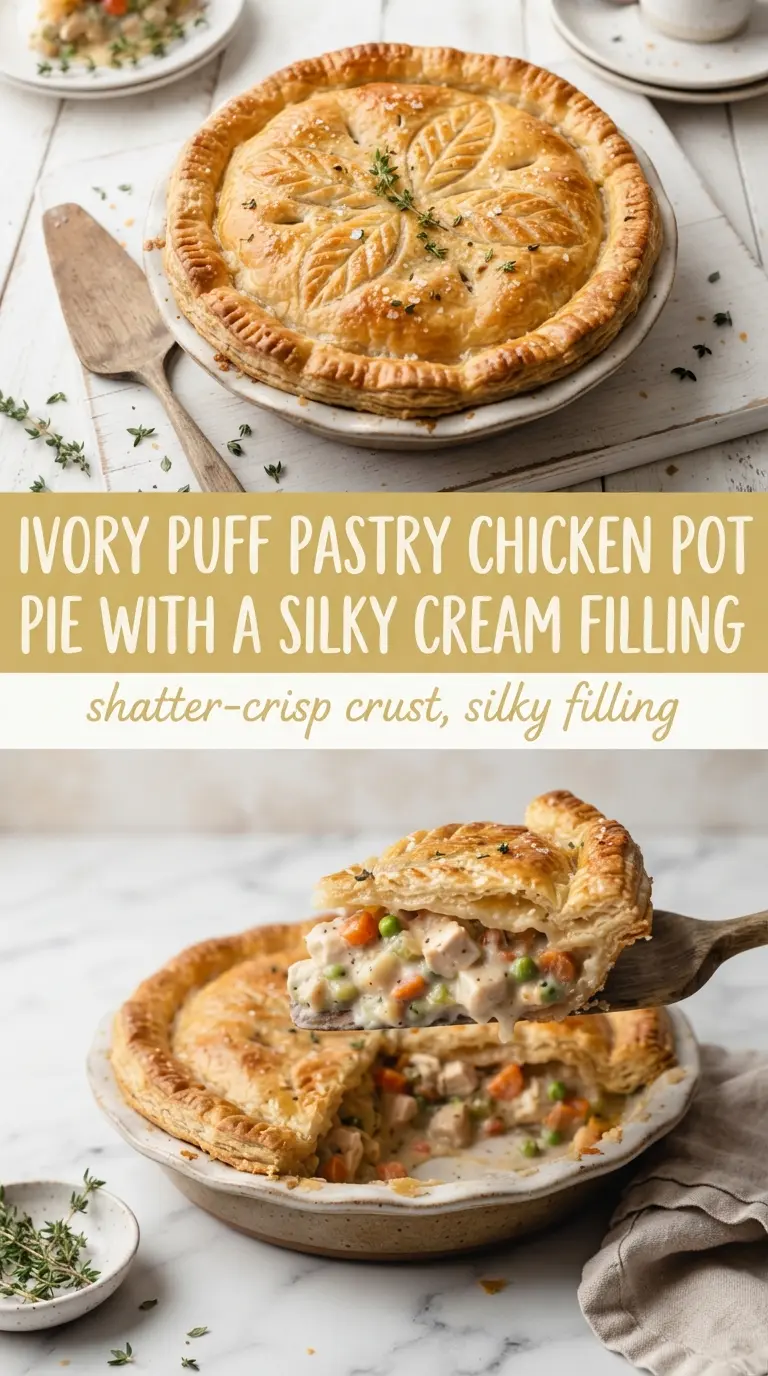
- Puff pastry — This is the whole point of the texture. Store-bought pastry works well here because the filling carries the flavor, and frozen pastry is easier to handle if you keep it cold until the last second. If it warms up and turns sticky, it won’t lift as high.
- Butter, onion, and carrots — The butter carries the vegetables and gives the filling a round, savory base. Dice the carrots small so they soften in time; big chunks stay firm and throw off the spoonable texture.
- Flour — This thickens the sauce and keeps the filling from leaking through the bottom crust. All-purpose flour is the right choice here. If you use less, the filling can turn loose; if you use more, it starts to eat like paste.
- Chicken broth and cream — The broth gives the pie its savory backbone, while the cream softens the edges and makes the sauce feel rich. You can use half-and-half in a pinch, but the sauce will be a little lighter and less plush.
- Shredded chicken and peas — Cooked chicken is the best shortcut in this dish because it goes straight into the thickened sauce without drying out. Frozen peas are perfect as-is; they hold their shape and add a fresh pop without any prep.
- Egg — A beaten egg brushed over the top gives you shine, color, and a better seal around the edges. Skip it and the pastry still bakes, but it won’t brown as evenly.
Building the Pie So the Bottom Doesn’t Go Soggy
Line the Dish and Keep the Pastry Cold
Fit the first pastry sheet into the pie dish and press it in gently without stretching it. Stretching makes it snap back in the oven, which can pull the sides thin. If the pastry feels soft at all, chill the dish for a few minutes before moving on. Cold pastry equals better layers.
Cook the Vegetables Before the Sauce Starts
Sauté the onion and carrots in butter until the onion turns translucent and the carrots lose their raw edge. This does two jobs at once: it builds flavor and gives the vegetables a head start so they’re tender by the time the pie finishes baking. If the pan looks dry, the butter wasn’t enough; if the vegetables are browning hard, the heat is too high.
Thicken the Filling Until It Mounds
Whisk in the flour and let it cook briefly before adding the broth and cream. The sauce should turn glossy and thick enough to coat a spoon, not race off it. Stir in the chicken and peas after the sauce has thickened so the meat stays tender and the peas don’t collapse. If the filling still looks loose, give it another minute on the stove before it goes into the crust.
Top, Seal, and Bake Hard Enough to Set the Layers
Pour in the filling once it has cooled a bit, add the second pastry sheet, and crimp the edges so steam doesn’t blast the seal open. Cut a few vents in the top so the pressure has somewhere to go. Brush the top with egg and bake at 400°F until the crust is deeply golden and the filling is bubbling at the edges. If the top is browning too fast, cover loosely with foil for the last stretch.
Three Ways to Adapt This Pie Without Losing the Good Part
Dairy-Free Version With a Still-Creamy Sauce
Swap the butter for a neutral dairy-free butter and use unsweetened oat cream or a full-fat dairy-free cooking cream in place of the cream. The filling won’t taste quite as lush as the original, but it still sets up well and keeps the sauce from feeling thin.
Use Turkey Instead of Chicken
Leftover turkey works in the same amount and brings a slightly deeper roasted flavor. It’s a smart move after a holiday meal, but slice or shred it before adding it so it heats through quickly without drying out in the oven.
Gluten-Free Adjustment That Still Feels Like Pot Pie
Use a gluten-free puff pastry if you can find one, and thicken the filling with a cup-for-cup gluten-free flour blend instead of regular flour. The filling texture stays close to the original, but gluten-free pastry usually browns a little faster, so watch the top during the last 10 minutes.
Storage and Reheating
- Refrigerator: Store covered for up to 3 days. The crust softens a bit, but the filling stays creamy.
- Freezer: Freeze the baked pie in portions or wrap the unbaked, assembled pie tightly and freeze for up to 2 months. Bake from frozen with extra time, or thaw overnight for a more even crust.
- Reheating: Reheat in a 350°F oven until the center is hot and the crust firms back up. The microwave will make the pastry limp, which is the one thing you’re trying to avoid.
Answers to the Questions Worth Asking
Puff Pastry Chicken Pot Pie
Ingredients
Equipment
Method
- Line a pie dish with one puff pastry sheet, pressing it into the dish edges so it holds shape. Set aside while you cook the filling.
- Sauté the butter, yellow onion, and carrots in a cast iron skillet over medium heat until the vegetables soften, about 5 minutes. Stir occasionally so nothing browns too fast.
- Whisk in the flour and cook for 1 minute to remove the raw taste. Keep stirring until the mixture looks slightly paste-like.
- Whisk in the chicken broth and then whisk in the cream until smooth, simmering just until thickened, 3 to 5 minutes. The sauce should coat the back of a spoon.
- Stir in the shredded chicken and frozen peas, heating through until hot, about 2 minutes. Turn off the heat and let the filling cool before assembling.
- Spoon the cooled chicken filling into the pastry-lined pie dish and spread it into an even layer. Leave a small border so the top crust can seal.
- Top with the second puff pastry sheet, trimming any overhang if needed. Press the edges to seal firmly.
- Brush the top pastry with the beaten egg to help it brown. Aim for full coverage for a deep golden color.
- Bake at 400°F for 35 minutes, until the crust is puffed and deeply golden. Let it rest for 5 minutes before slicing so the filling sets.