
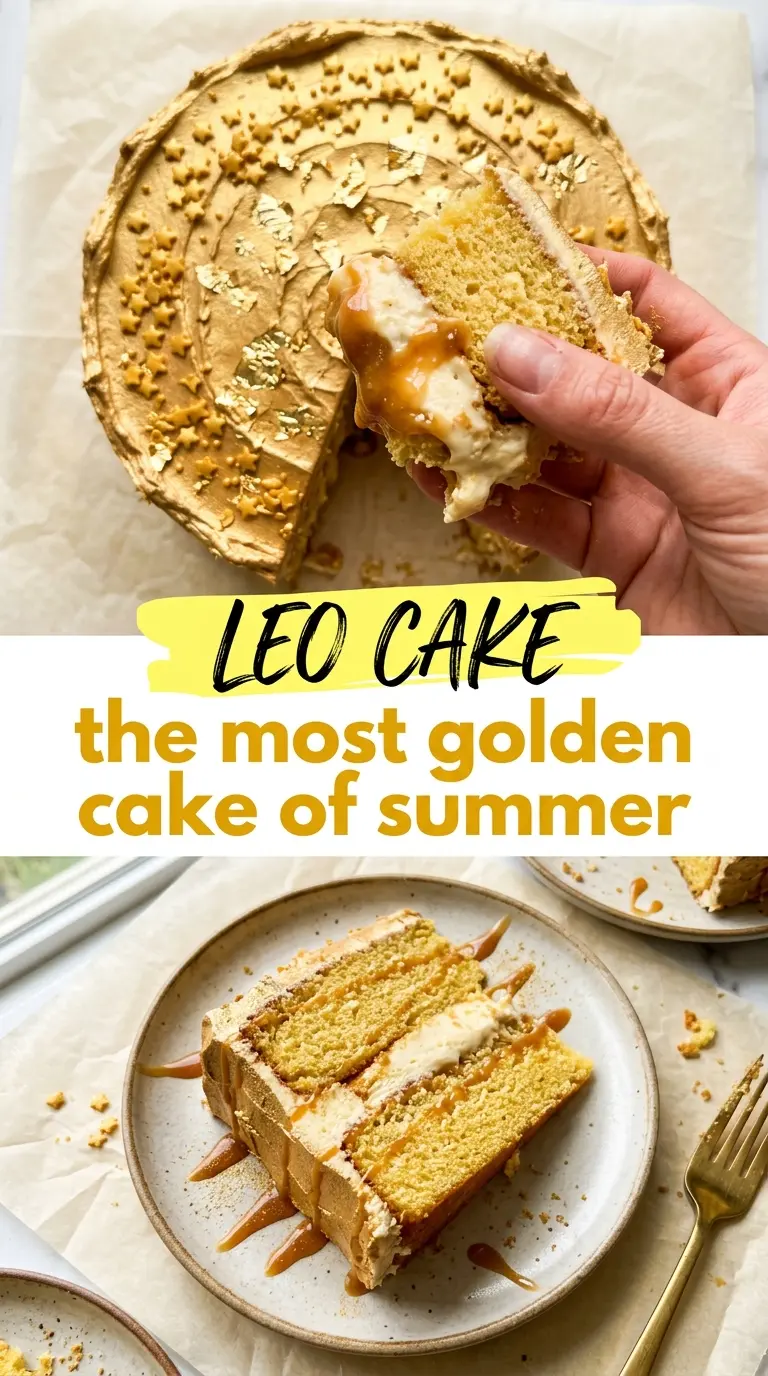
Golden vanilla layers and a sunlit sweep of buttercream make this Leo cake feel bold before you even add the stars. The texture is part of the appeal: soft, buttery sponge under a slightly rustic exterior of gold-tinted frosting that catches the light instead of trying to look perfectly smooth. It has the kind of celebratory look that feels intentional, not fussy, and the flavor stays classic enough that people keep coming back for a second slice.
What makes this version work is the contrast between a tender buttermilk cake and a frosting finish that’s built for texture. The buttermilk keeps the crumb soft without turning it heavy, and the palette-knife strokes on the outside give you those editorial ridges that hold the gold luster dust beautifully. A little orange and gold food coloring warms the buttercream so it reads as rich metallic gold instead of flat yellow.
Below, I’ve included the exact finishing trick that gives the cake its glow, plus a few ways to adapt the decoration if you want the Leo theme to feel more subtle or more dramatic.
The cake layers stayed soft for days, and the textured frosting held the gold dust without smearing. I used the constellation detail for my daughter’s birthday and everyone thought it came from a bakery.
Save this Leo Cake for a gold-flecked birthday centerpiece with buttery vanilla layers and dramatic starry frosting.
The Reason the Gold Finish Looks Expensive Instead of Flat
The difference is in the order of operations. The cake gets fully cooled before any frosting goes on, because even a little warmth softens the buttercream and turns those knife marks into a blur. Once the outside is coated, the gold luster dust goes on dry. If you mix it into the frosting, the color dulls and the shine disappears into the buttercream instead of sitting on top of it.
Palette-knife texture matters here more than perfect smoothness. Those ridges catch light, which is what makes the gold effect read as metallic. If you want the cake to look polished but still handmade, stop chasing a glass-smooth finish and lean into the texture.
What Each Ingredient Is Actually Doing in This Dish
- Butter — Use real butter for the cake and the frosting. Margarine won’t give you the same clean, rich base flavor or the same firm frosting texture for shaping.
- Buttermilk — This keeps the crumb tender and gives the cake enough acidity to stay soft after baking. If you don’t have it, stir 1 tablespoon lemon juice or vinegar into 1 cup milk and let it sit for 5 minutes.
- Food coloring — Gel coloring gives you richer gold and ivory tones without thinning the buttercream. Liquid coloring can work in a pinch, but you’ll need more of it, which makes the frosting softer.
- Luster dust — Dry application gives the strongest metallic finish. If you brush it on, use a soft dry brush and light pressure so you don’t disturb the textured frosting underneath.
What Matters Most When You Build the Layers and Finish
Mixing the Batter Without Toughening It
Cream the butter and sugar until the mixture looks pale and fluffy, not greasy. That step traps air and gives the cake lift, so rushing through it leaves you with a denser crumb. Add the eggs one at a time and stop as soon as the flour disappears, because overmixing after that point develops gluten and makes the layers spring back less cleanly when sliced.
Baking the Golden Layers Evenly
Divide the batter between the pans as evenly as you can and smooth the tops lightly so the centers don’t dome too aggressively. Bake until the tops spring back and a toothpick comes out with a few moist crumbs, not wet batter. If the layers are overbaked, they’ll still taste fine, but the crumb gets dry enough to fight the buttercream instead of supporting it.
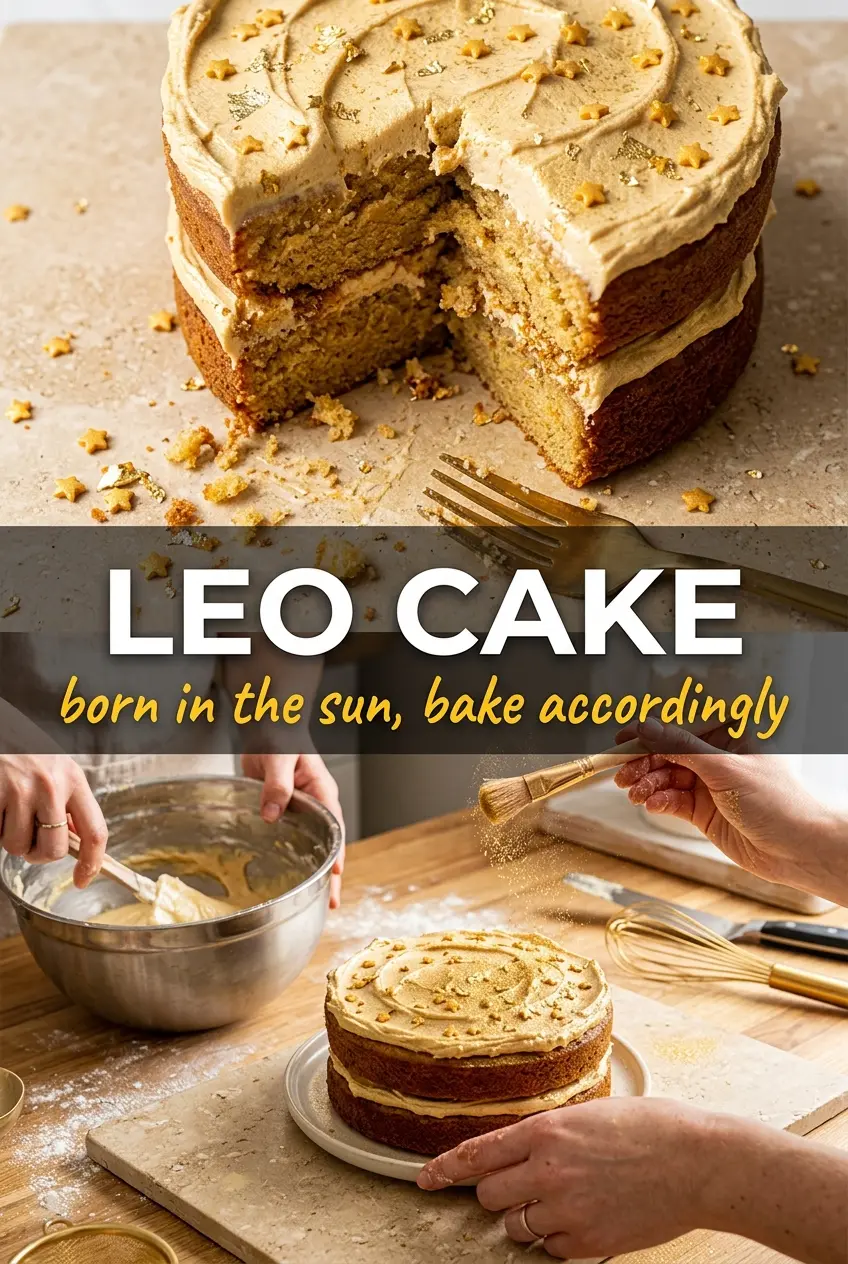
Creating the Textured Gold Exterior
Once the layers are completely cool, stack them with a thin, even layer of buttercream between each one. Spread the outside frosting with the edge of a palette knife in short, sweeping strokes instead of trying to smooth it flat. That ridged surface is what gives the gold dust something to cling to, and it also makes the cake look more dimensional from every angle.
Adding the Shine and Leo Details
Dust the cake with gold luster dust after the frosting is set enough to hold its shape. Work from the top down so the finish looks natural rather than patchy. Add star sprinkles and gold leaf at the end, then pipe or write “Leo” only once the surface is stable, because dragging a hand across soft frosting ruins the clean metallic effect.
How to Adapt This Leo Cake for Different Styles and Needs
Make It More Subtle and Elegant
Use the gold frosting on the outside, then keep the decorations restrained with just a few star sprinkles and a small script “Leo” message. You’ll still get the zodiac theme, but the cake reads more refined than playful.
Go Full Celestial
Add the constellation detail in edible gold leaf or piped buttercream dots connected with thin lines. This version works best on a smooth, well-chilled cake because the design needs a firm surface to stay crisp.
Dairy-Free Version
Swap in a plant-based butter and use unsweetened non-dairy milk with 1 tablespoon vinegar in place of the buttermilk. The cake will still bake up tender, though the buttercream will be a little softer, so chill it briefly before adding the gold dust.
Make-Ahead Storage
Storage and Reheating
- Refrigerator: Store the finished cake covered for up to 4 days. The buttercream firms up in the fridge, so the texture will be a little denser when cold.
- Freezer: Freeze unfrosted layers tightly wrapped for up to 2 months. Fully decorated cake doesn’t freeze well because the gold dust and decorative accents can smear.
- Reheating: Bring slices to room temperature for 30 to 45 minutes before serving. Don’t microwave the frosted cake, or the buttercream softens unevenly and loses the textured finish.
Questions I Get Asked About This Leo Cake
Leo Cake
Ingredients
Equipment
Method
- Heat oven to 350°F and prepare two 9-inch pans (line bottoms if desired). In a bowl, mix flour, baking powder, and salt.
- In a stand mixer, cream butter and sugar until light and fluffy, then add eggs one at a time. Mix in vanilla and alternate adding buttermilk and the dry ingredients just until combined.
- Divide batter evenly between the two 9-inch pans and bake until set and a toothpick comes out clean, about 25-30 minutes at 350°F. Cool layers completely before frosting.
- Warm the buttercream slightly so it spreads smoothly, then tint with orange and gold food coloring to create warm gold and ivory tones. Stir until the color is even.
- Place one cake layer on a serving plate and spread a layer of vanilla buttercream on top. Add the second layer and press gently to level the stack.
- Frost the outside of the stacked cake with gold-tinted buttercream, using a textured palette knife pattern for an editorial surface. Chill briefly if the frosting feels too soft, 10-15 minutes.
- Dust the top and sides with gold luster dust while the cake is cold so the sheen stays bright and metallic. Add star sprinkles and scatter gold leaf accents if using.
- Write “Leo” in script on top using an icing/guide or add a Leo constellation detail if desired. Let set for 10 minutes before slicing.