
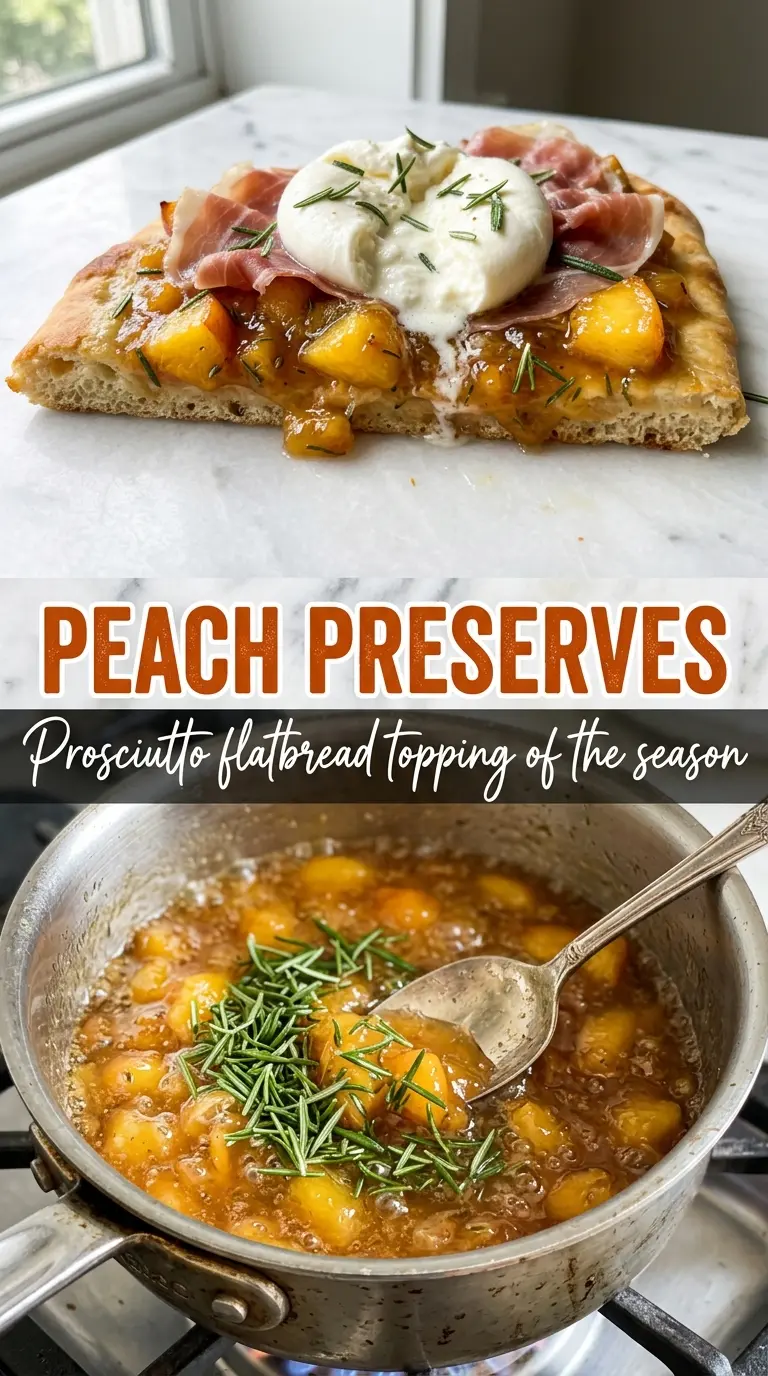
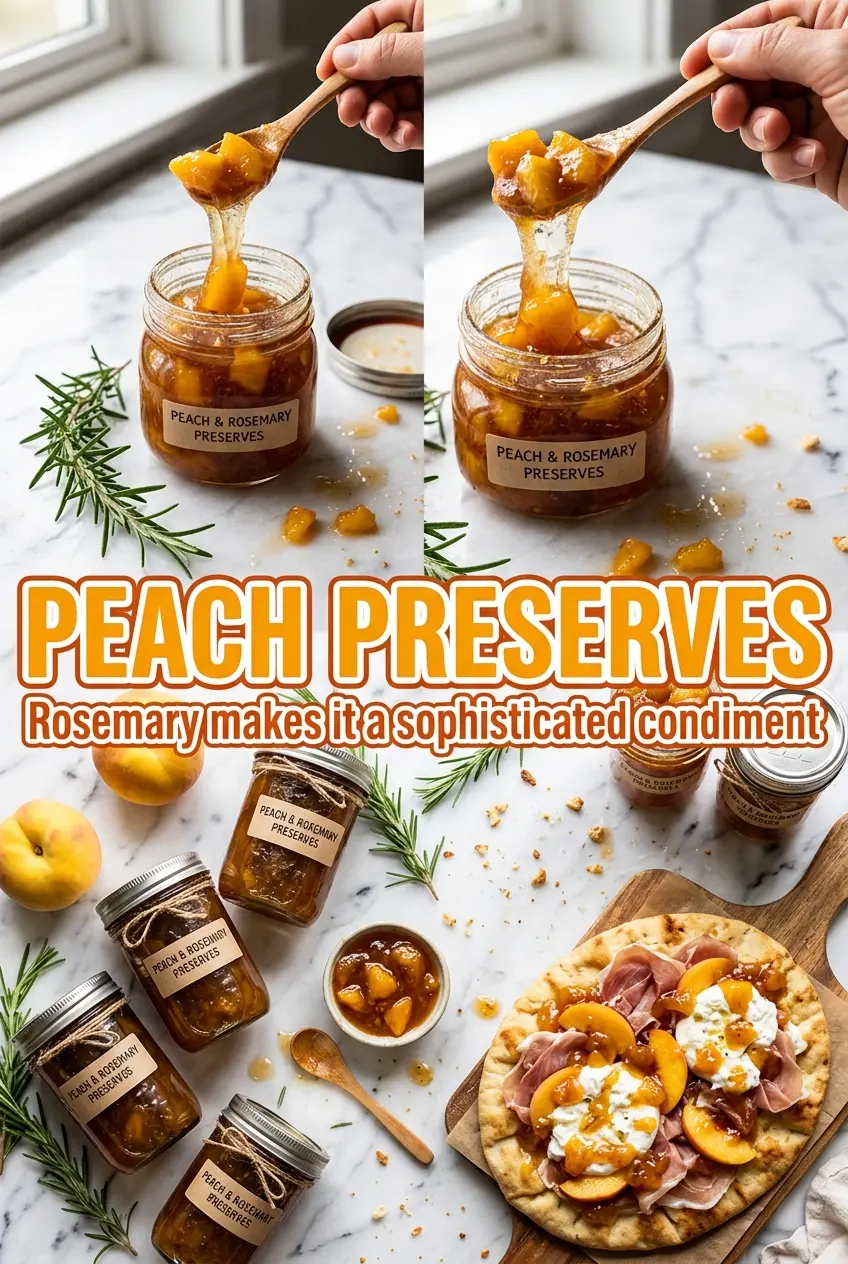
Amber peach preserves with soft fruit pieces and a glossy, spoon-coating syrup earn their place on the shelf fast. This version keeps the peaches in generous chunks instead of cooking them down into baby food, and the rosemary added near the end gives the whole jar a piney lift that keeps the sweetness from turning flat. The result tastes like fresh peaches with a sharper edge, the kind of preserve that works just as well beside a block of cheese as it does on toast.
The macerating step matters more than most people think. Letting the peaches sit with sugar and lemon juice draws out the juice first, which gives you a better syrup and helps the fruit cook evenly without scorching. A heavy pot also matters here, because preserves go from simmering politely to catching on the bottom in a hurry once they start thickening.
Below, you’ll find the exact cue I use to know when the set is close, plus a few ways to use these preserves beyond breakfast. They’re excellent spooned over yogurt, but they’re even better with savory food.
The preserves set up with a perfect spoonable texture, and the rosemary at the end made them taste much fancier than the effort I put in. I used them on a pork tenderloin and then again on biscuits the next morning.
Save these rosemary peach preserves for the jar that turns toast, cheese boards, and pork into something special.
The Trick to Keeps Peach Preserves Chunky Instead of Turned to Jam
The mistake that turns peach preserves into a loose, overcooked spread is rushing the boil and stirring too aggressively once the fruit softens. You want the sugar dissolved, the juices released, and then a steady medium cook that lets the syrup tighten around the fruit without breaking it apart. Large bubbles are your friend here; they tell you moisture has cooked off and the preserve is getting close to set.
The last few minutes matter most. That is when the rosemary goes in, along with the vanilla, so the herb stays bright instead of tasting stewed. If you add it at the beginning, the rosemary gets buried under all that sugar and the flavor reads muddy instead of clean.
What Each Ingredient Is Actually Doing in This Dish
- Fresh peaches — Use ripe but still firm fruit. Soft peaches collapse before the syrup thickens, which leaves you with a loose preserve. If your peaches are very juicy, add a few extra minutes of cooking time rather than reducing the sugar.
- Lemon juice — This keeps the flavor awake and helps the preserve set. Bottled lemon juice works in a pinch, but fresh tastes cleaner here because there are so few ingredients.
- Rosemary — Chop it finely so it disperses instead of staying stringy. Dried rosemary gets woody fast and doesn’t give the same fresh, resinous note; if that’s all you have, use half the amount and crush it between your fingers first.
- Vanilla — This doesn’t make the preserve taste like dessert. It rounds off the edges and gives the peaches a softer, warmer finish.
Cooking the Preserves Until the Syrup Clings to the Spoon
Macerating the peaches first
Toss the peach chunks with the sugar and lemon juice, then let them sit until the bowl looks juicy and shiny. That hour is doing real work: it pulls liquid from the fruit so the sugar dissolves before the pan ever hits the heat. If you skip it, the bottom of the pot tends to scorch before the peaches have time to soften evenly.
Boiling the fruit base
Pour everything into a heavy pot and bring it to a boil, stirring just until the sugar disappears and the mixture starts bubbling across the surface. Once it boils, reduce the heat to medium and keep it lively but not violent. You want a steady cook that reduces the liquid without smashing the peaches into pulp.
Knowing when the set is close
After 35 to 45 minutes, the bubbles will get larger and slower, and the syrup will start to look thicker around the edges. Drag a spoon through the pot; the line should hold for a second before filling in. If you cook it until it looks thick in the pot, it will usually be too firm once cooled, so pull it a little earlier than your instincts tell you.
Finishing with rosemary and vanilla
Stir in the rosemary and vanilla during the last five minutes so their flavor stays fresh and clear. The preserve should smell bright, peachy, and a little herbal, not like cooked jam with a dusty herb note. Ladle it into sterilized jars while it is still hot, because it thickens fast as it cools.
What to Change When You Want a Different Kind of Peach Preserve
Make it without the rosemary
Leave the herb out and increase the vanilla to 1/2 teaspoon if you want a smoother, more classic preserve. You’ll lose the savory edge, but the peaches will read brighter and more traditional, which works well for biscuits and toast.
Lower-sugar version
You can reduce the sugar a bit, but the preserve will set looser and taste more like cooked fruit than a true jarred preserve. If you cut the sugar too far, expect a shorter shelf life and a softer spoonable texture.
Use it as a quick freezer preserve
Skip the water-bath canning step and refrigerate the jars after cooling, or freeze in freezer-safe containers with a little headspace. The texture stays a touch softer this way, but the peach flavor tastes fresher and cleaner.
Storage and Reheating
- Refrigerator: Up to 1 month in a clean sealed jar once opened or if you skip canning. The texture tightens a little after chilling.
- Freezer: Freezes well for up to 6 months in freezer-safe containers. Leave headspace so the preserve can expand without cracking the jar.
- Reheating: For spooning over warm food, warm only the amount you need over low heat or in short microwave bursts. High heat can make the syrup bubble over and push the fruit toward a jammy, overcooked texture.
The Questions That Come Up When You Make Peach Preserves
Peach Preserves Recipe
Ingredients
Equipment
Method
- Combine the peach chunks with granulated sugar and lemon juice, then macerate for 1 hour so the peaches release syrup.
- Stir the mixture once halfway through the 1-hour maceration to help the sugar dissolve.
- Pour the macerated peaches into a heavy pot and bring to a boil, stirring, until you see active bubbling.
- Reduce to medium and cook for 35 to 45 min until thickened with large bubbles, stirring occasionally to prevent sticking.
- Stir in fresh rosemary and vanilla extract during the last 5 min of cooking so the herb stays bright.
- Test for set, then ladle into sterilized jars while hot.
- Process in a canner for 10 min, or refrigerate for up to 1 month instead of processing.