
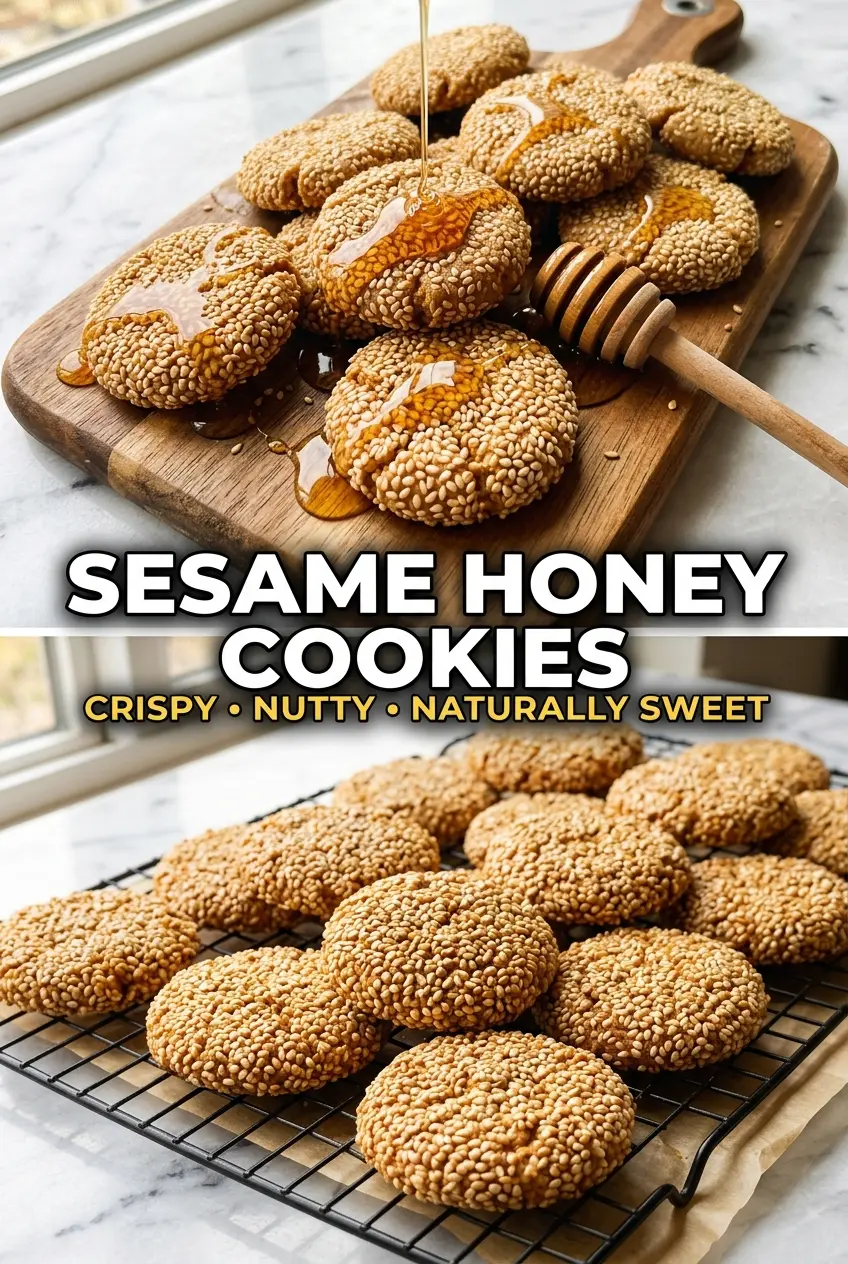
Golden-rimmed sesame honey cookies have a way of disappearing fast because they land right between crisp and tender. The edges set into a light crunch, the centers stay just soft enough, and every bite brings that toasted sesame snap before the honey warmth settles in. They taste grown-up without being fussy, which is exactly why they earn a spot in the regular cookie rotation.
The trick here is balancing sweetness and texture. Honey brings moisture and a floral note, but it can also make cookies spread too much if the dough is too warm. Beating the butter, honey, and sugar until fluffy gives the cookies a lighter finish, while coating the dough balls in extra sesame seeds adds a nutty crust that turns fragrant in the oven. Toasting the sesame seeds first deepens the flavor in a way plain seeds just can’t match.
Below you’ll find the small details that matter: how to keep the dough from getting sticky, when to pull the cookies so they stay crisp instead of dry, and a few smart swaps if you need to adjust for what’s in the pantry.
The sesame crust got perfectly toasted and the cookies crisped up as they cooled just like you said. I used the extra sesame seeds on the outside and they gave each cookie that nutty crunch my kids kept sneaking from the rack.
Sesame honey cookies with that toasted, nutty crunch deserve a spot in your cookie tin.
The Cookie Dough Problem: Honey Makes It Spread Faster
Honey changes the way cookie dough behaves. It adds moisture and sweetness, but it also loosens the dough enough that cookies can drift into each other if the butter is too soft or the dough gets too warm. That’s why the best texture here comes from a fluffy butter-sugar base and a quick mix once the flour goes in. You want a dough that holds its shape when rolled, not one that smears on the tray.
The other thing people miss is carryover crisping. These cookies come out looking a little soft in the center, and that’s correct. They firm up as they cool on the rack, which is how you get that crisp edge without baking them dry.
- Keep the butter softened, not melted. Melted butter gives you flatter cookies and a denser bite.
- Measure the flour properly. Too little flour makes the dough sticky; too much makes the cookies dry and crumbly.
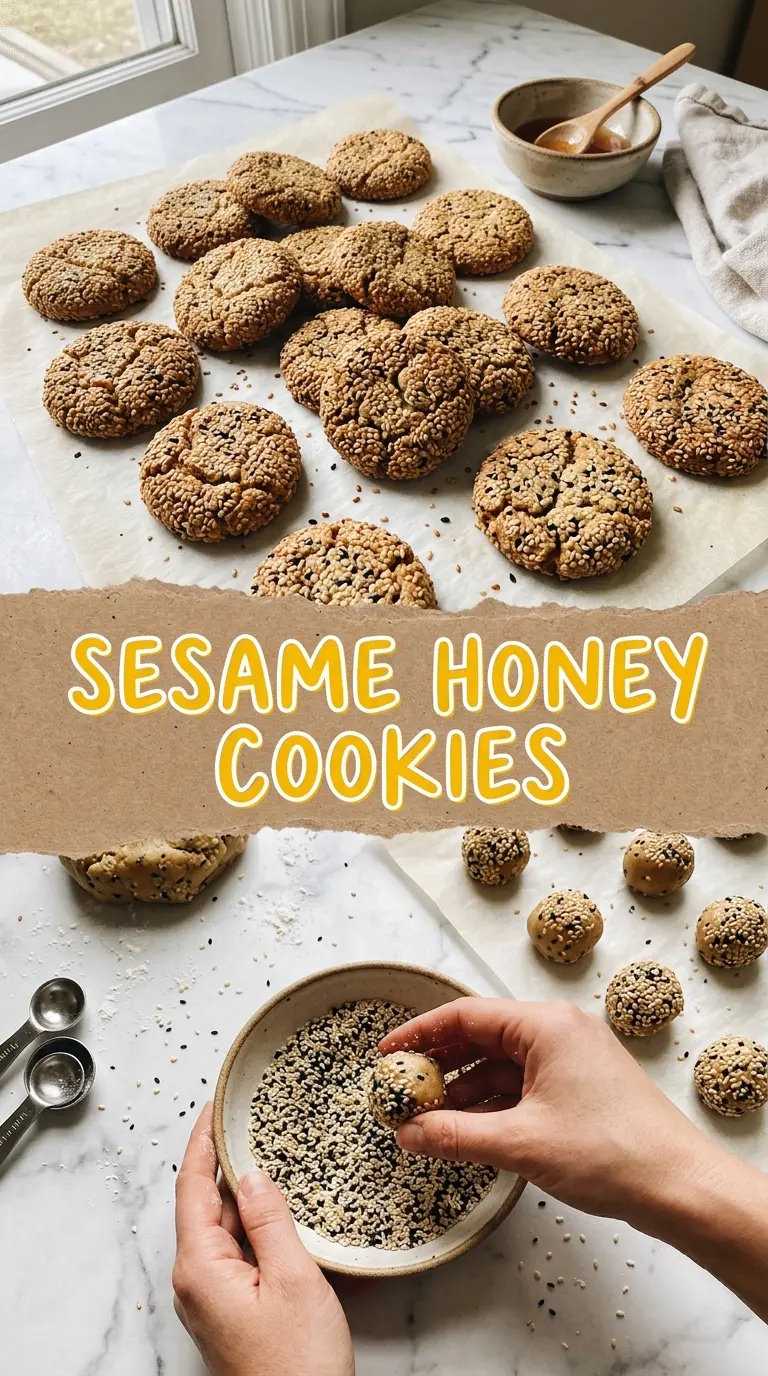
- Roll the dough balls in sesame seeds after portioning. That outer layer toasts into the best part of the cookie.
- Pull them when the edges are golden and the centers still look slightly pale. They finish setting on the pan.
What Each Ingredient Is Actually Doing in These Cookies
Honey does more than sweeten the dough. It brings moisture, helps the cookies brown, and gives the finished cookie that rounded, almost floral sweetness. If you swap in all sugar, you’ll lose that softness and the cookies will taste flatter.
Sesame seeds are the reason these cookies stand apart. Toasting them first takes them from mild and nutty to deep and fragrant. If you skip the toasting step, the cookies still work, but they won’t have the same roasted edge.
Butter gives the cookies their structure and richness. Use real butter here; margarine changes the texture and can make the dough behave unpredictably. If you need a dairy-free version, use a plant-based butter that comes in stick form, not a soft tub spread.
Egg and baking soda work together to keep the cookies from turning heavy. The egg adds structure while the baking soda helps with spread and browning. If you leave out the baking soda, the cookies bake up paler and tighter.
Cinnamon is subtle, but it rounds out the sesame and honey without making the cookies taste spiced. A pinch is enough. Too much and it starts competing with the sesame instead of supporting it.
Mixing, Rolling, and Baking Without Losing the Crunch
Building the Fluffy Base
Beat the butter, honey, and sugar until the mixture looks lighter in color and a little airy. That step matters because it helps the cookies bake up with some lift instead of turning dense and greasy. If the mixture still looks glossy and heavy, keep going for another minute or so. Once the egg and vanilla go in, the batter should look smooth and cohesive before you add the dry ingredients.
Bringing the Dough Together
Stir in the flour, sesame seeds, baking soda, salt, and cinnamon just until the dough comes together. Overmixing here makes the cookies tougher and can push them toward a bready texture. The dough should be soft but manageable. If it feels sticky, let it rest for a few minutes before rolling so the flour hydrates and the sesame seeds settle in.
Coating and Flattening
Roll the dough into balls, coat them in the extra sesame seeds, and set them on the baking sheet with room to spread. Press them slightly so they bake into even rounds instead of domed mounds. If you skip the flattening, the centers can stay too thick while the edges overbake. A gentle press is enough.
Watching for the Right Finish
Bake until the cookies are golden at the edges and lightly set in the middle, about 10 to 12 minutes. They should not look deeply browned all over when they come out. The cookies tighten as they cool, and that cooling time is what gives you the crisp bite. Move them to a wire rack once they’re firm enough to lift without breaking.
Three Ways to Make These Sesame Honey Cookies Fit What You Need
Dairy-Free Version With Plant Butter
Use a plant-based butter that comes in sticks and behaves like real butter when softened. Tub-style spreads often contain more water, which changes the spread and can make the cookies softer than intended. The flavor stays close, and the sesame still carries the cookie.
Gluten-Free Swap That Still Holds Together
Use a cup-for-cup gluten-free flour blend that includes xanthan gum. The dough may need a short rest before rolling so the flour can hydrate fully, and the baked cookies will be a little more delicate. The sesame crust helps mask any crumbly edges.
Extra Toasted Sesame Flavor
Toast all of the sesame seeds before using them, not just the coating portion. That gives the whole cookie a deeper, nuttier finish and makes the honey taste less one-note. It’s the easiest way to push the flavor from nice to memorable.
Storage and Reheating
- Refrigerator: Store in an airtight container for up to 1 week. The cookies stay crisp, but the sesame coating will soften a little after the first day.
- Freezer: Freeze baked cookies for up to 2 months, layered with parchment. You can also freeze the portioned dough balls and bake from frozen, adding 1 to 2 minutes.
- Reheating: Warm baked cookies in a 300°F oven for 3 to 4 minutes to bring back the toasted edge. The common mistake is microwaving them, which makes the honey soft and the sesame coating lose its crunch.
Answers to the Questions Worth Asking
Sesame Honey Cookies
Ingredients
Equipment
Method
- Preheat oven to 350F and line a sheet pan. Toast the sesame seeds until fragrant, then set aside to cool slightly.
- Beat the softened butter, honey, and sugar until fluffy, with the mixture visibly lighter in color and texture. Aim for a smooth, spreadable consistency.
- Add the egg and vanilla, then mix until fully combined. The batter should look glossy and uniform.
- Stir in the flour, sesame seeds, baking soda, salt, and cinnamon. Mix just until no dry flour remains and the dough holds together.
- Roll dough into balls and coat each one with extra sesame seeds. Flatten slightly so the cookies bake evenly.
- Bake at 350F for 10-12 minutes until the edges are golden. Watch for a light set center with browning at the rim.
- Cool on the wire rack until firm to the touch. Let them rest briefly so they crisp as they cool.