
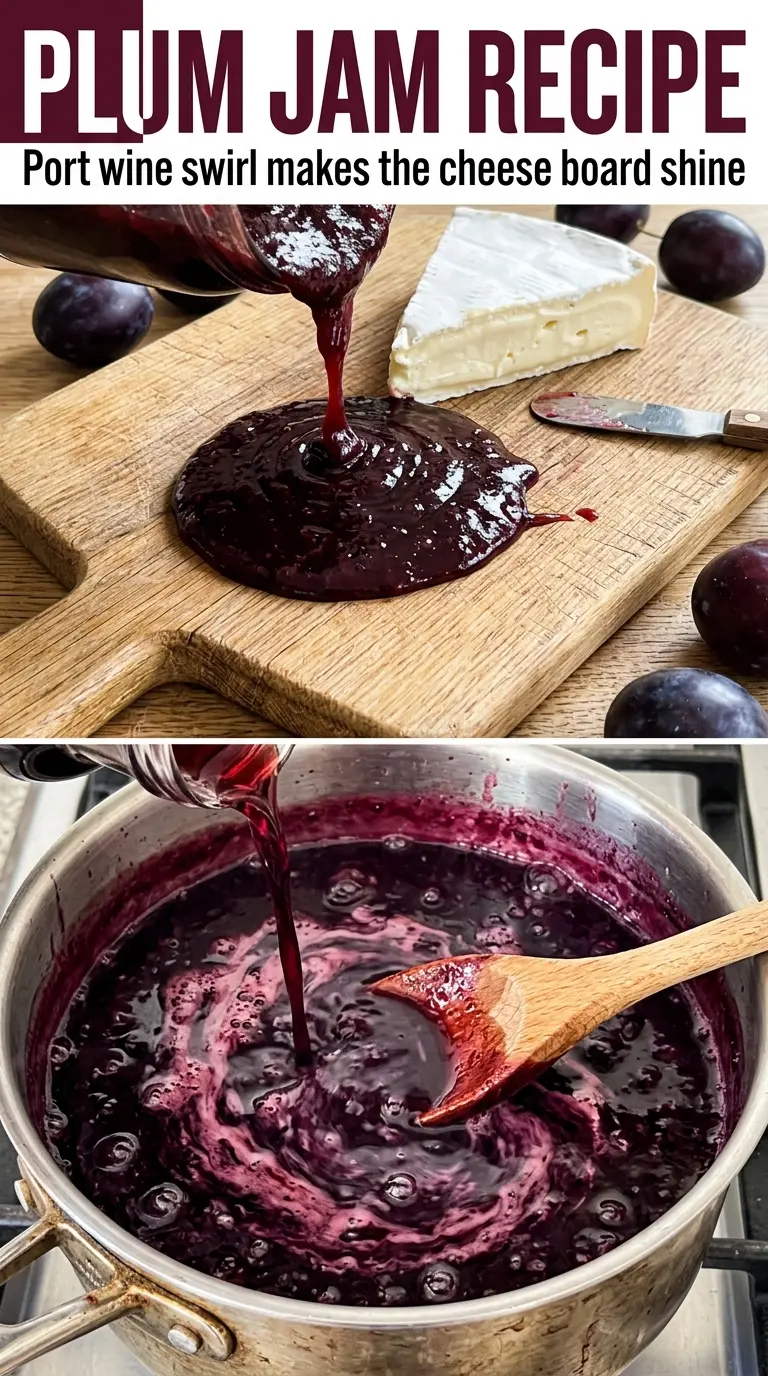
Deep burgundy plum jam turns glossy and thick on the spoon, with a bright tart edge that keeps the sweetness in check. The fruit breaks down into a soft, spreadable preserve that still tastes like plums instead of candy, and that balance is what makes this jar worth keeping around. It lands somewhere between fresh fruit and something slow-cooked, which is exactly why it disappears fast from toast, biscuits, and a spoon straight from the fridge.
What makes this version stand out is the short rest before cooking. Letting the chopped plums sit with the sugar, lemon, and zest pulls out juice first, so the pot starts with a built-in syrup instead of needing to cook the fruit dry. The lemon sharpens the flavor and helps the jam set, while a tiny bit of cinnamon and vanilla rounds out the edges without making it taste like dessert filling. If you use the optional port, add it at the end so the wine keeps its depth instead of cooking away.
Below you’ll find the exact point where the jam thickens, the test I use to check the set, and the one variation I think is worth trying if you want a richer, darker finish.
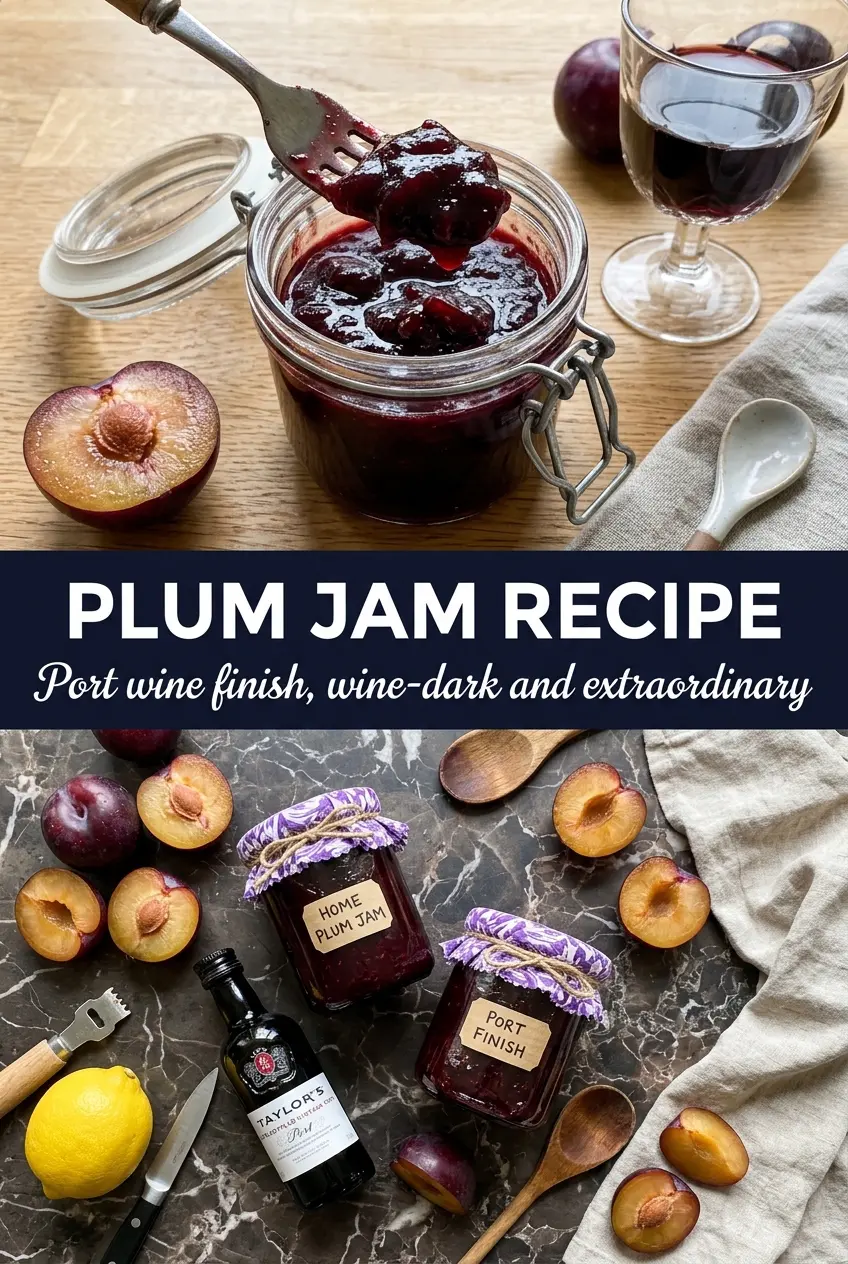
The jam set up beautifully after the cold-plate test, and the little bit of port at the end gave it this deep plum-wine flavor that tasted way more expensive than it was.
Save this plum jam for toast, cheesecake, and any time you want that deep port-kissed finish.
The Reason Plum Jam Sets Without Turning Grainy
Plum jam can go wrong in two opposite directions: it can stay thin and runny, or it can cook down into something stiff, dull, and sugary. The trick is starting with enough juice from the fruit itself and then stopping the cook at the moment the bubbles look thicker and slower. If you push it too far, the pectin concentrates and the jam turns pasty once it cools.
The other problem is boiling too hard for too long. A violent boil can scorch the bottom before the center has a chance to reduce evenly, especially in a wide pot where the fruit layer is thin. A steady simmer gives the fruit time to break down while the liquid evaporates in a controlled way. That’s also why the cold-plate test matters here more than the clock.
The jam is ready when it sheets slowly off the spoon and a spoonful dragged across a chilled plate leaves a clear path that doesn’t immediately fill back in.
What the Lemon, Cinnamon, and Port Are Doing in This Jam
- Plums — Fresh plums are the backbone here. Use ripe fruit with some give, because underripe plums can taste flat and need more sugar to wake up. If your plums are very juicy, the jam may take a few extra minutes to reduce, but that extra moisture is still worth starting with fresh fruit instead of canned.
- Sugar — The sugar isn’t just for sweetness; it helps the jam set and gives the finished preserve that clean, glossy texture. Reducing it too much changes the balance and can leave you with loose fruit butter instead of jam. If you want a less sweet result, cut back only a small amount and expect a softer set.
- Lemon juice and zest — Lemon brightens the flavor and supports the set. The juice adds the acidity jam needs, while the zest gives a sharper citrus note that keeps the plum flavor from going muddy. Fresh lemon matters here; bottled juice tastes flat in a preserve like this.
- Vanilla and cinnamon — These are background notes, not the main event. Cinnamon gives the jam a warmer edge, and vanilla smooths the tartness at the very end. Add them lightly, because too much of either will push the jam into pie-filling territory.
- Port wine — This is optional, but it’s the ingredient that turns good plum jam into something deeper and darker. Stir it in during the last two minutes so the alcohol cooks off gently while the flavor stays behind. If you skip it, the jam is still excellent; it just tastes brighter and more straightforward.
Cooking the Plums Down to the Right Texture
Let the Fruit Draw Its Own Syrup
Combine the chopped plums, sugar, lemon juice, and zest in a heavy pot and let them sit for 30 minutes. The fruit will start to glisten and release juices, which keeps the first stage of cooking from being dry or harsh. If you rush this step, the sugar has less liquid to dissolve into and the fruit can stick before it softens.
Simmer Until the Bubbles Slow Down
Bring the pot to a boil while stirring, then lower the heat to a steady simmer. You want the mixture active enough to reduce, but not popping so hard that it splatters or scorches. As it thickens, the bubbles will look larger and slower, and the spoon will start to leave a brief trail through the jam.
Finish the Flavor Off the Heat
Stir in the vanilla and the port, if you’re using it, during the last two minutes. Add them at the end so the flavor stays layered instead of cooking away. Then test the set on a cold plate: the jam should wrinkle slightly when pushed with a finger and not run like syrup.
Jar While It’s Still Hot
Ladle the jam into sterilized jars while it’s hot and seal them right away if you’re processing them. If you’re refrigerating instead, let the jars cool before chilling. The biggest mistake here is waiting too long after the jam reaches the right texture, because it thickens fast as it cools and becomes harder to portion cleanly.
Three Ways to Bend This Plum Jam Toward Your Own Table
Make it dairy-free and naturally vegan
This recipe already fits a dairy-free and vegan table without any changes, which is part of why it’s such a useful preserve to keep around. The fruit, sugar, lemon, and spice do all the work on their own. That means the only thing you need to watch is the set, not any special substitutions.
Skip the port and keep it bright
If you want a cleaner, more fruit-forward jam, leave out the port and lean into the lemon zest. The result tastes sharper and more like fresh plum, with less of that dark, winey depth. It’s the better choice if you’re planning to use the jam on breakfast toast or yogurt.
Add more depth with black pepper or star anise
A tiny pinch of black pepper or one star anise pod can push the jam toward a more savory, spiced finish. Use either one sparingly and remove the whole spice before jarring. That gives you complexity without turning the preserve into mulled fruit.
Storage and Reheating
- Refrigerator: Keep sealed jars in the fridge for up to 4 weeks. The jam may firm up a little more after chilling, which is normal.
- Freezer: It freezes well in freezer-safe jars with headspace left at the top. Thaw overnight in the fridge; don’t fill glass jars to the brim or they can crack.
- Reheating: Jam usually doesn’t need reheating, but if it’s too stiff to spread, warm a spoonful gently in a small pan or microwave it in short bursts. High heat can make the sugar seize and darken the flavor.
Answers to the Questions Worth Asking
Plum Jam Recipe
Ingredients
Equipment
Method
- Combine pitted plums, granulated sugar, fresh lemon juice, and lemon zest in a heavy Dutch oven; stir until sugar is moistened. Rest 30 min, then stir again to re-distribute fruit.
- Bring the mixture to a boil over medium-high heat, stirring to prevent sticking. Reduce to a steady simmer and simmer 25-35 min, stirring occasionally, until thick.
- Stir in vanilla extract (and optional port wine) for the last 2 min, keeping the jam at a gentle simmer. Test a small spoonful on a cold plate—if it wrinkles when pushed, it’s set.
- Ladle the hot jam into sterilized jars, leaving headspace, then cap tightly. Process in a water bath for 10 min, or refrigerate and use within 4 weeks.